It's nice to have a fancy breakfast on the weekend, but I don't
always have the time or the energy to make one. That's why make-ahead
and fast recipes are best. You can enjoy a delicious meal without
jumping out of bed at the crack of dawn.
The other morning, I wanted something new for Sunday breakfast. After getting some inspiration over at Pinterest,
I decided to try German Pancakes. They're also referred to as Dutch
Babies, and there are a zillion variations on how to make them. I opted
for the King Arthur Flour recipe. These take about a minute to prepare
and bake up in about 15 minutes. By the time you set the table and
make coffee, breakfast is ready!
I served the German
Pancake with a squeeze of lemon and a healthy dusting of powdered
sugar. You could be really fancy and make a stovetop fruit jam or
cinnamon apples for the topping. Cinnamon sugar, fresh fruit, maple
syrup, or other berry syrups or jams would also work.
King Arthur Flour's Puff Pancake
Serves 2-4, depending on appetites
3 tablespoons (1 1/2 ounces) butter
1/2 cup (2 ounces) All-Purpose Flour
1/4 teaspoon salt
small pinch of nutmeg
(optional)
1 tablespoon (1/2 ounce) granulated sugar
1/2 cup (4 ounces) milk
1 teaspoon vanilla extract
1/8 teaspoon lemon oil (optional)
2 large eggs
2 tablespoons freshly squeezed lemon juice (juice of half a juicy lemon)
2 tablespoons (1/2 ounce) confectioners’ sugar
Preheat the oven to 425°F.
Melt
the butter in an 11" straight-sided skillet, or a 12" skillet with
straight or sloping sides. Make sure whatever you use is oven-proof. Or
melt the butter, and pour it into a 10" square pan, or 12" round
deep-dish pizza pan. Yes, the size of the pan matters. Too small, it’ll
overflow. Too large, it won’t puff as high. Try to find a pan or
oven-proof skillet whose square-inch cooking surface is about 100 square
inches.
Whisk together the flour, salt, nutmeg, sugar,
milk, vanilla, lemon oil, and eggs till fairly smooth.
Pour the batter into the pan. Bake the pancake for 18 to 20 minutes, or
until it’s very puffy and golden, with deeper brown patches. Remove it
from the oven, and sprinkle with the lemon juice, then the sugar.
Cut in squares, and serve immediately, garnished with fresh berries, if desired.
Showing posts with label fast. Show all posts
Monday, July 2, 2012
Wednesday, January 12, 2011
The Name Sounds Silly, but the Food is Good!
Right before Christmas, I heard Nigella Lawson on NPR, talking about some of her favorite quick dishes for the holidays. In her NPR piece, she mentioned her latest favorite, Peanut Butter Hummus--a recipe that also appears in her newest book, Nigella Kitchen.
I am not the biggest fan of tahini--the sesame paste that usually gives hummus it's flavor--so using peanut butter in place of tahini (essentially sesame butter) sounded perfect. After hearing the interview, I pulled the recipe off the internet and whipped this up for appetizers for my Christmas dinner.
Peanut Butter Hummus was a hit! It had a nice texture, smooth flavor, and was a snap to make. My mom had some a few days later on a sandwich, and she said it was delicious.
The recipe, below, makes a boat-load of hummus. If you don't want tons of the stuff, you may want to half the recipe.
PEANUT BUTTER HUMMUS
2 x 15-ounce cans chickpeas (garbanzo beans)
1 garlic clove, peeled
3-5 tablespoons regular olive oil
1/3 cup creamy peanut butter
3 tablespoons lemon juice, or more as needed
2 teaspoons kosher salt or 1 teaspoons table salt, or to taste
2 teaspoons ground cumin
1/4 - 1/3 cup Greek yogurt
2 tablespoons peanuts, finely chopped, to serve (optional)
1 teaspoon smoked paprika, to serve (optional)
breadsticks, mini pitas, crackers, tortilla chips, to serve (optional)
Note: The hummus can be made 1–2 days ahead. Transfer to non-metallic container, cover, and refrigerate until needed. Should be consumed within 2 days of making
I am not the biggest fan of tahini--the sesame paste that usually gives hummus it's flavor--so using peanut butter in place of tahini (essentially sesame butter) sounded perfect. After hearing the interview, I pulled the recipe off the internet and whipped this up for appetizers for my Christmas dinner.
Peanut Butter Hummus was a hit! It had a nice texture, smooth flavor, and was a snap to make. My mom had some a few days later on a sandwich, and she said it was delicious.
The recipe, below, makes a boat-load of hummus. If you don't want tons of the stuff, you may want to half the recipe.
PEANUT BUTTER HUMMUS
2 x 15-ounce cans chickpeas (garbanzo beans)
1 garlic clove, peeled
3-5 tablespoons regular olive oil
1/3 cup creamy peanut butter
3 tablespoons lemon juice, or more as needed
2 teaspoons kosher salt or 1 teaspoons table salt, or to taste
2 teaspoons ground cumin
1/4 - 1/3 cup Greek yogurt
2 tablespoons peanuts, finely chopped, to serve (optional)
1 teaspoon smoked paprika, to serve (optional)
breadsticks, mini pitas, crackers, tortilla chips, to serve (optional)
- Drain and rinse the chickpeas. Put the garlic clove, chickpeas, 3 tablespoons oil, peanut butter, lemon juice, salt, and cumin into a food processor and blitz to a knobbly puree.
- Add 1/4 cup of the Greek yogurt and process again; if the hummus is still very thick, add another 1–2 tablespoons yogurt and the same of oil. (This will often depend on the chickpeas, as different sorts make the hummus thicker or not.)
- Taste for seasoning, adding more lemon juice and salt if you feel it needs it.
- On serving, mix the chopped peanuts with the paprika and sprinkle on top if you wish, and put an array of bits and pieces to eat with or dip in, as you see fit.
Note: The hummus can be made 1–2 days ahead. Transfer to non-metallic container, cover, and refrigerate until needed. Should be consumed within 2 days of making
Wednesday, January 5, 2011
Easy Elegance
![]() |
| Cream Puffs with Peppermint Ice Cream and Hot Fudge Sauce. Easy and yummy! |
I first read through several recipes for pate a chou before consulting my mother. I remember my mother making cream puffs (or profiteroles) when I was a kid, and I know my mom is not a fan of complex recipes. I thought I found a simple enough recipe from the Joy of Cooking, but Mom told me to get out my copy of the Southern Living Cookbook. The recipe she always used was from there and, she promised, it was a piece of cake.
I'm happy to report that I took my mom's sage advice. The Southern Living Cookbook recipe was perfection--it was easy to follow and yielded deliciously elegant results. If you need a fancy dessert that's easy to make, I highly recommend this one. And the best part is that you can do whatever you want with the cream puffs once they're cooked. They can be used for savory or sweet dishes, and the only limit to fillings and pastry shapes is your imagination.
Try this one out...it's a breeze. And, you can make it ahead of time and stick it in the freezer. Nice!
![]() |
| Cream Puffs, fresh out of the oven...cooling off. |
2/3 cup water
1/3 cup butter
2/3 cup all purpose flour
1/8 tsp salt
3 eggs
- Combine water and butter in a medium saucepan; bring to a boil.
- Add flour and salt, all at once, stirring vigorously over medium-high heat until the mixture leaves the sides of the pan and forms a smooth ball.
- Remove from heat and cool 4 to 5 minutes.
- Add eggs, one at a time, beating thoroughly with a wooden spoon after each addition; then beat until the dough is smooth.
- Shape and bake pastry immediately according to recipe directions. Dough can be used for cream puffs, eclairs, etc.
- To make cream puffs: drop pastry into 8 equal mounds 3 inches apart on an ungreased baking sheet (note: I lined my baking sheet with parchment paper). Bale at 400 degrees for 30 to 35 minutes or until golden brown and puffed. Cool away from drafts. Cut top off of puffs and scoop and discard out the soft, uncooked dough in the center. Add ice cream and top with hot fudge sauce.
Tuesday, November 23, 2010
A Simple and Easy Taste of the Season
On one of my recent trips to the grocery store, I looked over the seasonal display and found Pumpkin Scones by Sticky Fingers. I love their other scones and have found them to be incredibly easy to make - add 3/4 cup of water, mix with a fork, then scoop spoonfulls onto a greased baking tray; cook for approximately 15 minutes and you have delicious scones. I also really like the flavor of pumpkin and thought that I would give these a try.I am really glad that I did! These were super yummy and followed in the tradition of the other Sticky Fingers product line. I made these while my son was getting ready for school and put a little bit of butter on them when they came out of the oven. The smell was definitely of Autumn and the flavors were delicious. I enjoyed mine with a hot cup of coffee. My mother thought that they could use raisins (I disagreed and this one and thought that they were wonderful as-is) and she also ate hers with some cream cheese (that actually looked good).
Anyway, if you enjoy pumpkin flavored breads then keep your eye out for this mix. Again, I am always happy with the Sticky Fingers products and highly recommend them!
Wednesday, October 27, 2010
Some Kitchen Essentials
We had another of our potluck dinners at work the other night. This time, I made the main course. Now I work a night shift and we usually eat mid-way through which is usually between midnight and one AM. We are limited to basically a microwave or George Foreman Grill and I do not have a crockpot, but I do have an electric wok. So I decided to make a stirfry and I am really happy that I did!
With the electric wok, everything was done in less than 10 minutes and we had a fresh meal cooked right in the office. My coworker enjoyed it so much, she went on Amazon.com and bought an electric wok that evening!
Ok, now for the reason for the introduction, in order to for this to have turned out as good as it was, I discovered three things that were essential to workplace woking.
The first is the electric wok. I am convinced that this is an essential part of any kitchen. Our electric wok was inherited from my grandparents and it is probably 20 years old. It is not fancy and I am guessing that it was not a super expensive model when they bought it. I mentioned that my coworker bought one on Amazon.com and she spent about $40 on it. I would think that you would be able to find a good, inexpensive one at Target, Bed, Bath and Beyond or Kohls too. This is definitely worth the investment!
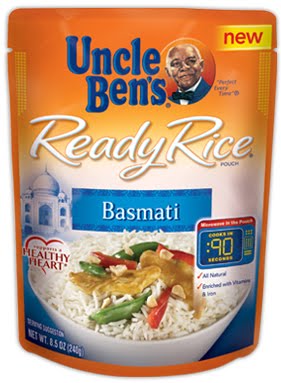
The next thing that made the meal a success was microwavable rice. Lydia uses this all the time and swears by it. So I thought it might be a good option for my dinner. I ended up buying Uncle Ben's Basmati rice that was ready in 90 seconds. It was super easy: break it up in the package, open a vent, microwave for 90 seconds, serve. I used 2 packs and it was really good! Lydia was right and I would buy this again (even if I wasn't cooking at work).
Lastly, was having a good, premade stirfry sauce. Whenever I go to the Asian section of the grocery store, I spend at least 10 minutes looking at all the sauces and trying to figure out which one to buy. Well for this, I ended up with a Mandarin Sauce and it was really good too. I find that the secret to a good stirfry is to add the sauce last, right before you serve it.
Anyway, I hope this inspires you to think about making a delicious stirfry meal at home (or at work). It takes minimal effort and you will enjoy the payoff!
With the electric wok, everything was done in less than 10 minutes and we had a fresh meal cooked right in the office. My coworker enjoyed it so much, she went on Amazon.com and bought an electric wok that evening!
Ok, now for the reason for the introduction, in order to for this to have turned out as good as it was, I discovered three things that were essential to workplace woking.
The first is the electric wok. I am convinced that this is an essential part of any kitchen. Our electric wok was inherited from my grandparents and it is probably 20 years old. It is not fancy and I am guessing that it was not a super expensive model when they bought it. I mentioned that my coworker bought one on Amazon.com and she spent about $40 on it. I would think that you would be able to find a good, inexpensive one at Target, Bed, Bath and Beyond or Kohls too. This is definitely worth the investment!
The next thing that made the meal a success was microwavable rice. Lydia uses this all the time and swears by it. So I thought it might be a good option for my dinner. I ended up buying Uncle Ben's Basmati rice that was ready in 90 seconds. It was super easy: break it up in the package, open a vent, microwave for 90 seconds, serve. I used 2 packs and it was really good! Lydia was right and I would buy this again (even if I wasn't cooking at work).
Lastly, was having a good, premade stirfry sauce. Whenever I go to the Asian section of the grocery store, I spend at least 10 minutes looking at all the sauces and trying to figure out which one to buy. Well for this, I ended up with a Mandarin Sauce and it was really good too. I find that the secret to a good stirfry is to add the sauce last, right before you serve it.Anyway, I hope this inspires you to think about making a delicious stirfry meal at home (or at work). It takes minimal effort and you will enjoy the payoff!
Wednesday, October 13, 2010
Pot Full of Yummy!
Last week I told you about a book my husband gave me, Glorious One Pot Meals. I pulled it off my cookbook shelf recently for two reasons: 1) it's getting cooler so I want to eat heartier foods; and 2) I've been trying to cook at home on the weekends more often to save money and because it can be a hassle to go out over and over again.
I'm cooking my way through this book and thought I'd share one of the recipes, Chicken Marsala. I'm not giving you the exact recipe in the book--instead, I'm giving you what I did to whip this up. It's a super fast one pot meal, perfect for two people. It can be easily adapted, so have fun with it if you decide to give it a try.
One Pot Chicken, Marsala Style
PAM, or olive oil spray
1 shallot, sliced fine
3-4 cloves of garlic, minced
1 cup rice (use any kind you like--I've done this with normal white rice and arborio rice)
1/2 cup chicken broth
1/2 cup marsala
1/2 tsp. red pepper flakes
1/4 tsp. ground fennel (optional)
2 boneless, skinless chicken breasts
Sea salt and pepper to taste
1 small zucchini, cut into circles and then in fourths
Mushrooms--about 16 oz., give or take--any kind you like (baby bellas, shiitake, etc.)
3 sprigs, fresh thyme
Directions
NOTES:
I'm cooking my way through this book and thought I'd share one of the recipes, Chicken Marsala. I'm not giving you the exact recipe in the book--instead, I'm giving you what I did to whip this up. It's a super fast one pot meal, perfect for two people. It can be easily adapted, so have fun with it if you decide to give it a try.
One Pot Chicken, Marsala Style
PAM, or olive oil spray
1 shallot, sliced fine
3-4 cloves of garlic, minced
1 cup rice (use any kind you like--I've done this with normal white rice and arborio rice)
1/2 cup chicken broth
1/2 cup marsala
1/2 tsp. red pepper flakes
1/4 tsp. ground fennel (optional)
2 boneless, skinless chicken breasts
Sea salt and pepper to taste
1 small zucchini, cut into circles and then in fourths
Mushrooms--about 16 oz., give or take--any kind you like (baby bellas, shiitake, etc.)
3 sprigs, fresh thyme
![]() |
| Ready for the oven! |
- Preheat oven to 450. Spray the inside and inner top of a two-quart dutch oven.
- Scatter sliced shallots and half the garlic on the bottom of the dutch oven.
- Add the rice to the dutch oven in an even layer.
- Mix together broth, marsala, red pepper flakes, fennel and remaining garlic. Stir, then pour half of this mixture over the rice.
- Season the chicken lightly with sea salt and pepper. Place the breasts on top of the rice (do not overlap).
- Pour the remaining liquid over the chicken.
- Scatter mushrooms and zucchini over the chicken. Tuck the sprigs of thyme into the mushrooms.
- Cover and cook in the preheated oven for 45 minutes.
- Remove thyme sprigs and serve immediately.
![]() |
| All cooked up and ready to serve! |
- Unlike normal marsala chicken, you do not get any sauce out of this dish. What you do get is perfectly cooked, moist chicken and rice that is infused with the flavors of a traditional marsala.
- If you want, you can substitute the rice for couscous.
- If you don't have any zucchini, try another squash. You can also add carrots to the mix if you want.
- Instead of thyme, try rosemary for a heartier taste.
- The possibilities are endless!
Wednesday, October 6, 2010
A Fall Favorite: Soup and Sandwich
Since fall has started to make its presence know, I have been wanting warm, soothing foods - what better than soup accompanied by a sandwich!
The following recipe is supper easy to make. The most involved part is cleaning and chopping the escarole. I made this the other day while on hold with my insurance company (I was on hold for about 25 minutes) and by the time I spoke to a human, the soup was ready! This is a really good recipe - it doesn't look or sound like much, but it is delicious and very satisfying. If you like soup, try it! It is also very low in calories (if you are watching your caloric intake).
8 ounces escarole
1 tablespoon olive oil
1 onion, peeled and chopped
2 cloves garlic, peeled and minced
4 cans of chicken broth
2 cans (15 oz. each) cannellini (white kidney beans), rinsed and drained
salt & pepper
grated Parmesan cheese
1 loaf Rustic sourdough bread (we had a round loaf), sliced
olive oil
The following recipe is supper easy to make. The most involved part is cleaning and chopping the escarole. I made this the other day while on hold with my insurance company (I was on hold for about 25 minutes) and by the time I spoke to a human, the soup was ready! This is a really good recipe - it doesn't look or sound like much, but it is delicious and very satisfying. If you like soup, try it! It is also very low in calories (if you are watching your caloric intake).
Escarole and White Bean Soup
8 ounces escarole1 tablespoon olive oil
1 onion, peeled and chopped
2 cloves garlic, peeled and minced
4 cans of chicken broth
2 cans (15 oz. each) cannellini (white kidney beans), rinsed and drained
salt & pepper
grated Parmesan cheese
- Cut base off escarole; rinse and drain leaves. Cut leaves crosswise into 1/4 inch wide strips.
- Set a 4- to 5-quart pan over medium-high heat. When hot, add oil, onion and garlic; stir often until onion is limp, 3 to 5 minutes.
- Add broth and beans, cover, and bring to a boil over high heat. Stir in escarole and cook just until wilted, about 1 minute. Add salt and pepper to taste.
- Ladle into bowls and top with Parmesan cheese.
Grilled Irish Cheddar and Honeycrisp Apple Sandwiches
1-2 Honeycrip apples, sliced thin1 loaf Rustic sourdough bread (we had a round loaf), sliced
olive oil
- Lightly brush 2 slices of bread with olive oil (only on one side).
- To the "naked" side add a slice of cheese, then an apple slice, more cheese, another apple slice, cheese, the top with the other slice of bread.
- Either use a panini press or grill in a pan - both sides of the sandwich until the bread is nicely browned.
- Cut the sandwich in half and serve with the soup.
Tuesday, September 7, 2010
Hotter Than Hell!
The other day I was puttering around the kitchen, trying to figure out what to cook for dinner. I dug through my pantry and fridge and found a bottle of simmer sauce I picked up from Cost Plus World Market during one of my visits there. It was a Vindaloo sauce, very low in calories, and I thought I'd whip up a tasty, quick dinner.
I swirled a tiny bit of oil in my skillet and added some cubed up pieces of chicken breast. I let that cook then added onions, zucchini, and mushrooms. Once everything was cooked nicely I poured in the Vindaloo sauce. It was beautiful! It smelled amazing and looked good. I let the sauce, chicken and veggies cook together so the sauce thickened up a tad. I couldn't wait to eat!
I put a bed of rice in the center of my plate, topped it with the Chicken and Veggie Vindaloo and sat down to eat. I took one bite and WOW! I thought my head was going to explode. It was insanely hot!
What I failed to notice on the bottle of Vindaloo sauce were those three evil little peppers. Now, I can handle some spice, but this? It was way too much! I sucked down a forkful of rice and tried a few more bites of my meal. Big mistake! My mouth was on fire and the heat seemed to intensify as I sat there and tried to eat. Out of desperation, I gulped down a glass of milk to cool things off.
My poor husband can't tolerate spicy foods well (he's a big baby), so I put the remaining rice and Chicken and Veggie Vindaloo in a tupperware container and gave it to the only person I know who would eat it: My sister. Turns out that was a good move--she loved it and thought it was spicy but not too hot to eat. Apparently she inherited some sort of asbestos tastebuds or something.
Overall: this Vindaloo sauce was a huge disappointment. I wish it had been a few degrees cooler because it looked, smelled and tasted so good. Maybe I could have stirred in some yogurt to cool it off...who knows. Oh well...you can't win them all!
Wednesday, August 18, 2010
Grilled Peaches
Summer fruits are my favorites - strawberries, blueberries, raspberries, nectarines, cherries, and peaches. I love them fresh, in pies, cakes, cupcakes, etc., but I have never tried to cook fruit on the grill. I was already going to make chicken on the grill and had an apricot marinade going (see Monday's blog) and I wondered how a grilled peach would do to accompany it? Answer - DELICIOUS!Here is what I did...
3 large peaches
2 tablespoons olive oil
Chipotle powder, light sprinkle on each
Sea salt, to taste
Ground black pepper, to taste
1/4 tsp brown sugar per peach
1 pat of butter per peach
- Cut the peaches in half and remove the pits; I looked for firm peaches (I thought that if they were too ripe, they might fall apart). Pour olive oil on a baking sheet or plate and lightly coat the peaches. Sprinkle with Chipotle powder, salt, pepper and brown sugar. Place butter over seasonings.
- Place on hot grill over high to medium-high heat, seasoned side up. Grill for 3-5 minutes. The skin should have a slight char and the butter & sugar should be melted.
- Remove from heat and eat up!
Monday, August 9, 2010
Caprese Salad - A Delicious Summer Treat
I love summer fruits and veggies and to have fresh tomatoes is a real treat. I love caprese salads and think that they really showcase the ripe tomato in a tasty way.This recipe is from Everyday Italian by Giada De Laurentiis - it is super easy and absolutely delicious!
3 tablespoons fresh lemon juice
1/2 teaspoon salt
1/4 teaspoon freshly ground black pepper
3 tablespoons extra-virgin olive oil
2 large tomatoes, cut into 1/4-inch thick slices
4 ounces fresh mozzarella cheese. drained and sliced
2 tablespoons thinly sliced fresh basil leaves
Whisk the lemon juice, salt, and pepper in a medium bowl. Gradually whisk in the oil to blend. Set the dressing aside.
Arrange the tomatoes and cheese on a platter. Drizzle the dressing over. Sprinkle with basil and serve.
Wednesday, July 28, 2010
Gluten-Free, Wheat-Free, Non-Dairy Brownies, Are They Good?
I recently started a new job (yeah!!) and one of my co-workers has a gluten food allergy. One night we decided to have a gluten free dinner - that was easy, we had taco salads (super yummy and gluten free thanks to corn tortilla chips). I wanted to also have something chocolaty for dessert and I found Pamela's Chocolate Brownie Mix (that is gluten and wheat free) and thought I would give it a try.
These were very easy to make. I used the directions for the original oil recipe:1 bag of Pamela's Brownie Mix
1 egg
1/2 cup oil
1/4 cup water
Mix all ingredients together and pour into a lightly greased square pan. Cook at 350 degrees for 18 minutes, then let cool. Cut into squares and enjoy!
I ended up cooking my batch for an additional 5 minutes (my stove usually takes a bit longer) and I let them cool for about 2 hours before I cut them. They were moist and filled with chocolate chunks and very good for a mix. I can't say that I missed the flour or wheat and felt that these were a great substitute! My one complaint is the price, almost $8.00 at Safeway, but if you can not eat wheat, gluten, or dairy I would spend the money to get my dessert fix!
Tuesday, July 13, 2010
Salad Days!
Yesterday, Greta gave you a great idea for summer grilling. But when it's really hot...when you don't want to heat the house up or have a whole lot to eat...your best option is something easy, something like a salad.
There are so many good combinations of greens, veggies, fruit, protein, etc. that can come together to make a yummy, substantial meal. Here's one of my favorite salads--it comes from
Giada De Laurentiis and it's really worth trying out. My husband and I love salad, especially raw in salads. The addition of the orange vinaigrette and the salty, crumbled prosciutto really make this special. Give it a try--you'll love it (and if you have extra dressing, consider using it for a marinade for chicken or shrimp...yum!)
Spinach Salad with Orange Vinaigrette
Ingredients
* 6 slices prosciutto
* 2 oranges, zested
* 2 small oranges, juiced or 1 large orange, juiced
* 2 tablespoons balsamic vinegar
* 2 tablespoons honey
* 1 clove garlic, peeled
* 3/4 teaspoon salt
* 3/4 teaspoon freshly ground black pepper
* 3/4 cup extra-virgin olive oil
* 10 to 12 ounces pre-washed spinach
Directions
Preheat the oven to 350 degrees F.
Place the prosciutto slices on a baking sheet and bake until just crisp, about 10 minutes. Let cool. Crumble the prosciutto slices into a container and store in the refrigerator.
In a blender, combine the orange zest, orange juice, balsamic vinegar, honey, garlic, salt, and pepper. Blend until smooth. With the blender running, add the olive oil in a steady stream until combined. Transfer to a container and store in the refrigerator.
To serve, put the spinach in a large bowl. Toss with enough of the vinaigrette to coat the spinach. Sprinkle with the crisp prosciutto crumbles, toss again, and serve.
I also like to have what I call "Cold Plate" for dinner on hot summer nights. For a Cold Plate, you just need to put whatever salads, veggies, etc. you like on a plate and serve it up. I lay down some crisp greens and add a nice scoop of Chicken Salad (one of my favorite things ever!). I add to the plate raw red peppers, celery, carrots, olives, pepperocini, and maybe a hard boiled egg or sliced tomato if you want. It's an easy dinner and if you don't want to cook, you can just grab pre-cooked Chicken Salad from a deli or the grocery store.
If you want to make your own Chicken Salad, try this recipe from the Barefoot Contessa (note: I never use tarragon because I can't stand the stuff! I use parsley instead.)
Chicken Salad Contessa
Ingredients
* 2 split (1 whole) chicken breasts, bone in, skin on (1 1/2 pounds)
* Good olive oil
* Kosher salt and freshly ground black pepper * 1/2 cup pecan halves
* 1/2 cup walnuts halves
* 1/2 cup good mayonnaise
* 1/2 cup sour cream
* 1 tablespoon chopped fresh tarragon leaves, divided
* 1 cup green grapes, cut in 1/2
* Lettuce leaves, for serving
Directions
Preheat the oven to 350 degrees F.
Place the chicken breasts, skin side up, on a baking sheet and rub them with olive oil. Sprinkle generously with salt and pepper. Roast for 35 to 40 minutes, until the chicken is cooked through. Set aside until cool.
When the chicken is cool, remove meat from the bones and discard the skin and bones. Cut the chicken into a 3/4-inch dice.
Meanwhile, place the pecans and walnuts on a separate sheet pan and toast in the oven for 7 to 8 minutes until golden. Set aside to cool.
For the dressing, mix together the mayonnaise, sour cream, 2 teaspoons salt and 1/2 teaspoon pepper. Fold in half the chopped tarragon leaves.
Place the diced chicken in a bowl, add the pecans, walnuts and grapes. Pour the dressing over the chicken and toss well. Sprinkle the remaining chopped tarragon leaves on top, and serve on a bed of lettuce leaves.
There are so many great salads to be made. I also like throwing together mixed greens, crumbled blue cheese, sliced green onions, craisins, nuts of some sort, and tossing it all with a blue cheese vinaigrette. Yum! Also good, especially for summer: baby spinach, fresh strawberries or raspberries and chopped macadamia nuts with a raspberry vinaigrette--it's crunchy, fresh, and delicious.
What's your favorite salad?
*recipes and photos from Food Network.
There are so many good combinations of greens, veggies, fruit, protein, etc. that can come together to make a yummy, substantial meal. Here's one of my favorite salads--it comes from
Giada De Laurentiis and it's really worth trying out. My husband and I love salad, especially raw in salads. The addition of the orange vinaigrette and the salty, crumbled prosciutto really make this special. Give it a try--you'll love it (and if you have extra dressing, consider using it for a marinade for chicken or shrimp...yum!)
Spinach Salad with Orange Vinaigrette
Ingredients
* 6 slices prosciutto
* 2 oranges, zested
* 2 small oranges, juiced or 1 large orange, juiced
* 2 tablespoons balsamic vinegar
* 2 tablespoons honey
* 1 clove garlic, peeled
* 3/4 teaspoon salt
* 3/4 teaspoon freshly ground black pepper
* 3/4 cup extra-virgin olive oil
* 10 to 12 ounces pre-washed spinach
Directions
Preheat the oven to 350 degrees F.
Place the prosciutto slices on a baking sheet and bake until just crisp, about 10 minutes. Let cool. Crumble the prosciutto slices into a container and store in the refrigerator.
In a blender, combine the orange zest, orange juice, balsamic vinegar, honey, garlic, salt, and pepper. Blend until smooth. With the blender running, add the olive oil in a steady stream until combined. Transfer to a container and store in the refrigerator.
To serve, put the spinach in a large bowl. Toss with enough of the vinaigrette to coat the spinach. Sprinkle with the crisp prosciutto crumbles, toss again, and serve.
I also like to have what I call "Cold Plate" for dinner on hot summer nights. For a Cold Plate, you just need to put whatever salads, veggies, etc. you like on a plate and serve it up. I lay down some crisp greens and add a nice scoop of Chicken Salad (one of my favorite things ever!). I add to the plate raw red peppers, celery, carrots, olives, pepperocini, and maybe a hard boiled egg or sliced tomato if you want. It's an easy dinner and if you don't want to cook, you can just grab pre-cooked Chicken Salad from a deli or the grocery store.If you want to make your own Chicken Salad, try this recipe from the Barefoot Contessa (note: I never use tarragon because I can't stand the stuff! I use parsley instead.)
Chicken Salad Contessa
Ingredients
* 2 split (1 whole) chicken breasts, bone in, skin on (1 1/2 pounds)
* Good olive oil
* Kosher salt and freshly ground black pepper * 1/2 cup pecan halves
* 1/2 cup walnuts halves
* 1/2 cup good mayonnaise
* 1/2 cup sour cream
* 1 tablespoon chopped fresh tarragon leaves, divided
* 1 cup green grapes, cut in 1/2
* Lettuce leaves, for serving
Directions
Preheat the oven to 350 degrees F.
Place the chicken breasts, skin side up, on a baking sheet and rub them with olive oil. Sprinkle generously with salt and pepper. Roast for 35 to 40 minutes, until the chicken is cooked through. Set aside until cool.
When the chicken is cool, remove meat from the bones and discard the skin and bones. Cut the chicken into a 3/4-inch dice.
Meanwhile, place the pecans and walnuts on a separate sheet pan and toast in the oven for 7 to 8 minutes until golden. Set aside to cool.
For the dressing, mix together the mayonnaise, sour cream, 2 teaspoons salt and 1/2 teaspoon pepper. Fold in half the chopped tarragon leaves.
Place the diced chicken in a bowl, add the pecans, walnuts and grapes. Pour the dressing over the chicken and toss well. Sprinkle the remaining chopped tarragon leaves on top, and serve on a bed of lettuce leaves.
There are so many great salads to be made. I also like throwing together mixed greens, crumbled blue cheese, sliced green onions, craisins, nuts of some sort, and tossing it all with a blue cheese vinaigrette. Yum! Also good, especially for summer: baby spinach, fresh strawberries or raspberries and chopped macadamia nuts with a raspberry vinaigrette--it's crunchy, fresh, and delicious.What's your favorite salad?
*recipes and photos from Food Network.
Thursday, July 8, 2010
Quick Dinner: Turkey Marsala
Let me say this right now: for the most part, my Safeway sucks. You have to constantly check expiration dates on everything from milk to bread to canned goods (I once found a year old loaf of bread on their shelves...no lie!), their produce is sub-par (and often filled with pesky fruit flies), and the never seem to have particular cuts of meat that I want.One of my favorite proteins is turkey breast cutlets. They're very easy to cook...and very versatile. But Safeway rarely has them in stock. The other day, I saw a few packages in the poultry section and I snatched them up.
There's so much you can do with turkey breast cutlets--here's a quick, easy, yummy recipe that should be a family-pleaser:
Turkey Marsala
- One package of turkey breast cutlets (about 1 1/4 pounds)
- 1 Tablespoon olive oil
- 1/4 cup flour
- Salt and pepper, to taste
- 1 shallot, diced
- 2 cloves garlic, minced
- 8 oz mushrooms, sliced (use whatever you like--I used criminis)
- 2 tsp dried thyme
- 1/3 cup marsala
- 1/4 cup chicken broth
- Juice of 1/2 lemon
- 1 Tablespoon butter
- 1-2 Tablespoons freshly chopped parsley (optional!)
- Heat olive oil over med-high heat in a non-stick skillet.
- Combine the flour, salt and pepper. Dredge turkey cutlets in flour and tap to remove excess.
- When oil is hot, add flour-coated turkey cutlets to the pan and cook until turkey is no longer raw, about 4 minutes or so per side (more if you like it browned and a bit crunchy!).
- Place cooked turkey on a plate and cover with foil.
- Add a little more oil to your pan (or just spray it with Pam if you don't want to add the fat) and add the shallots and garlic to the pan. Cook for a minute, stirring constantly.
- Add the mushrooms to the pan and stir. Season with salt, pepper, and thyme. Cook the vegetable mixture until mushrooms are softened, about 3 minutes.
- Pour the marsala and chicken broth into the pan, stirring to get up any cooked on bits that may be at the bottom of the pan. Add the juice of the lemon and stir well. Allow the mixture to cook over high heat to reduce a bit.
- Add the butter to the marsala/mushroom mixture. This will help thicken up the sauce.
- Return the turkey cutlets to the pan (be sure to pour in any juices that accumulated) and heat through.
- Sprinkle parsley over the turkey and serve immediately.
Wednesday, July 7, 2010
The Answer To Leftovers - Casserole
What do you do with leftover taco fixings (aside from have tacos again)? My answer, to make a casserole.
As Lydia said in her post yesterday, we had tacos for the fourth of July and with it, lots of leftovers (no guac though). I didn't want to have the same dinner over, so I mixed everything together in a large bowl - this included seasoned taco meat, refried black beans, Spanish rice, tomatoes, onions, salsa, sour cream, and crunchy taco shells (broken into bite sized pieces). I then put the mix in a casserole dish and covered it with leftover cheese (I added a bit more cheese too) and cooked it at 375 degrees for 30 minutes.
I still had shredded lettuce and 1/2 an avocado, so that became a salad. I added some carrot shreds and hot peppers and Mom made a vinaigrette for it and we squeezed a fresh lemon over it all. The salad went nicely with the casserole and gave us something fresh to eat.
When I served the dish, we ate it with leftover tortilla chips, salsa and sour cream (some of Lydia's guacamole would have been delicious too). It was a really good use of taco leftovers and I would make it again! The best part is you can add anything you like to the dish and it will probably work well!
As Lydia said in her post yesterday, we had tacos for the fourth of July and with it, lots of leftovers (no guac though). I didn't want to have the same dinner over, so I mixed everything together in a large bowl - this included seasoned taco meat, refried black beans, Spanish rice, tomatoes, onions, salsa, sour cream, and crunchy taco shells (broken into bite sized pieces). I then put the mix in a casserole dish and covered it with leftover cheese (I added a bit more cheese too) and cooked it at 375 degrees for 30 minutes.
I still had shredded lettuce and 1/2 an avocado, so that became a salad. I added some carrot shreds and hot peppers and Mom made a vinaigrette for it and we squeezed a fresh lemon over it all. The salad went nicely with the casserole and gave us something fresh to eat.When I served the dish, we ate it with leftover tortilla chips, salsa and sour cream (some of Lydia's guacamole would have been delicious too). It was a really good use of taco leftovers and I would make it again! The best part is you can add anything you like to the dish and it will probably work well!
Monday, June 28, 2010
Saturday Dinner
Over the weekend, I was thinking about what I had on-hand and what would taste good together. I came up with Apricot Glazed Chicken, Snow Peas with Toasted Almonds, and Basmati Rice with Peas. I started preparing the ingredients around 04:30 and had dinner served at 05:30 - so this was a pretty quick meal to make.Almond Glazed Chicken
4 skinless, boneless chicken breasts
cooking spray
1 teaspoon dried rosemary
1 tablespoon garlic
salt & pepper to taste
1/2 cup apricot preserves
2-3 tablespoons chicken broth
toasted almonds to garnish
- Spray a large, non-stick skillet with cooking oil and heat over medium-high. Add garlic, rosemary and chicken. Season the chicken with salt & pepper. Brown the chicken on both sides (3-4 minutes per side).
- Heat oven to 375 degrees and spray an oven safe cooking dish with cooking spray.
- Once the chicken has browned, remove from the skillet and place in the prepared baking dish. Add apricot preserves and broth to the hot skillet to deglaze it. Allow the preserves to bubble slightly.
- Pour the sauce over the chicken, cover with foil and cook in the oven for an additional 25-30 minutes.
- Remove from the oven and sprinkle with some toasted almonds (about 1 tablespoon).
1/2 cup sliced almonds, toasted (reserve some for the chicken)
1 tablespoon peanut oil (vegetable oil or sesame oil can also be used)
1 cup snow peas
- In a medium sized non-stick skillet (or wok), heat oil over medium-high to high heat. Add the snow peas and stir fry for about 3-5 minutes; stir often.
- Right before removing from heat, add toasted almonds and mix well.
- Serve immediately.
2 cups chicken broth (I prefer low sodium)
1 cup Basmati rice, rinsed and drained
1/2 cup frozen peas
- Bring the broth to a boil over high heat. Add rice, reduce heat to simmer, and cover.
- Simmer rice for 15-20 minutes.
- About 1 minute before removing the rice from heat, add the peas and allow to simmer; cover.
- Serve and enjoy!
Wednesday, June 23, 2010
Fast and Easy Stir Fry
I love stir fry! Any excuse to use the wok and cook up something usually makes me happy. Now there are about a million ways to make a stir fry and you can add almost anything and use all types of sauces. The prep time for cutting all the meat, veggies and sauce is about 20-30 minutes and the cook time is about 10 minutes. The one trick that I have learned is to cook the meat first, remove it, then cook the veggies. Add the sauce and then add back the meat; serve with rice - yum! Here is one option to cook up.
Ingredients - all sliced thin:3 chicken breasts
10 mushrooms
1 onion
1/2 cup Snow Peas
1/2 cup Broccoli slaw
1/4 cup Almonds, toasted
Peanut Sauce
Let your wok heat up and add oil (peanut or vegetable work best). Make sure that the oil is hot, then add the chicken. Cook it until fully done, then remove to a clean bowl. Next add the onion and broccoli slaw. Cook until the onions are translucent. Add the snow peas and mushrooms and cook for about 30 seconds. Add the peanut sauce and chicken (including any juices). Right before serving, add the toasted almonds.
Wednesday, June 9, 2010
Easy Weeknight Dinner
It's harder for me to figure out what to make for dinner than it should be. My husband works a ridiculous shift and he doesn't get home until 9:30 pm. When I make dinner, I have to consider how things are going to reheat. And although this isn't the BEST re-heating recipe in the world, this was a very quick, very easy, very tasty meal that's perfect for a busy weeknight dinner.
LYDIA'S SMOTHERED PORK CHOPS
4 Boneless Pork Chops, medium thickness
Salt and Pepper, to taste
1-2 Tablespoons Vegetable Oil
1 Vidalia onion, sliced into rings
Sliced Mushrooms (as many as you prefer!)
1 can Cream of Mushroom Soup (I used the low-fat version)
1/2 cup Chicken Broth (or water...or white wine)
Dried Thyme, to taste
Dried Parsley, to taste
Salt and pepper both sides of the pork chops.
Heat the vegetable oil over medium high heat in a skillet (I used a non-stick pan so I used less oil). When the oil is hot, add the pork chops. Saute the chops until they are lightly browned on both sides (about 5 minutes or so depending on how hot your stovetop gets!).
Add the onions and mushrooms to the pan with the chops and let cook until the vegetables soften to your liking.
Add the Cream of Mushroom soup and chicken broth to the pan. Stir well (be sure to scrape the bottom of the pan to get all the yummy browned bits!). Season the creamy mixture with thyme and parsley.
Stir and continue to cook until everything is warmed through.
Notes:
- This serves 2 to 4 people, depending on how hungry everyone is and how thick the chops are.
- I served this with lightly buttered whole wheat egg noodles--this let me sop up all the sauce. It would also be good over rice.
- Feel free to change up the vegetables. I'm a red pepper fiend, so I think they'd be tasty in this. Add what you like, take out what you don't!
Monday, May 3, 2010
Make it Better: Quesadillas
Cinco de Mayo is this week, and to "celebrate" we're focusing on Mexican inspired food. Our family loves Mexican food--or, to be accurate--Tex-Mex and Americanized Mexican (though we really do appreciate the real deal, it's difficult to get up in the Pacific Northwest. Such is life!).To start off our week of Mexican yummies, I'm focusing on a simple dish that's super quick and super easy: Quesadillas. We've all had them and know that they're basically the Mexican version of a grilled cheese sandwich. You take two flour tortillas, stuff cheese in the middle, heat it up and viola--quesadillas!
But if you want to elevate your quesadilla, you need to elevate your technique. And I've found the best way to make them. You don't need to use your microwave or oven...you only need a decent non-stick skillet.
You can fill quesadillas with anything you want. I like them plain--with shredded cheddar and jack only--but you can add deli-sliced ham (my hubby's fave), cooked chicken, crumbled bacon, leftover taco meat (ground beef, shredded beef or shredded pork), grilled veggies...anything you want. And you can also play with the cheeses you use. Anything that you can slice or shred--that melts well--will work.
Here's how to do it:
- Gather all your equipment. You need a decent non-stick skillet (large enough to accommodate your tortilla), a pastry brush, a spatula, and a clean, heavy pot (or some sort of heat-resistant, food safe weight).
- Gather all your ingredients. Have your tortillas, cheese, and filling ingredients at the ready. You'll also need kosher salt and some oil (vegetable, canola, etc. work well--you don't want olive oil for this).
- Put your skillet on medium-high heat.
- Prep the bottom tortilla. Using a pastry brush, brush on small amount of oil, lightly coating one side of the tortilla. Sprinkle a little kosher salt over the oil. Place the tortilla, oil side down, in the skillet.
- Add filling ingredients. Leaving about a 1/4 inch boarder, add cheese and your filling ingredients to the top of the tortilla in the skillet (I usually lay down some cheese, the meat/veggie filling, and then more cheese). Work quickly and neatly.
- Cover and press. Put your second tortilla on top of the filling and place your clean, heavy pot on top of this tortilla. This will press everything together and will keep the heat locked in so that it melts the cheese and crisps up the bottom tortilla.
- Cook for a few minutes. Depending on your stove and how high the heat is, keep the tortilla pressed and cooking for a couple of minutes.
- Prep the other side. Take the weight off the top of your quesadilla. Quickly brush oil on the top tortilla and sprinkle with kosher salt. Carefully flip the entire quesadilla so the top tortilla is now on the bottom. Put the pot/weight back on the quesadilla and continue to cook.
- Cut and eat. When your tortillas are golden brown (or to your liking), slide your quesadilla out of the skillet and cut into triangles using a sharp knife. Serve with whatever sides you like (I like mine with sour cream and salsa).
Subscribe to:
Posts (Atom)