Tuesday, November 30, 2010

Fancy Comfort Food

Lately my husband and I have been spending our weekends in.  It's been so nice to hang around the house with no real need to adhere to an agenda.  Time at home has also afforded me with ample opportunity to cook.  I've made a few big dishes lately, but one of my favorites has been Coq Au Vin...chicken in wine.

My mother used to make Coq Au Vin when I was a little kid.  I liked it so much that I had her make it for my birthday dinner one year.  It's a meal that I have great memories of, though I haven't had it in years.  After picking up a decent (but not exceptional) frozen Coq Au Vin from Trader Joe's, I decided to break down and make it myself.

I'm so glad I did! 

The final product turned out better than my memories.  The chicken was tender and flavorful, the sauce was thick and perfect, and the mushrooms and onions rounded things out nicely.  I served my Coq Au Vin over hot, buttered egg noodles with a salad and (of course!) crunchy French bread.

After reading both Julia Child's recipe and the recipe in The Joy of Cooking, I went with the later.  Both recipes were very similar, but The Joy of Cooking won out because I wanted more onions and carrots.  There are a million ways to make Coq Au Vin, and there are a number of wines you can use (I may try this with a Riesling in the springtime for a lighter dish), but The Joy of Cooking recipe was easy to follow and didn't require hours upon hours of cooking. Since everyone has (or should have!) a copy of The Joy of Cooking, I'm not going to type out the recipe.  Just flip open your book and get cooking!  Here's what mine looked like in the end:


If you make this (and you should!) let me know how it went!

Monday, November 29, 2010

Thanksgiving Success!

I survived making my very first Thanksgiving dinner for my family!  Here are some highlight's from last week's feast:

My 13 pound turkey was yummy!  I followed an easy recipe from Ina Garten and--though the cooking time was more like 3 hours, not 2 1/2 like Ina said--the turkey turned out great.  No brining or basting required! 

My husband and father carved up the bird using the handy dandy electric knife.  I really prefer the thick chunks of breast meat to the traditional thin slices.  The meat seemed more moist, stayed warmer, and felt more substantial.

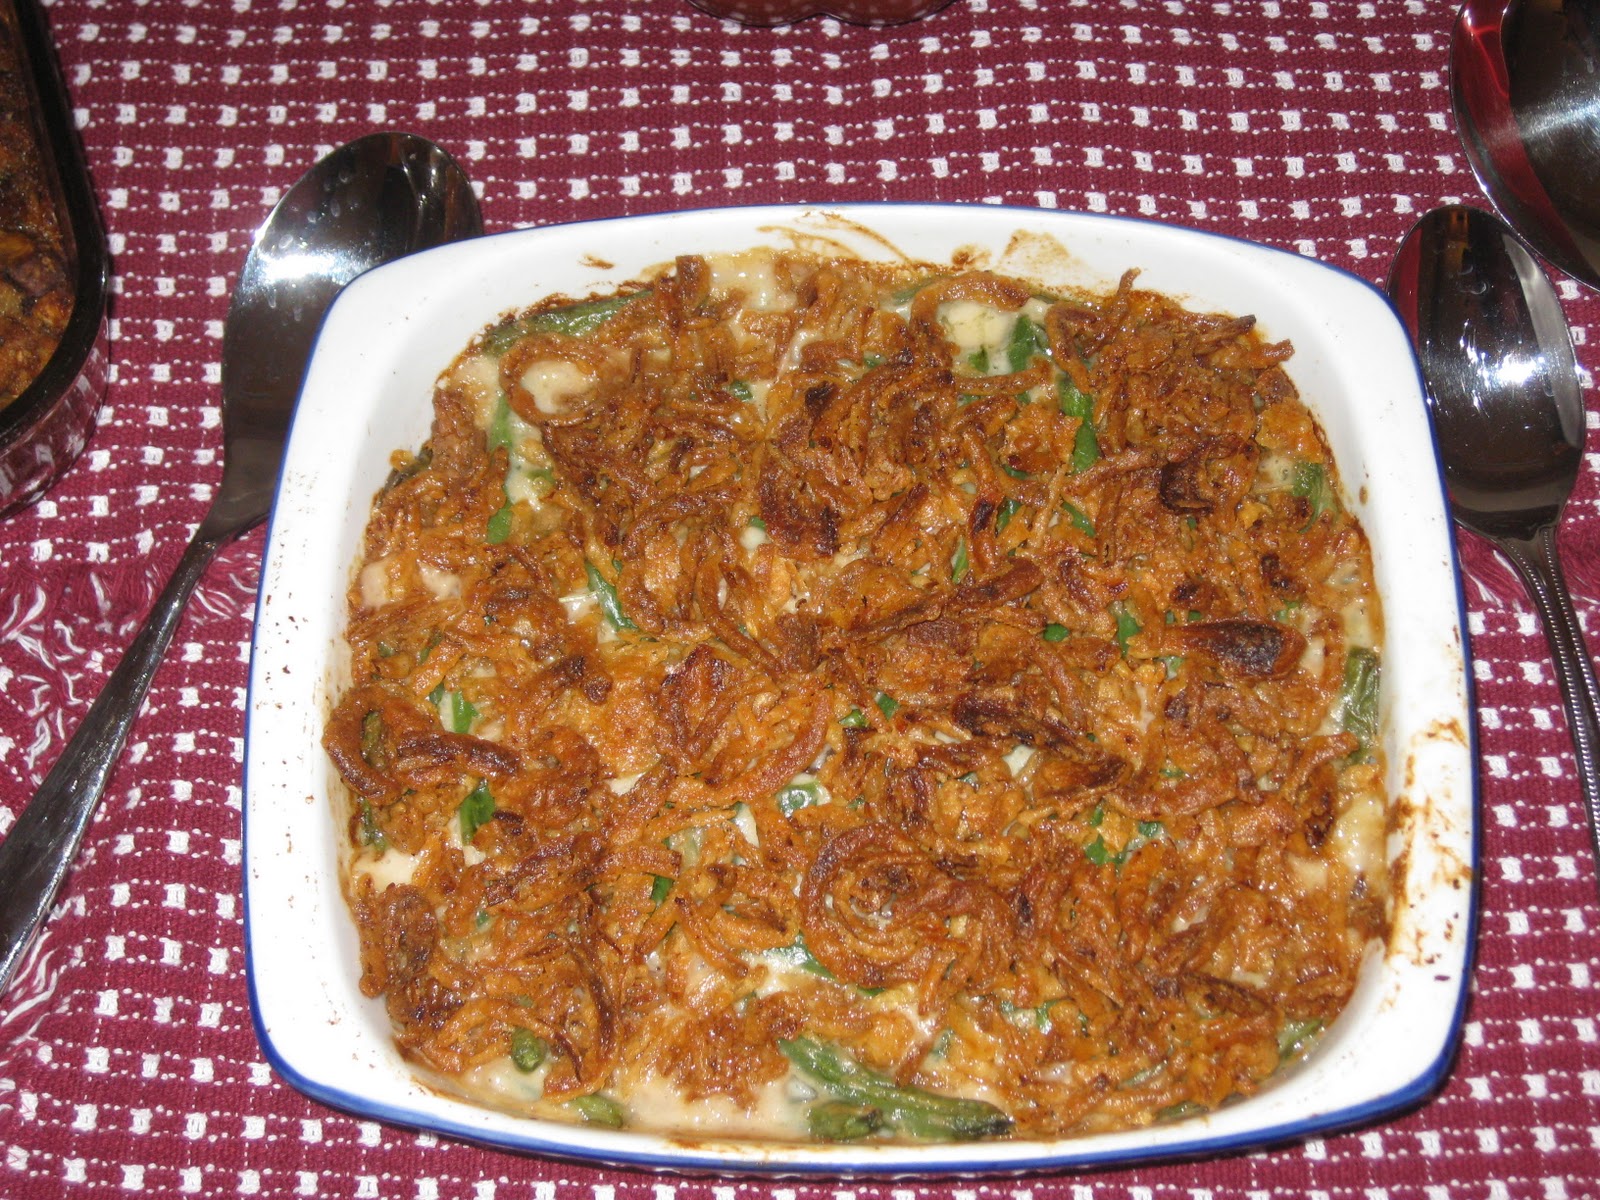
I went 2 for 3 with my side dishes. 

The classic green bean casserole (yes, from Campbell's!) was predictable but good (the Mister loves this dish!).  There's something so wrong and wonderful about those damn French Fried onions!

The stuffing was AMAZING.  I've never made stuffing before, so I just threw everything in and hoped for the best.  I wanted to appease the people who like "inside the bird" stuffing (because I did not stuff my bird when I cooked it) and those of us who prefer outside the bird stuffing.  I think my stuffing was a satisfying mix of moist and crunchy goodness.  (My "recipe" is at the end of this post.)

The smashed sweet potato casserole was a flop.  The recipe was also from Ina, the rare TV cook that usually has good cooking ideas...but this one was a miss.  My husband was the only one who liked it.  It was too nutmeg-y for me and Greta said it reminded her of soap.  Yup...that's a FAIL.  If I were to try this again, I'd steer clear of the stupid nutmeg.  Lesson learned!

The other sides for the night were easy: a can of cranberry sauce (yes, a can!  We love the open and slice approach to cranberry goodness), sauerkraut (it's not Thanksgiving without it!), and gravy.  Mom helped me out with the gravy, and it turned out delicious as always.

Desserts were also kick ass!  Greta made pumpkin pie (with a little help from Mom, who makes the world's best pie crust), I made Chocolate Guinness Cake (a cake I'm inexplicably sick of), and I also had some mincemeat tarts from Cost Plus World Market.

Overall it was a very good meal and a happy Thanksgiving.  Oh, and before I forget, here's how I made my stuffing.  I didn't really have a single recipe that I followed, but it turned out super yummy. From reading many different stuffing recipes, I figured out that the most important thing was to make sure my stuffing had a lot of moisture.  I'm currently doing the Weight Watchers program, and I don't usually eat this much rich yumminess, but it's Thanksgiving...why not break out multiple sticks of butter?  This is not a recipe for calorie counters, but so be it. 

Lydia's "How the Hell Do You Make Stuffing?" Stuffing
  • 1 pound breakfast sausage (I used the unseasoned "original" kind from Jimmy Dean because Greta hates sage.  Use whatever you want!  Even Italian sausage would work here.)
  • 1/2 stick butter (1/4 cup)
  • 3 stalks of celery, chopped
  • 1 onion, chopped
  • 2-3 cloves of garlic, minced
  • 8 oz. sliced crimini mushrooms
  • 14 oz. package of cubed stuffing (I used Safeway brand because I'm cheap.  I also opted for the unseasoned variety because of the sage-hater.  If you have homemade bread cubes, use that)
  • fresh parsley, chopped (to taste--I probably used 1/4 cup or so)
  • To taste: 
    • Kosher salt
    • Fresh cracked black pepper
    • Dried thyme
    • Dried marjoram 
    • Dried rosemary
  • 2 1/2 to 3 cups chicken stock (I used my homemade stock)
  • 1/2 cup melted butter
Brown sausage in a hot pan, breaking it up into small pieces.  When cooked through, place sausage on paper towel lined plate to drain a bit. Pour out excess grease from the pan.

In the same pan, melt 1/2 stick of butter over medium high heat.  Add the celery, onion and garlic.  Cook a few minutes then add the mushrooms.  Cook and stir well to get all the browned bits on the bottom of the pan up and mixed into the veggies.  Add a few pinches of salt and pepper to this mixture and cook until veggies are soft.

In a large bowl, combine cooked sausage and cooked veggies.  Stir well to mix.  Add cubed bread to the bowl and toss well to combine.  Add parsley and seasonings, stirring well.  (I spent a lot of time stirring and adding to make sure the entire mixture was well seasoned.)  Pour in chicken stock and stir to moisten.  Place mixed stuffing in a large casserole dish sprayed with Pam. 

You can either cook the stuffing right away or put it in the fridge and let it sit overnight, to be cooked the next day.  Before you put the stuffing in the oven, pour the melted butter over the top of the casserole.  Bake at 350 until heated through...about 45 minutes or so.

Wednesday, November 24, 2010

Happy Thanksgiving!

The big day is almost here.  Greta and I want to wish you all a happy and delicious Thanksgiving.

Here's what I am planning to make for the big day.  Leave a comment and let us know what you're serving!

Appetizers (I'm keeping it light...no need to stuff yourself before the turkey!)
Dinner
  • Ina's Perfect Roasted Turkey
  • Gravy
  • Sausage Stuffing
  • Smashed Sweet Potatoes
  • Green Beans
  • Cranberry Sauce
  • Sauerkraut (I think this is a Baltimore tradition...it's certainly a family tradition if nothing else!)
  • Dinner rolls
  • Wine (not sure what kind yet...I better figure that out!)
Dessert
It's safe to say no one will go away hungry.  Again, have a Happy Thanksgiving!  Thanks for reading our little blog.

Tuesday, November 23, 2010

A Simple and Easy Taste of the Season

On one of my recent trips to the grocery store, I looked over the seasonal display and found Pumpkin Scones by Sticky Fingers. I love their other scones and have found them to be incredibly easy to make - add 3/4 cup of water, mix with a fork, then scoop spoonfulls onto a greased baking tray; cook for approximately 15 minutes and you have delicious scones. I also really like the flavor of pumpkin and thought that I would give these a try.

I am really glad that I did! These were super yummy and followed in the tradition of the other Sticky Fingers product line. I made these while my son was getting ready for school and put a little bit of butter on them when they came out of the oven. The smell was definitely of Autumn and the flavors were delicious. I enjoyed mine with a hot cup of coffee. My mother thought that they could use raisins (I disagreed and this one and thought that they were wonderful as-is) and she also ate hers with some cream cheese (that actually looked good).

Anyway, if you enjoy pumpkin flavored breads then keep your eye out for this mix. Again, I am always happy with the Sticky Fingers products and highly recommend them!

Monday, November 22, 2010

Tool Time: Slice With Ease!

Back when I made the yummiest roasted chicken I've had in some time, I had my parents come over to share the meal.  Like they always do, they asked if they could bring anything.  I said yes!  Bring your electric carving knife!

Since my husband normally leaves meat carving (and cake slicing) to my dad, I wanted the Mister to have a chance to practice before Thanksgiving.  I asked my dad to guide my hubby through the carving process.  With the help of the electric carving knife, some earlier reading on the matter from The Joy of Cooking, and words of experience from my father, the Mister carved up the chicken beautifully.  (More on that in a minute!)

The electric carving knife was a huge help.  If you don't have one, consider making the modest financial investment to pick one up.  My father has used electric carving knives ever since I've been alive (he's gone through at least two of them!), and he's never had a hard time carving meat.  My husband declared the electric carving knife fun to use...it made first time carvery a snap because he got a clean cut without that annoying sawing motion of a traditional knife.  The electric carving knife doesn't tear the meat, and it gets the carving process done faster than a normal knife.  It's also easy to clean (bonus!)

Men like power tools...and since men are traditionally tasked to carve meat, this is the perfect gadget for the kitchen.  We'll be using this tool on Thursday to carve up the turkey!

Oh, one more note on carving: This year, we're carving the turkey breast differently.  Instead of cutting thin slices, my husband is going to remove the entire breast and then cut it into thicker slices...just like he did with the chicken (see photo below).  This does a few things: 1) it ensures people will get substantial pieces of white meat, 2) it keeps the meat moister and warmer (since less of the meat is exposed), and 3) it allows diners to get a better bite of yummy, crispy turkey skin!

Wednesday, November 17, 2010

The Dinner That Keeps on Giving

The early stages of homemade stock.
After I made my super yummy roasted chicken, I couldn't let myself throw out the carcass and leftover bones of the bird.  So I did the thrifty thing and made stock.  I didn't follow a recipe, but I did throw the carcass, the chicken neck, some bones, onion skins, carrots, celery, parsley, and peppercorns into a big pot.  I added enough water to cover everything, turned the burner on medium, and left the concoction to bubble all day long.  After several hours, I strained all the veggies and bones (and threw them away) then let the strained liquid sit on low heat to continue to reduce.  The end result?  A dark, flavorful stock.

I'm planning on using the stock when I make my Thanksgiving dinner (I'll probably add it to the stuffing), so I have it in the freezer, waiting to be used.  Before I froze it, though, I ran it through the most awesome gizmo: Oxo's Fat Separator.  If you don't have one of these (and you're planning to make gravy or stocks), you should get one!

This handy gadget will set you back about $15, and it will help keep the oil slick out of your gravy/stock.  It's surprisingly easy to use.  You just pour your gravy/stock through the separator then pull out the stopper.  This creates suction so that the non-fatty liquid pours easily from the spout.  The fat will rise to the top so you can see when to stop pouring.

One bit of advice: pour slowly and pay attention to the color of liquid in the spout.  As soon as you get into the fat, stop pouring!

I'm glad I picked up this kitchen tool.  It's very helpful and will come in handy when I make Thanksgiving gravy.

Tuesday, November 16, 2010

A Chicken in Every Pot!

I only snapped one photo before this delicious, moist, crisp-skinned chicken was devoured!
Lately I've been getting in the habit of cooking a big meal on Saturday nights.  This past Saturday, I felt like roasting a chicken.  Really...is there anything better than roasted chicken (and, of course, crispy chicken skin!)?

There are a million recipes and techniques out there for roasting a chicken.  Some call for starting out with a super hot oven, others have you flip the chicken from side to side throughout cooking, others say to just throw the chicken in the oven as is.  After reading over a dozen different ways to cook a chicken, I settled on this super easy recipe from everyone's favorite, Martha Stewart...and I must say, I picked the right recipe.  It was a snap to make and it produced chicken that was flavorful, moist, and delicious!

MARTHA'S PERFECT ROASTED CHICKEN
  • 1 six-pound roasting chicken
  • 1 tablespoon unsalted butter
  • Salt and freshly ground black pepper
  • 2 medium onions, peeled and sliced crosswise 1/2 inch thick
  • 1 lemon
  • 3 large cloves garlic, peeled
  • 4 sprigs fresh thyme
1. Let chicken and 1 tablespoon butter stand at room temperature for 30 minutes. Preheat oven to 425 degrees. Remove and discard the plastic pop-up timer from chicken if there is one. Remove the giblets and excess fat from the chicken cavity. Rinse chicken inside and out under cold running water. Dry chicken thoroughly with paper towels. Tuck the wing tips under the body. Sprinkle the cavity of the chicken liberally with salt and pepper, and set aside.

2. In the center of a heavy-duty roasting pan, place onion slices in two rows, touching. Place the palm of your hand on top of lemon and, pressing down, roll lemon back and forth several times. This softens the lemon and allows the juice to flow more freely. Pierce entire surface of lemon with a fork. Using the side of a large knife, gently press on garlic cloves to open slightly. Insert garlic cloves, thyme sprigs, and lemon into cavity. Place chicken in pan, on onion slices. Cut about 18 inches of kitchen twine, bring chicken legs forward, cross them, and tie together.

3. Spread the softened butter over entire surface of chicken, and sprinkle liberally with salt and pepper. Place in the oven, and roast until skin is deep golden brown and crisp and the juices run clear when pierced, about 1 1/2 hours. When chicken seems done, insert an instant-read thermometer into the breast, then the thigh. The breast temperature should read 180 degrees.and the thigh 190 degrees.

4. Remove chicken from oven, and transfer to a cutting board with a well. Let chicken stand 10 to 15 minutes so the juices settle. Use the pan juices to make gravy, as you prefer. Untie the legs, and remove and discard garlic, thyme, and lemon. Carve, and serve gravy on the side.

I didn't love Martha's gravy technique, and instead called upon my trusty Joy of Cooking to make a super yummy, rich, deep brown gravy with leftover pan juices, wine, broth, butter, flour, and (here's a tip) a few drops of lemon.  The lemon juice and wine really added some much needed acidity to the mix.  Here's an embarrassing fact: before Saturday, I had never made gravy.  Lame, right?  But now that I have, it's not a problem.

If you make Martha's Perfect Roasted Chicken, be sure to keep and serve the onions that get cooked (and burnt!) in the roasting pan.  They sit under the chicken, soaking up all the flavor and juices from the roast.  The onions became almost like an onion jam, and were a huge source of flavor.  In Martha's recipe, she says to throw them away.  Really, Martha?  Ditch all that lovely flavor?  You're crazy!

This was sort of a dry run for Thanksgiving dinner...a delicious dry run!

Sticking With Tradition

As I mentioned last week, I gave my family several options for dinner on Thanksgiving.  I let the family vote, and--despite saying earlier that they didn't want a turkey--the family has chosen to stick with tradition.  So...just like millions of OTHER Americans, I'll be making turkey, stuffing, gravy, etc. on November 25th.  Turkey wouldn't have been my first choice, but the people have spoken.

Gobble, gobble!

Monday, November 15, 2010

Cottage Pie - A New Take on Sheperd's Pie

My mother HATES mashed potatoes and will not eat them in anything. We rarely had them growing up and the only time I ever ate a Sheperd's Pie would be at a restaurant. So I was a little surprised when my Mom found a recipe in Everyday Food by Martha Stewart for Cottage Pie and wanted me to make it - the kicker, no mashed potatoes.

Here is the original recipe for Cottage Pie per Everyday Food.

3 tablespoon unsalted butter, melted
1 large yellow onion, diced
2 large carrots, cut into 3/4-inch pieces
coarse salt & pepper
2 tablespoons tomato paste
1 pound ground beef or lamb
2 teaspoons fresh thyme leaves
1 cup dark (porter) beer
2 tablespoons all-purpose flour
3/4 cups frozen peas
1 large russet potato, very thinly sliced

  • Preheat oven to 400 degrees. In a large skillet, heat 1 tablespoon butter over medium-high heat. Add onion and carrots and cook, stirring often, until onion is soft, 5 minutes. Season with salt and pepper and stir in tomato paste. Add meat and cook, breaking up with a wooden spoon, until almost cooked through, 3 minutes. Add thyme and beer and bring to a boil. Cook, stirring frequently, until slightly reduced, 2 minutes. Sprinkle flour over mixture and stir to combine. Add 1 cup water and cook until mixture thickens, about 2 minutes. Stir in peas and season with salt and pepper.
  • Transfer mixture to a 2-quart baking dish. Top with potatoes, overlapping slices. Season potatoes with salt and pepper and drizzle with 2 tablespoons butter. Bake until potatoes are browned around edges and tender when pierced with a knife, 40 to 45 minutes. Let cool 10 minutes before serving.
The family really liked this dish and we served it with sweet Hawaiian rolls and salad. I added fresh mushrooms and used dried thyme. I would also like to add in pear onions to the dish, as I think that it would add a little kick to it. For my first attempt, I used ground beef, but I think the ground lamb would really be nice and give a bit more flavor too.

Anyway, thank you Martha for providing a recipe that even my Mom would like - although, I missed the mashed potatoes!

Thursday, November 11, 2010

A New Burger Tradition

We have started a tradition on Wednesday nights after my son's hockey practice - that is going to Five Guys for burgers and fries. My son absolutely loves it - from the free peanuts to the fresh made burgers, it is a fun post practice routine.

Five Guys Burgers is not fancy and they do not have a large menu - burgers, hot dogs and grilled cheese sandwiches, plus cajun and regular fries and that is it! But what they do, they do well. When you walk in, they have boxes of peanuts for you to help yourself to while you wait in line. You step up to the counter and order, get your cup and fill it up with a drink, then wait for your number to be called and then you eat your food!

The thing that I like the most about Five Guys is that the toppings are free and plentiful. You can get grilled onions, grilled mushrooms, jalapeno peppers, green peppers, pickles, lettuce, tomatoes, relish, onions, and sauce all for free and in any combination. They have two sizes of burgers, regular and little - the difference is that little burger is a single patty and the regular is a double patty.

My son always gets a little bacon cheeseburger with mustard, while I get a little bacon cheeseburger with grilled onions, grilled mushrooms, tomatoes and mustard, plus we share a small order of hand-cut fries. It is a fun meal for us to share together and we both look forward to our burgers!

All-in-all, Five Guys Burgers is a no frills restaurant that does burgers and fries really well. For the two of us, it costs about $15 and I always know what the quality is going to be. I would definitely recommend Five Guys - make sure you get some peanuts!

Wednesday, November 10, 2010

Cookbook Corner: Best-Loved Cookies

Since we are entering the holiday cooking season, I thought I would share my favorite cookie cookbook: Best-Loved Cookies by Publications International, Ltd. I found this book about 9 years ago and I break it out whenever I want to cook up a batch of delicious cookies (usually around Christmas time). I have been really happy with the cookbook and the variety of the recipes in it.

What to expect: About 370 pages of recipes and pictures. The introduction includes cookie basics like the different types of cookies, how to melt chocolate, how to bake them, and how to store them once they are made.

The book is organized by the different types of cookies: Cookie Jar Classics, Chockful of Chips, Out of the Ordinary, Brownie Bonanza, A Bevy of Bars, Holiday Treats, Almost Homemade, and Especially for Kids.

Best recipes: These are my go to favorites and I use them so much that the spine has been worn out.
  • Mexican Wedding Cakes, p.26. I love these - little balls of sugar, butter and nuts. They are fun to make and are delicious with coffee.
  • Soft Spicy Molasses Cookies, p.37. These are exactly what the title says they are and are yummy. Warning, they are a bit messy to make and you really need to keep these cold when you roll them into balls (otherwise they kind of melt).
  • Original Nestle Toll House Chocolate Chip Cookies, p.56. In case you do not have the recipe memorized or have a bag of Nestle chips, this recipe is a favorite and I use this all year long. It is the same recipe that you find on the back of the Nestle Toll House bag.
  • Chocolate Edged Lace Cookies, p110. These look very fancy, but are pretty easy to make (and to eat). Watch out, these do not last long because they are so edible!
  • Philadelphia Marble Brownies, p.188. A nice spin on traditional brownies by adding Philadelphia cream cheese to the recipe.
  • Chippy Chewy Bars, p.232. I knew these growing up as 5 layer bars. They have graham crackers, peanut butter chips, chocolate chips and my favorite - coconut flakes!
  • Danish Raspberry Ribbons, p.280. A shortbread type cookie with jam in it. These are made into ropes with indents to place the jam and then after they are cooked, they are cut and drizzled with glaze. Very delicious!
Complaints: This book does not have a good recipe for Spritz cookies or Gingerbread cookies - both an essential to holiday cooking. For these recipes, I turn to the Joy Of Cooking Cookbook, a tried and true no frills cookbook that has page after page of recipes.

Deliciousness scale: 4 spoonfuls of yum out of 5.

Details: This review is based on ISBN# 0-7853-4363-6.

Tuesday, November 9, 2010

More Trader Joe's Faves

I've been cooking in more than usual lately (and I'm happy about that), so I've been grocery shopping a lot more lately.  I've been hitting up my local Trader Joe's as much as I can, and I have a few more favorites to add to my TJ's list.  I mentioned the delicious awesomeness of TJs earlier this year, but here are a few more goodies that are MUSTS when visiting the best grocery store in the world:
  • Chocolate Croissants: OMG.  These things are addictive! They're in the freezer section, and you need to let the dough proof overnight.  It's amazing how big they get as you let them sit at room temperature.  When they come out of the box, they're flat, tiny things.  By the morning, they're fully risen and just beautiful.  They cook up in 20 minutes, and they're flaky, chocolaty perfection for breakfast.  Perfect for a lazy Sunday morning!
  • Almond Biscotti.  I don't usually care a whole lot about sweets...I'm much more of a salty-crunchy girl.  But these things?  So good!  They're crunchy biscotti with a nice almond kick...they pair up nicely with black coffee.
  • Pumpkin Bread/Muffin Mix: TJ's has this mix only in the fall, but it's worth picking up.  You just add some eggs, oil and water, stir, and VIOLA!  Spicy, moist muffins or pumpkin bread that's good enough to whip up and give as a quick gift.
  • Mini Baguettes: These are also in the frozen section and it's just a bag of small, frozen baguettes.  One little bread is enough for one person and they heat up super fast (better yet: no need to let them thaw--they go right from freezer to oven).  Because my hubby and I never get to eat together, frozen, single-serving items like this are ideal.  Plus they taste good!
  • Butternut Squash: TJ's has pretty good (and inexpensive) produce.  I always seem to pick up a bag of cut up butternut squash.  You can just nuke it and then serve it up.  I like my squash mashed up with a tiny bit of butter and salt and pepper.  Yum!
  • New things at TJs: On my latest trip, I picked up two new, intriguing items from the frozen section: Coq au Vin and Mushroom Ravioli with Braised Beef.  I'll let you know how they taste!
In other grocery store news, a WinCo Foods just opened up not far from where we live.  I hear that they're super cheap (which scares me, to be honest).  I think I'll let the hype (and crowds!) die down before venturing over to check it out.  Have any of you ever been to WinCo?  Is it a hit or a miss?

Monday, November 8, 2010

Back to the Drawing Board

Last week, I posted about my plans to make Thanksgiving dinner for the first time ever in my life.  In my head, I had it all worked out.  I've been looking at recipes, thinking about menus, etc. since Halloween flew by.  But now?  I am officially not sure what I'm going to do!

I had my parents and nephew over for dinner on Saturday night and mentioned my plans to make a traditional turkey dinner for Thanksgiving.  My dad looked at me like I said I was going to cook one of my cats.  "A turkey?  Why don't you make something else?" he asked.  I think he's wanting lamb, but lamb is not a meat I'm in love with.

After my dad's comment (and because I am not the biggest fan of turkey and Thanksgiving in general), I've made a decision: I'm going to let the family decide what I'm cooking.  I haven't told the family my plan to have them pick the meal yet, but I'm going for a democratic approach.  I'm going to give them five dinner options (below) and then let them tell me their first, second, and third choice picks.  From that, I'll tally up a cumulative score for each option and then cook whatever gets the highest score.  This will be fun (sorta!).

What would you pick if you were coming to my house for Thanksgiving dinner this year?  Here are the options, in no particular order:

  • Traditional Turkey Dinner (with stuffing, sweet potatoes, green beans, gravy, rolls, etc.)
  • Chicken with Morel Mushrooms (boneless, skinless breasts in a cream sauce with mushrooms.  Served with rice, green beans, crunchy bread)
  • Boeuf Bourguignon (Julia Child's classic French beef stew, served with hot, buttered noodles and crunchy bread)
  • Fettuccine Bolognese (when I don't burn the crap out of it, this is really good dish.  The sauce is made of ground beef, pork and veal in a wine and cream tomato sauce.  Served with salad and bread)
  • Connecticut Beef (this is a family recipe that I've never made!  It's chunks of beef and mushrooms in a creamy sauce, topped with scalloped potatoes, cheese and breadcrumbs.  Served with veggies and bread)
These are all good choices.  I have my top three meals picked out, but I won't say what they are.  I don't want to bias my family in any way.  I'll let you know what gets decided!  No matter what, it should be a yummy meal.

Thursday, November 4, 2010

Getting Ready For Turkey Day

So Lydia told you all that she is making Thanksgiving Day dinner this year - this is one of the first years since graduating from college that I am not cooking the meal! In 2006, I listened to an interview on NPR with Greg Atkinson and he talked about brining the turkey and I thought that sounded really good - so I gave it a try. Since then, I have made a brine for my bird and have been really happy with the results.

The first thing to making a delicious turkey is to order a fresh bird from the meat department at the grocery store. I usually put in my order in mid-November and schedule to pick it up at least one day before the big day. I also try to get a 14-16 pound bird (enough to feed everyone and still have leftovers -because what is Thanksgiving without leftovers). Also for the brine, use Kosher salt.

Here's how to make your brine, based on Greg Atkinson's recipe.
1 14-16 pound turkey (fresh or thawed)
4 cups Kosher salt
2 cups brown sugar
2 tablespoons whole black peppercorns
4 bay leaves
1 gallon boiling water
1 gallon ice
  • Wash out a medium-sized cooler. Unwrap the turkey, remove all the giblets and wash it well; place the turkey in the cooler.
  • Make the brine. Stir the kosher salt, brown sugar, and peppercorns into the boiling water and let it steep for 20 minutes. Stir in the ice water and continue stirring until the ice has melted. Pour the cold brine over the turkey and cover the cooler. Allow the turkey to soak for 12 to 24 hours - make sure that the bird stays cool (you can use gel packs for this purpose).
  • Preheat the oven to 350 degrees. Place the turkey on a roasting pan and discard the brining solution. Roast the turkey until the thigh meat reads 180 degrees, about 3 1/2 to 4 hours. Cover the breast with aluminum foil during the last hour to prevent it from over browning. Allow it to sit for at least 20 minutes prior to carving it.

Wednesday, November 3, 2010

Roasted Pumpkin Seeds - A Fall Treat

Last week I carved pumpkins with my son. As with most kids, when he was searching for the perfect pumkin from the pumpkin patch he wanted the largest one that he could get Mom to ok. Now for him, it wasn't just because it was huge, it was because in his mind the larger the pumpkin the more seeds. He loves pumpkin seeds and always looks forward to the buttery, salty, crunchy treat that comes from some ooey, mushy diggining in pumkin guts!

Here is how I was taught to make them - as Lydia said, low and slow.

Roasted Pumpkin Seeds:

Preheat the oven to 250 degrees. Carve your pumpkin and sort through all the pumpkin guts for the seeds. I use a large bowl to put all the cravings in and then place the seeds in a large collendar. Once I have everything sorted, I run cold water over them and pull off any remaing pumpkin pieces - you can also let them soak in cold water for about 15 minutes.


Remove them from their bath, dry them a bit and spread over a large baking pan. Generously sprinkle the seeds with salt and drop pats of butter over them. Bake for about 3 hours, turning them every 45 minutes (or so).


They should be brown (not burned/black) when done. Remove from heat and allow to cool. Enjoy!


I was also playing with the idea of making a sweet version this year by adding cinnamon and sugar (with the butter) instead of salt; my son would have none of that though.

Tuesday, November 2, 2010

Time for the Holidays!

Now that Halloween is over, it's inescapable: the holiday season is upon us!  It's time to start thinking about Thanksgiving dinner, Christmas shopping, and trimming the tree.  Eesh!  This year is flying by...

This year--for the first time ever in my 34 years--I've committed to cooking Thanksgiving dinner.  This is a big deal for me because 1) Thanksgiving is my least favorite holiday and 2) like I said, I've never done this before.  Sure, I've roasted chickens, made big holiday dinners for Christmas, etc., but Greta always handles turkey day.

Last year our parents were back in Maryland, leaving just me, the Mister, my sister, and my nephew.  We decided to depart drastically from tradition and celebrated with what our family calls tachos (tacos/nachos).  This year, I'll roast up a turkey and do it the old fashioned way.

I've been looking at a ton of recipes and menu ideas to get myself prepared.  I know that our Thanksgiving dinner MUST include a turkey, canned cranberry sauce, and sauerkraut.  These three things are a tradition, and I'm not about to mess with tradition. 

But I do have a question for all of you: What has to appear on your Thanksgiving Day menu?  Are there any recipes or dishes that you absolutely, positively have to have for it to be Thanksgiving?  If so, leave me a comment...I want to hear about it and who knows!  Maybe I'll include one of your family traditions in my own this year.

Monday, November 1, 2010

Food Tourism

Last week, my hubby and I took the entire week off of work to spend some time together.  It's something we try to do every year...some years we're able to get away, other years we stay put.  This year was a "stay-cation" year and it was just what we needed.  Every day we got up and went on a day trip around the Seattle area.  We visited the International District, Pt. Townsend, and Langley among other places.

Here in WA state, we have an extensive ferry system, and I love riding the ferries!  We made sure to get two roundtrip rides in over the week, with one of our day trips taking us to Pt. Townsend...one of my favorite little towns in the Puget Sound area.  Pt. Townsend is a funky place.  It has a bunch of Victorian-style buildings, a busy port area, and a downtown area filled with fun shops (including an occult bookstore!) and nice restaurants.

Pt. Townsend is also home to the two culinary treasures I'm going to tell you about today: Pane d'Amore and Mt. Townsend Creamery.


Pane d'Amore is located in the "uptown" section of Pt. Townsend (they also have locations in Sequim and Bainbridge Island).  They make the most amazing French bread that is crunchy on the outside and fluffy perfection on the inside.  Many restaurants in Pt. Townsend serve up the local baguettes, making for happy diners, I'm sure!  I've visited the bakery twice now.  Each time I snag a loaf of bread and at least one cheese straw.  This time we also picked up a chocolate croissant and a cinnamon twist.  Check out how yummy their food looks:
Cheese sticks from Pane d'Amore...a perfect snack for a ferry ride!
Pane d'Amore baguette (and butter, of course)
Breakfast: cinnamon twist and black coffee
Over at Mt. Townsend, they are passionate about cheese...and it shows!  Their products are available at many local grocery stores, but if you stop by their shop, you can try everything they make.  My hubby loves stinky cheese, so he was the official taster at the Mt. Townsend shop (I'm more of a cheese wimp...I like a nice sharp Cheddar, maybe some brie, etc.). 
Mt. Townsend Creamery: Even their labels are neat!
 The Mister loved everything he tried, but settled on two to take home: Trailhead, their award-winning tomme (a robust, nutty cheese) and Seastack, a soft-ripened cheese with a dusting of vegetable ash.  We shared our cheese loot with my parents and Greta.  I'm not sure if Greta's tried the cheese yet, but my dad had some and declared them delicious.  Take a look for yourself:
Top: Seastack; Bottom: Trailhead  Both: Yum!
It's fun to try out local food places like Pane d'Amore and Mt. Townsend.  They seem to have more heart--and better tasting products!--than their mass-manufactured competition.  Plus it feels good to support local businesses.  I'm looking forward to finding more local food treasurers like these places in my future travels.