Showing posts with label family recipes. Show all posts

Wednesday, June 13, 2012

Gaga's Sauerbraten & Potato Dumplings

 Growing up, this was always one of my favorite meals. My grandmother would make this for holiday dinners or when the whole family got together. I loved mixing my dumplings with the meat and pouring gravy over top. Also, the leftovers were always amazing! This dish makes me think of her and all the times we had together. Please enjoy and if you make it, let me know how you like it!
 
Sauerbraten 
4-5 lb beef (Chuck-Bottom Round)
2 cups water
2 cups vinegar
1 T salt
1/2 tsp pepper
1 T sugar
2 medium onions, sliced
1 lemon
2 T pickling spices
2 Bay leaves
15 gingersnaps (broken in to small pieces)

Place meat in a large bowl. Heat vinegar and water. Dissolve salt, pepper and sugar in vinegar mixture. Top meat with sliced onions and lemon. Pour vinegar mixture over meat. Add remaining ingredients (except gingersnaps) to vinegar around meat. Cover and refrigerate for 3 or 4 days, turning meat daily. Remove meat and drain well. Strain liquid and save for gravy.

Sprinkle meat with flour and brown in oil in heavy pan. Add 3/4 cup of strained liquid. Cover and cook over low heat until meat is tender, about 3-4 hours. Add more liquid as needed. When tender, remove meat and keep hot. To make gravy add more strained vinegar mixture to juice in the pan to make 3 cups liquid. Bring to a boil and stir to dissolve all brown drippings. Add gingersnaps, simmer and stir gravy until gravy is thickened and smooth.

Potato Dumplings
6 medium potatoes
2 eggs
Croutons - make by cutting bread (3-4 slices) in small cubes; saute in butter
Flour

Cook potatoes in jackets. Cool and pare. Put through ricer and sprinkle with salt. Add eggs and croutons. Add flour as needed, so they hold together. Drop in boiling, salted water.

Serves 6-8

Note: You can add raisins to the gravy if you like. Use 1/2-3/4 cups of raisins. Also, Bisquick dumplings can also be substituted for the potato dumplings, just keep them small when you make them.

Wednesday, January 5, 2011

Easy Elegance

Cream Puffs with Peppermint Ice Cream and Hot Fudge Sauce.  Easy and yummy!
After serving up a meal like Boeuf Bourgignon for Christmas dinner, I knew I had to do something easy yet delicious for dessert.  After much consideration, I decided on cream puffs filled with ice cream, bathed in rich hot chocolate sauce.  Nothing wrong with that!

I first read through several recipes for pate a chou before consulting my mother. I remember my mother making cream puffs (or profiteroles) when I was a kid, and I know my mom is not a fan of complex recipes.  I thought I found a simple enough recipe from the Joy of Cooking, but Mom told me to get out my copy of the Southern Living Cookbook.  The recipe she always used was from there and, she promised, it was a piece of cake.

I'm happy to report that I took my mom's sage advice.  The Southern Living Cookbook recipe was perfection--it was easy to follow and yielded deliciously elegant results.  If you need a fancy dessert that's easy to make, I highly recommend this one.  And the best part is that you can do whatever you want with the cream puffs once they're cooked.  They can be used for savory or sweet dishes, and the only limit to fillings and pastry shapes is your imagination.

Try this one out...it's a breeze.  And, you can make it ahead of time and stick it in the freezer.  Nice!


Cream Puffs, fresh out of the oven...cooling off.
CREAM PUFF PASTRY

2/3 cup water
1/3 cup butter
2/3 cup all purpose flour
1/8 tsp salt
3 eggs

  1. Combine water and butter in a medium saucepan; bring to a boil.
  2. Add flour and salt, all at once, stirring vigorously over medium-high heat until the mixture leaves the sides of the pan and forms a smooth ball.  
  3. Remove from heat and cool 4 to 5 minutes.
  4. Add eggs, one at a time, beating thoroughly with a wooden spoon after each addition; then beat until the dough is smooth.
  5. Shape and bake pastry immediately according to recipe directions.  Dough can be used for cream puffs, eclairs, etc.
  6. To make cream puffs: drop pastry into 8 equal mounds 3 inches apart on an ungreased baking sheet (note: I lined my baking sheet with parchment paper).  Bale at 400 degrees for 30 to 35 minutes or until golden brown and puffed.  Cool away from drafts.  Cut top off of puffs and scoop and discard out the soft, uncooked dough in the center.  Add ice cream and top with hot fudge sauce.

Monday, November 29, 2010

Thanksgiving Success!

I survived making my very first Thanksgiving dinner for my family!  Here are some highlight's from last week's feast:

My 13 pound turkey was yummy!  I followed an easy recipe from Ina Garten and--though the cooking time was more like 3 hours, not 2 1/2 like Ina said--the turkey turned out great.  No brining or basting required! 

My husband and father carved up the bird using the handy dandy electric knife.  I really prefer the thick chunks of breast meat to the traditional thin slices.  The meat seemed more moist, stayed warmer, and felt more substantial.

I went 2 for 3 with my side dishes. 

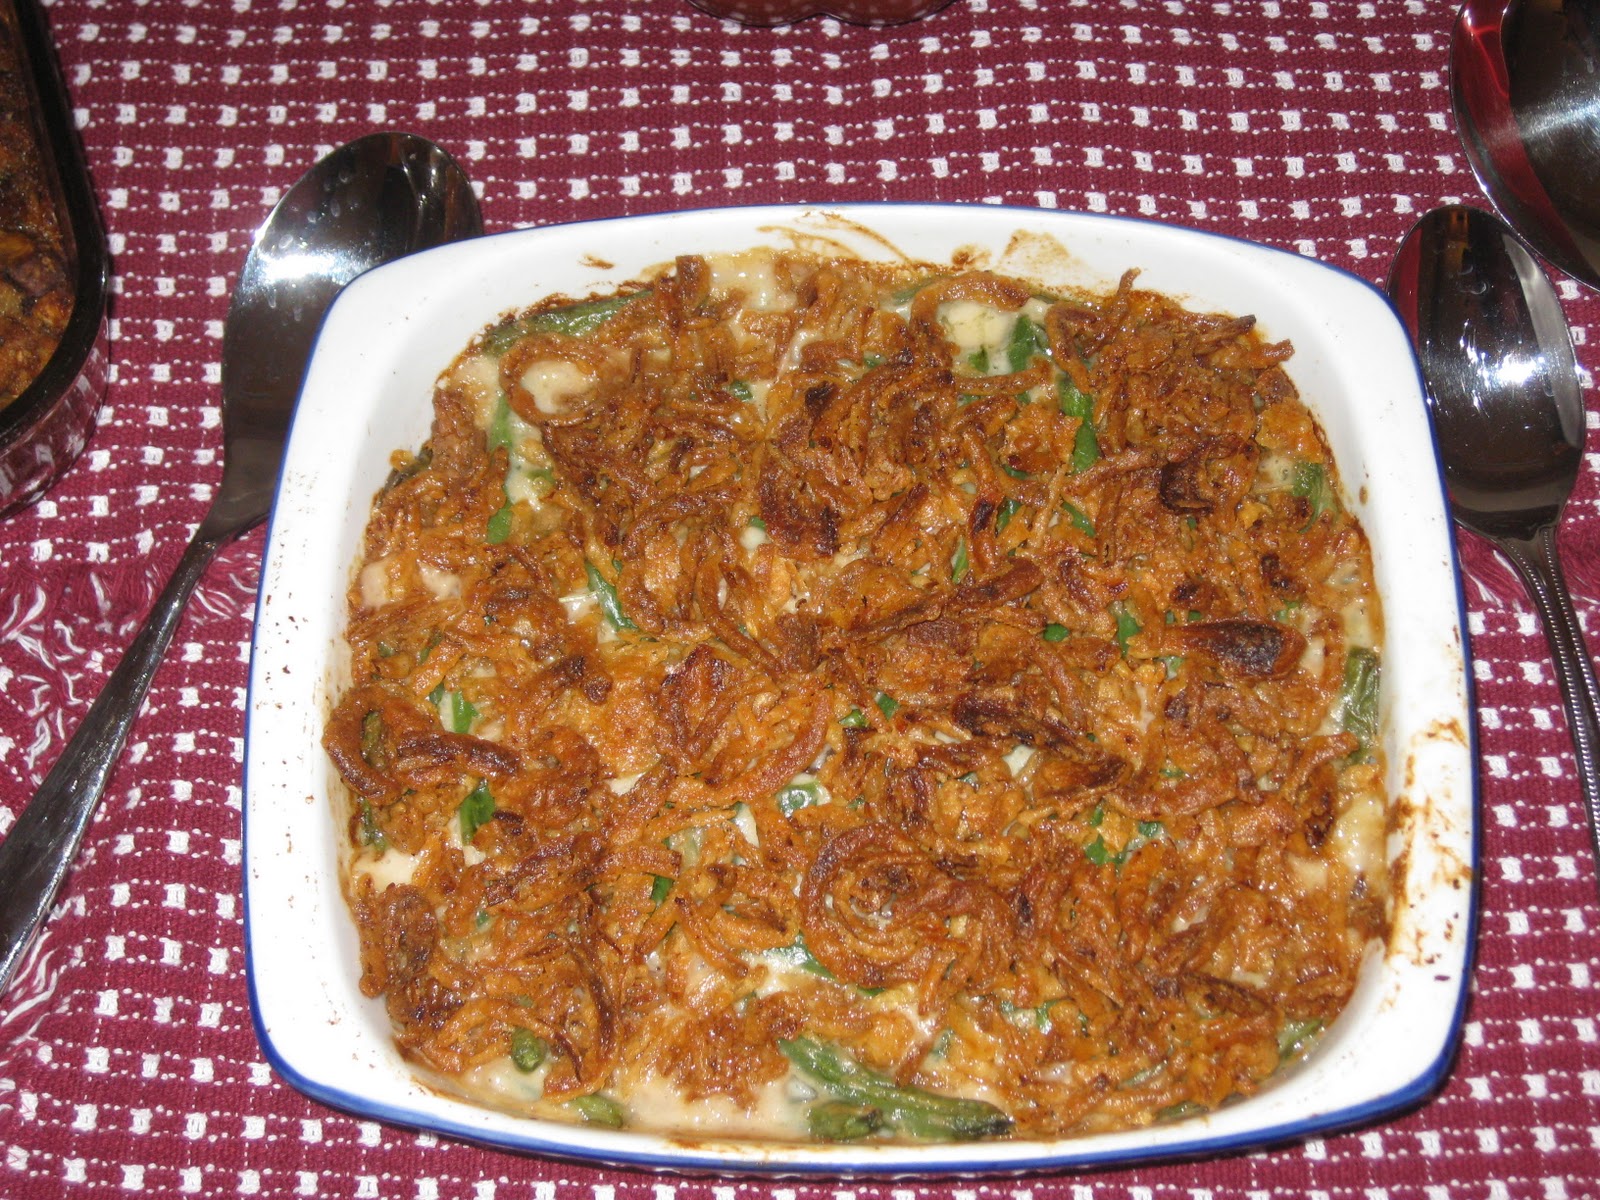
The classic green bean casserole (yes, from Campbell's!) was predictable but good (the Mister loves this dish!).  There's something so wrong and wonderful about those damn French Fried onions!

The stuffing was AMAZING.  I've never made stuffing before, so I just threw everything in and hoped for the best.  I wanted to appease the people who like "inside the bird" stuffing (because I did not stuff my bird when I cooked it) and those of us who prefer outside the bird stuffing.  I think my stuffing was a satisfying mix of moist and crunchy goodness.  (My "recipe" is at the end of this post.)

The smashed sweet potato casserole was a flop.  The recipe was also from Ina, the rare TV cook that usually has good cooking ideas...but this one was a miss.  My husband was the only one who liked it.  It was too nutmeg-y for me and Greta said it reminded her of soap.  Yup...that's a FAIL.  If I were to try this again, I'd steer clear of the stupid nutmeg.  Lesson learned!

The other sides for the night were easy: a can of cranberry sauce (yes, a can!  We love the open and slice approach to cranberry goodness), sauerkraut (it's not Thanksgiving without it!), and gravy.  Mom helped me out with the gravy, and it turned out delicious as always.

Desserts were also kick ass!  Greta made pumpkin pie (with a little help from Mom, who makes the world's best pie crust), I made Chocolate Guinness Cake (a cake I'm inexplicably sick of), and I also had some mincemeat tarts from Cost Plus World Market.

Overall it was a very good meal and a happy Thanksgiving.  Oh, and before I forget, here's how I made my stuffing.  I didn't really have a single recipe that I followed, but it turned out super yummy. From reading many different stuffing recipes, I figured out that the most important thing was to make sure my stuffing had a lot of moisture.  I'm currently doing the Weight Watchers program, and I don't usually eat this much rich yumminess, but it's Thanksgiving...why not break out multiple sticks of butter?  This is not a recipe for calorie counters, but so be it. 

Lydia's "How the Hell Do You Make Stuffing?" Stuffing
  • 1 pound breakfast sausage (I used the unseasoned "original" kind from Jimmy Dean because Greta hates sage.  Use whatever you want!  Even Italian sausage would work here.)
  • 1/2 stick butter (1/4 cup)
  • 3 stalks of celery, chopped
  • 1 onion, chopped
  • 2-3 cloves of garlic, minced
  • 8 oz. sliced crimini mushrooms
  • 14 oz. package of cubed stuffing (I used Safeway brand because I'm cheap.  I also opted for the unseasoned variety because of the sage-hater.  If you have homemade bread cubes, use that)
  • fresh parsley, chopped (to taste--I probably used 1/4 cup or so)
  • To taste: 
    • Kosher salt
    • Fresh cracked black pepper
    • Dried thyme
    • Dried marjoram 
    • Dried rosemary
  • 2 1/2 to 3 cups chicken stock (I used my homemade stock)
  • 1/2 cup melted butter
Brown sausage in a hot pan, breaking it up into small pieces.  When cooked through, place sausage on paper towel lined plate to drain a bit. Pour out excess grease from the pan.

In the same pan, melt 1/2 stick of butter over medium high heat.  Add the celery, onion and garlic.  Cook a few minutes then add the mushrooms.  Cook and stir well to get all the browned bits on the bottom of the pan up and mixed into the veggies.  Add a few pinches of salt and pepper to this mixture and cook until veggies are soft.

In a large bowl, combine cooked sausage and cooked veggies.  Stir well to mix.  Add cubed bread to the bowl and toss well to combine.  Add parsley and seasonings, stirring well.  (I spent a lot of time stirring and adding to make sure the entire mixture was well seasoned.)  Pour in chicken stock and stir to moisten.  Place mixed stuffing in a large casserole dish sprayed with Pam. 

You can either cook the stuffing right away or put it in the fridge and let it sit overnight, to be cooked the next day.  Before you put the stuffing in the oven, pour the melted butter over the top of the casserole.  Bake at 350 until heated through...about 45 minutes or so.

Wednesday, November 24, 2010

Happy Thanksgiving!

The big day is almost here.  Greta and I want to wish you all a happy and delicious Thanksgiving.

Here's what I am planning to make for the big day.  Leave a comment and let us know what you're serving!

Appetizers (I'm keeping it light...no need to stuff yourself before the turkey!)
Dinner
  • Ina's Perfect Roasted Turkey
  • Gravy
  • Sausage Stuffing
  • Smashed Sweet Potatoes
  • Green Beans
  • Cranberry Sauce
  • Sauerkraut (I think this is a Baltimore tradition...it's certainly a family tradition if nothing else!)
  • Dinner rolls
  • Wine (not sure what kind yet...I better figure that out!)
Dessert
It's safe to say no one will go away hungry.  Again, have a Happy Thanksgiving!  Thanks for reading our little blog.

Tuesday, November 16, 2010

A Chicken in Every Pot!

I only snapped one photo before this delicious, moist, crisp-skinned chicken was devoured!
Lately I've been getting in the habit of cooking a big meal on Saturday nights.  This past Saturday, I felt like roasting a chicken.  Really...is there anything better than roasted chicken (and, of course, crispy chicken skin!)?

There are a million recipes and techniques out there for roasting a chicken.  Some call for starting out with a super hot oven, others have you flip the chicken from side to side throughout cooking, others say to just throw the chicken in the oven as is.  After reading over a dozen different ways to cook a chicken, I settled on this super easy recipe from everyone's favorite, Martha Stewart...and I must say, I picked the right recipe.  It was a snap to make and it produced chicken that was flavorful, moist, and delicious!

MARTHA'S PERFECT ROASTED CHICKEN
  • 1 six-pound roasting chicken
  • 1 tablespoon unsalted butter
  • Salt and freshly ground black pepper
  • 2 medium onions, peeled and sliced crosswise 1/2 inch thick
  • 1 lemon
  • 3 large cloves garlic, peeled
  • 4 sprigs fresh thyme
1. Let chicken and 1 tablespoon butter stand at room temperature for 30 minutes. Preheat oven to 425 degrees. Remove and discard the plastic pop-up timer from chicken if there is one. Remove the giblets and excess fat from the chicken cavity. Rinse chicken inside and out under cold running water. Dry chicken thoroughly with paper towels. Tuck the wing tips under the body. Sprinkle the cavity of the chicken liberally with salt and pepper, and set aside.

2. In the center of a heavy-duty roasting pan, place onion slices in two rows, touching. Place the palm of your hand on top of lemon and, pressing down, roll lemon back and forth several times. This softens the lemon and allows the juice to flow more freely. Pierce entire surface of lemon with a fork. Using the side of a large knife, gently press on garlic cloves to open slightly. Insert garlic cloves, thyme sprigs, and lemon into cavity. Place chicken in pan, on onion slices. Cut about 18 inches of kitchen twine, bring chicken legs forward, cross them, and tie together.

3. Spread the softened butter over entire surface of chicken, and sprinkle liberally with salt and pepper. Place in the oven, and roast until skin is deep golden brown and crisp and the juices run clear when pierced, about 1 1/2 hours. When chicken seems done, insert an instant-read thermometer into the breast, then the thigh. The breast temperature should read 180 degrees.and the thigh 190 degrees.

4. Remove chicken from oven, and transfer to a cutting board with a well. Let chicken stand 10 to 15 minutes so the juices settle. Use the pan juices to make gravy, as you prefer. Untie the legs, and remove and discard garlic, thyme, and lemon. Carve, and serve gravy on the side.

I didn't love Martha's gravy technique, and instead called upon my trusty Joy of Cooking to make a super yummy, rich, deep brown gravy with leftover pan juices, wine, broth, butter, flour, and (here's a tip) a few drops of lemon.  The lemon juice and wine really added some much needed acidity to the mix.  Here's an embarrassing fact: before Saturday, I had never made gravy.  Lame, right?  But now that I have, it's not a problem.

If you make Martha's Perfect Roasted Chicken, be sure to keep and serve the onions that get cooked (and burnt!) in the roasting pan.  They sit under the chicken, soaking up all the flavor and juices from the roast.  The onions became almost like an onion jam, and were a huge source of flavor.  In Martha's recipe, she says to throw them away.  Really, Martha?  Ditch all that lovely flavor?  You're crazy!

This was sort of a dry run for Thanksgiving dinner...a delicious dry run!

Monday, November 8, 2010

Back to the Drawing Board

Last week, I posted about my plans to make Thanksgiving dinner for the first time ever in my life.  In my head, I had it all worked out.  I've been looking at recipes, thinking about menus, etc. since Halloween flew by.  But now?  I am officially not sure what I'm going to do!

I had my parents and nephew over for dinner on Saturday night and mentioned my plans to make a traditional turkey dinner for Thanksgiving.  My dad looked at me like I said I was going to cook one of my cats.  "A turkey?  Why don't you make something else?" he asked.  I think he's wanting lamb, but lamb is not a meat I'm in love with.

After my dad's comment (and because I am not the biggest fan of turkey and Thanksgiving in general), I've made a decision: I'm going to let the family decide what I'm cooking.  I haven't told the family my plan to have them pick the meal yet, but I'm going for a democratic approach.  I'm going to give them five dinner options (below) and then let them tell me their first, second, and third choice picks.  From that, I'll tally up a cumulative score for each option and then cook whatever gets the highest score.  This will be fun (sorta!).

What would you pick if you were coming to my house for Thanksgiving dinner this year?  Here are the options, in no particular order:

  • Traditional Turkey Dinner (with stuffing, sweet potatoes, green beans, gravy, rolls, etc.)
  • Chicken with Morel Mushrooms (boneless, skinless breasts in a cream sauce with mushrooms.  Served with rice, green beans, crunchy bread)
  • Boeuf Bourguignon (Julia Child's classic French beef stew, served with hot, buttered noodles and crunchy bread)
  • Fettuccine Bolognese (when I don't burn the crap out of it, this is really good dish.  The sauce is made of ground beef, pork and veal in a wine and cream tomato sauce.  Served with salad and bread)
  • Connecticut Beef (this is a family recipe that I've never made!  It's chunks of beef and mushrooms in a creamy sauce, topped with scalloped potatoes, cheese and breadcrumbs.  Served with veggies and bread)
These are all good choices.  I have my top three meals picked out, but I won't say what they are.  I don't want to bias my family in any way.  I'll let you know what gets decided!  No matter what, it should be a yummy meal.

Wednesday, November 3, 2010

Roasted Pumpkin Seeds - A Fall Treat

Last week I carved pumpkins with my son. As with most kids, when he was searching for the perfect pumkin from the pumpkin patch he wanted the largest one that he could get Mom to ok. Now for him, it wasn't just because it was huge, it was because in his mind the larger the pumpkin the more seeds. He loves pumpkin seeds and always looks forward to the buttery, salty, crunchy treat that comes from some ooey, mushy diggining in pumkin guts!

Here is how I was taught to make them - as Lydia said, low and slow.

Roasted Pumpkin Seeds:

Preheat the oven to 250 degrees. Carve your pumpkin and sort through all the pumpkin guts for the seeds. I use a large bowl to put all the cravings in and then place the seeds in a large collendar. Once I have everything sorted, I run cold water over them and pull off any remaing pumpkin pieces - you can also let them soak in cold water for about 15 minutes.


Remove them from their bath, dry them a bit and spread over a large baking pan. Generously sprinkle the seeds with salt and drop pats of butter over them. Bake for about 3 hours, turning them every 45 minutes (or so).


They should be brown (not burned/black) when done. Remove from heat and allow to cool. Enjoy!


I was also playing with the idea of making a sweet version this year by adding cinnamon and sugar (with the butter) instead of salt; my son would have none of that though.

Tuesday, November 2, 2010

Time for the Holidays!

Now that Halloween is over, it's inescapable: the holiday season is upon us!  It's time to start thinking about Thanksgiving dinner, Christmas shopping, and trimming the tree.  Eesh!  This year is flying by...

This year--for the first time ever in my 34 years--I've committed to cooking Thanksgiving dinner.  This is a big deal for me because 1) Thanksgiving is my least favorite holiday and 2) like I said, I've never done this before.  Sure, I've roasted chickens, made big holiday dinners for Christmas, etc., but Greta always handles turkey day.

Last year our parents were back in Maryland, leaving just me, the Mister, my sister, and my nephew.  We decided to depart drastically from tradition and celebrated with what our family calls tachos (tacos/nachos).  This year, I'll roast up a turkey and do it the old fashioned way.

I've been looking at a ton of recipes and menu ideas to get myself prepared.  I know that our Thanksgiving dinner MUST include a turkey, canned cranberry sauce, and sauerkraut.  These three things are a tradition, and I'm not about to mess with tradition. 

But I do have a question for all of you: What has to appear on your Thanksgiving Day menu?  Are there any recipes or dishes that you absolutely, positively have to have for it to be Thanksgiving?  If so, leave me a comment...I want to hear about it and who knows!  Maybe I'll include one of your family traditions in my own this year.

Wednesday, August 4, 2010

Vacation Food, Part 3

Though I made this dish while on vacation, it's more evocative of my childhood.  As a kid, my mom would make this onion-y/salty pull apart bread concoction that my sister and I could not get enough of.  Over the years, my mom stopped making the pull apart onion bread, but it has a place in my happy food memories.

Thanks to the magic of the internet, I was able to resurrect this yummy childhood favorite.  I made it for my husband prior to vacation and thought it was a bit too salty.  I adjusted the ingredients a bit and tried it again during vacation.  It was less salty but still yummy.  This is, by no means, a healthy dish.  It's got a ton of butter and way too much sodium, but if you enjoy it once or twice a year, you shouldn't do any long-term damage.

I served this with BBQ chicken and think the flavor combo was pretty darn good.  Give this a try--it's worth the calories.

Pull Apart Onion Rolls

1/2 c. butter (1 whole stick!)
2 tbsp. instant minced onion
1 tbsp. instant beef bouillon (I used 1 large bouillon from Knorr's)
1 tsp. parsley flakes
1/4 tsp. onion powder
2 c. Bisquick baking mix
1/2 c. cold water

Heat oven to 425 degrees. Mix butter, onion, bouillon, parsley and onion powder in saucepan. Heat until butter is melted and bouillon is dissolved; cool slightly. (Or, if you're lazy like me: melt the butter in a microwave-proof container and then add all the other ingredients and stir like crazy!) Pour about half of the butter mixture into round layer pan, 9 x 1 x 1/2 inch. Spread onions evenly in pan. Mix baking mix and water until soft dough forms; beat vigorously 20 strokes. Drop dough by teaspoonsful onto butter mixture in pan, drizzle with remaining butter mixture. Bake until golden brown about 12 minutes. Invert pan on heat proof serving plate. Leave pan over rolls a few minutes. About 2 dozen rolls.

Note: My mom thought she used Lipton's French Onion Soup mix to make this.  I think that would work--I'll have to try it at some point.

Another note: In my memory, I think there was chives in the bread.  Maybe I'm jumbled up, but again, I might have to try that addition to see how it changes things up.

Tuesday, June 1, 2010

One Of My Favorite Desserts: Black Bottoms

Growing up, there has been an on-going debate in the house on how to properly eat a black bottom cupcake. One camp (my Dad's) likes them fresh from the oven with the cream cheese and chocolate chips melting. The other camp (my sister's & myself) prefer them cold, with the cream cheese and chocolate chips formed and solid. Either way, these are one of my favorite desserts and will always bring back good & tasty childhood memories. So whip up a batch and join the debate - warm or cold!

Filling:
1 egg
1, 8 ounce cream cheese
1/3 cup sugar
  • Combine then add 6 ounces chocolate chips.
Cupcakes:
1 cup sugar
1/4 cup cocoa
1/2 teaspoon salt
1 1/2 cups flour
1 teaspoon baking soda
1 cup water
1/2 cup vegetable oil
1 tablespoon vinegar
1 teaspoon vanilla
  • Combine and blend well.
Directions:
  • Fill muffin tin with foil or paper cupcake liners.
  • Put cupcake mixture into liners, 2/3 full.
  • Drop a tablespoon of filling into cupcakes, do not blend.
  • Bake at 350 degrees for 30-35 minutes.
  • Refrigerate when cool (these can also be frozen).

Tuesday, May 25, 2010

Double-Beatloaf!

Remember the dinner table scenes in A Christmas Story? Dinner for the Parker family was utter chaos, and the youngest member of the family, Randy, was a terrible eater. When presented with a plate of meatloaf, he responded "Meatloaf, smeatloaf, double-beatloaf. I HATE MEATLOAF!" And I think viewers, both young and old, could relate.

Growing up, there are certain meals that I absolutely hated. I'd cry my way through dinner, trying not to gag as I choked down a forkful of the disgusting, inedible yuck my mom called dinner.

Don't get me wrong. My mom is a great cook. She really is. And there are so many meals that she made that I loved. But it seemed like the platefuls of yuck were in heavy rotation at times.

Here are my two most hated family dinners:
  • Ham Steak with Rice and Cheese. According to my father, this dish sometimes included sliced olives, only upping the barf factor. I've mercifully blocked this detail from my memory. This dinner of terror consisted of a huge bed of rice covered in semi-melted cheddar cheese, all sitting on top of a frighteningly pink ham steak. My mom served this culinary masterpiece on a silver platter and little rainbow-tinted pools of nasty ham oil dripped off the pink meat, glistening against the silver. My mom used that same platter for pancakes, but not even fluffy, lovely pancakes could erase the image of disgusting ham/cheese/rice that I always associate with that platter. I don't know what it was about the ham/rice/cheese fiasco that was so wrong. I love rice. I love cheddar cheese. Sure, I hate ham, but I think that my ham-hatred stems from this dish. It was just so...ugh...so...barfy.

  • Corn Beef Hash Pinwheels. Pinwheels! That sounds like a fun meal for the whole family! But dear, sweet god--this dish was a plate of hurl. Nasty canned corn beef hash (which is another disgusting thing I cannot bring myself to eat as an adult) was encased in a gummy dough made from Bisquick, sliced and baked. Then, to serve this gourmet feast, mom heated up a can of cheddar cheese soup and poured it over the pinwheel of despair. The bright orange cheese congealed on the pinwheel but didn't quite hide red bits of hash. The whole thing looked like an orange scab with chunks of blood sticking out of it. Gag. To make this a nutritious and family friendly meal, mom boiled the hell out of Brussel spouts as our vegetable. Nothing like overcooked green balls that taste like fertilizer to go with this one. A meal to remember!
I know it's hard to be a mom...to have to cook every day and try to make meals that are nutritious and delicious, and that please every member of the family. I also know that as a kid, being served a meal you absolutely hate is an act of torture and only reaffirms your thought that your family really does hate you and is trying to kill you.

Somehow I survived these meals...and others I wasn't too fond of. These epic culinary battles make us stronger as we go through life!

So--what were your hated family dinners?

Tuesday, May 11, 2010

Mother's Day Dinner of Luxury! (Part 1)

I am the only non-mom in my family. That means when it comes to Mother's Day, it's my job to do the cooking--to spoil my mother and sister. (By the way: shouldn't there be an Aunt's Day? We could use some pampering, too!)

I usually cook the family a big Mother's Day brunch, but my mom is not much of a morning person. So this year, I asked Mom: would you prefer a brunch or dinner? She picked dinner. And she requested Chicken with Morel Mushrooms, a dish I've made a few times now, for family celebrations. She and my sister also requested Chocolate Guinness Cake for dessert--click here for that recipe.

Here's the recipe I used for the Chicken with Morel Mushrooms. It comes from Ina Gartner, aka the Barefoot Contessa. This is a heavy, rich dish--one to enjoy on occasion. I am not always willing to shell out the $20+ for dried morels, so I used a dried mushroom medley instead. You could use fresh mushrooms if you don't want to bother with dried.

Ingredients
  • 1- ounce dried morels, soaked for 30 minutes in 3 cups very hot water
  • 6 boneless, skinless chicken breasts
  • Kosher salt
  • Freshly ground black pepper
  • All-purpose flour, for dredging
  • 1⁄4 cup clarified butter
  • 1⁄3 cup chopped shallots (2 large)
  • 1 tablespoon minced garlic (3 cloves)
  • 1 cup Madeira wine
  • 1 cup (8 ounces) creme fraiche
  • 1 cup heavy cream
  • 2 tablespoons freshly squeezed lemon juice
Directions
  1. Preheat the oven to 375 degrees F.
  2. Lift the morels carefully from the hot water in order to leave any grit behind in the liquid. Rinse a few times to be sure all the grittiness is gone. Discard the liquid and dry the morels lightly with paper towels. Set aside.
  3. Sprinkle the chicken breasts with salt and pepper. Dredge them in flour and shake off the excess. Heat half the clarified butter in a large saute pan and cook the chicken in 2 batches over medium-low heat until browned on both sides, 8 to 10 minutes. Remove to an ovenproof casserole.
  4. Add the rest of the clarified butter to the pan along with the shallots, drained morels, and garlic. Saute over medium heat for 2 minutes, tossing and stirring constantly. Pour the Madeira into the pan and reduce the liquid by half over high heat, 2 to 4 minutes. Add the creme fraiche, cream, lemon juice, 1 teaspoon salt, and 3⁄4 teaspoon pepper. Boil until the mixture starts to thicken, 5 to 10 minutes. Pour the sauce over the chicken and bake for 12 minutes, or until the chicken is heated through.
NOTES:
  • To make ahead, refrigerate the chicken and sauce in the casserole and increase cooking time to approximately 30 minutes, or until heated through.
  • I don't use clarified butter--I just don't have time to deal with that. Instead, I add a tiny bit of olive oil to the butter before cooking the chicken.
  • Serve with rice and veggies--check out tomorrow's post for a yummy green bean idea from Cooks Illustrated.

Thursday, April 15, 2010

An Egg Filled Plate of Memories

I rescued my husband from Texas many years ago. Since we left the Lone Star State back in the late 1990s, we haven't ventured further south than Northern California. I can speak for my husband when I say that he really doesn't miss Texas. However, the one thing he does miss is the food.

My husband's mom is an amazing cook. She makes the best tamales in the world, and a plate of her chicken taquitos will make everything better. The other day my husband and his mom were talking and she mentioned that she made one of my hubby's childhood favorites: scrambled eggs with corn tortillas. My husband smiled as he remembered them, and I knew what I had to do: try to replicate one of my mother-in-law's recipes.

Now, eggs and tortillas are nothing new. Some call them migas. To others, they're chilaquiles (which is a super fun word to say). Whatever you call them, scrambled eggs and tortillas is easy, cheap, versatile, and tasty.

You can have this for breakfast, lunch, dinner, or a snack...and would probably be exceptionally good after a long night out on the town.

Here's the basic recipe, though it's more of a cooking technique than a recipe.
  • Heat a non-stick skillet and add about a tablespoon of oil (not extra virgin olive oil!)
  • Tear up (or cut) a few corn tortillas into strips and add to the hot oil. Allow the tortillas to crisp up.
  • Remove crispy tortillas from the skillet and drain on paper towels.
  • Beat a few eggs with a tablespoon or so of water. Add beaten eggs to the skillet and scramble to your liking.
  • Toss the crispy tortillas into the eggs and season with salt and pepper.
  • Serve immediately.
Now here are some ideas for additions--since this is an egg dish, you could add almost anything you like:
  • Saute some veggies with the tortilla. Onions, green/red peppers, mushrooms, zucchini, etc. would all be good.
  • Add meats: cooked and crumbled bacon or sausage might be good. Or be fancy and opt for shredded beef. Ham would certainly work, but really whatever you have in the fridge could go in this dish.
  • Add cheese: cheddar, jack, whatever you like!
  • Go southwest: serve this with avocado, salsa, chorizo, and extra tortillas.
As simple as this is, I'm still trying to perfect this dish, to make it as good as my mother-in-law's. Even though what I make is probably a sad rip-off, my husband loves this and devours it happily.

Give it a try!

Wednesday, April 14, 2010

Gloppy, Gooey, and Delicious!

Yesterday Greta gave you the recipe for a comfort food chicken casserole, and keeping in that theme, I present you Unforgettable Chicken Casserole. What a lame name! I refer to this as gloppy, gooey chicken because I think that's a tad more descriptive.

This recipe comes from my mother. She made it for the family over the winter and it was so good that I asked her to make it for my birthday in February. The recipe's super easy because you just stir everything together and throw it in the oven. The hardest part of making this for me is fighting with my cats so they don't eat the roasted chicken.
This is not health food by any stretch, but it is full of flavor and is very much a comfort food. Even though it's April, this dish is appealing to me on some weird level.

Here's the recipe:

3 cups chopped deli-roasted chicken
1 cup chopped carrots
1 cup grated cheddar cheese
1/2 cup slivered almonds
1/2 cup sour cream
1/2 cup light mayonnaise
1 can cream of chicken soup
1 cup sliced mushrooms
1 1/2 cups French fried onion rings
  1. Stir together first 8 ingredients in a large bowl.
  2. Spoon mixture into a lightly greased 11 x 7 baking dish.
  3. Bake at 350 for 40 minutes. Sprinkle onion rings over top and bake an additional 5 minutes, or until bubbly around the edges.
  4. Let stand 10 minutes before serving.
Variations:
You could add red peppers, celery, water chestnut, green beans etc. to this to make it more to your taste. In November when you have tons of leftover turkey, go ahead and throw that in instead of the chicken. Oh, and don't skimp on the fried onions! The crunch and onion-y flavor really makes the dish more tasty.

Wednesday, March 3, 2010

Birthday Treats

This past weekend was my son's 8th birthday and I let him pick his favorite foods to celebrate. He is a funny kid and does not like to eat much - including cake. So for his birthday, we had his famous Tachos (Tacos and Nachos) for dinner and Mammy's famous homemade brownies for dessert.


Here is my Mom's recipe for making brownies - growing up, this was it (no box brownies ever). The first time I made these, I misread the instructions and added 2 sticks of butter - yuck! I had to toss out this batch and start over.

Brownies


2 squares (2oz) unsweetened chocolate
1/3 cup butter
1 cup sugar
2 eggs
3/4 cup flour
1/2 tsp baking powder
1/2 tsp salt
1/2 cup chocolate chips
1/2 cup chopped nuts (optional - Aidan says NO to nuts)
  • Heat oven to 350 degrees. Generously grease a square pan 8x8x2".
  • Melt chocolate and butter together over low heat. Beat in (with spoon) sugar and eggs.
  • Measure flour by dipping method. Blend flour, baking powder + salt, stir into chocolate mixture. Mix in nuts and chocolate chips. Spread in pan.
  • Bake 30 to 35 minutes, until top has dull crust. A slight imprint will remain when touched lightly with finger.
  • Cool slightly. Cut into 2" squares.
I love a light dusting of powdered sugar to top these off and a large, cold glass of milk!

The dinner was delicious - Tachos are always a winner in my house and the brownies too were a treat! The best part of the evening was celebrating my little boy's special day with family and friends.

Monday, February 22, 2010

The Perfect Cure?!

The flu has been making its presence known in our household this weekend. So there has been a lot of Tylenol, Kleenex, and chicken soup to ward it off.

I love Mom's homemade chicken soup and she always makes it whenever someone isn't feeling well; this weekend, it has been on the stove for most meals as my Dad has been in bed. So here is the recipe for Mom's cure-all.

Ingredients:

1 cut up chicken
2 1/2 tsp salt
1/8 tsp pepper
1/4 tsp basil
1 bay leaf
4 medium carrots
1 can pear onions, drained
1 cup fine noodles, uncooked
1 tbsp dried parsley leaves
  1. Wash chicken. Place in large kettle and cover with water. Add seasonings.
  2. Bring to a boil then simmer, covered 1 1/2 hours or until chicken is tender.
  3. While chicken is cooking wash and peel carrots, slice into thin slices. Make sure onions are drained.
  4. When chicken is done, remove it, along with the bay leaf from the stock. Skim off as much fat as possible from stock.
  5. Bring back to boiling, add carrots and onions, simmer uncovered 45 minutes.
  6. While vegetables are cooking, remove bone and skin from chicken, cut chicken into bitesize pieces.
  7. When vegetables are done, add noodles and chicken. Cook 10 minutes longer.
  8. Remove pan from stove and cool and refrigerate until next day.
  9. Skim off solid fat, heat slowly and sprinkle with parsley.
You can add any vegetables that you like - I usually add peas, celery and mushrooms. Also, you can make this and eat it in one day.

I love this soup with crusty bread and a glass of wine. Although if I am sick, that glass of wine becomes a glass of ginger ale.

Even if you are super healthy, this is a classic recipe and a delicious meal; enjoy!

Monday, December 28, 2009

More Holiday Treats (In Case You Still Have Room)

These are all recipes from my cookie party. All are delicious and fairly easy to make. If you haven't yet had your fill of butter, sugar and chocolate, then these treats should help put you back into the holiday spirit (or a sugar coma).

Five Layer Bars

By Ariel

Every time a bite into these bars, I think of my Aunt. My Aunt always made a version of these at Christmas time. She kept them in the refrigerator and they were always one of my favorite holiday treats. When these showed up at the cookie party, I was delighted and taken back to childhood!


1 1/2 cups graham cracker crumbs
1 stick salted butter, melted
1/2 cup chopped pecans
1 cup butterscotch chips
1 cup semisweet chocolate chips
1 cup shredded coconut
1 14-ounce can sweetened condensed milk

Preheat oven to 350. Combine graham cracker crumbs and melted butter in a bowl. Press into the bottom of a 9x13 inch baking dish. Mix pecans, chips, and coconut and sprinkle on top of graham cracker crumbs. Pour sweetened condensed milk over the mixture and bake for 30 minutes. Cool completely and cut into bars.


Frosted Ginger Cookies

By Andrea

These are soft and melt in your mouth. They are perfect with coffee and really bring out the smells and taste of the season!


1 cup granulated sugar, plus more for rolling cookies
3/4 cup butter at room temperature
1 egg
3 Tbsp molasses
2 cups flour, sifted
1 tsp baking soda
1 1/2 tsp ground ginger
1 tsp cinnamon
1/2 tsp salt
1/2 tsp ground cloves
1/2 tsp ground nutmeg
1 cup powdered sugar
1 tsp lemon juice
  1. Preheat oven to 350. In a large bowl cream 1 cup granulated sugar with butter until light and fluffy, about 3 minutes. Mix in egg and molasses.
  2. In a medium bowl, stir together flour, baking soda and spices. Add butter to mixture and blend well.
  3. Fill a shallow bowl with granulated sugar. Break off walnut-size pieces of dough and roll into balls; roll balls in sugar. Arrange on greased cookie sheets and bake until golden brown, about 10 minutes. Transfer to cooling racks.
  4. Meanwhile, make glaze. Combine powdered sugar with 1 Tbsp water and stir until smooth, then stir in lemon juice. Drizzle glaze over cookies.
Enjoy and keep the holiday spirit!

Thursday, December 17, 2009

Southern Comfort Sour, Dad's Style

If I am going to have an alcoholic beverage, I much prefer a mixed drink to a glass of wine or bottle of beer. In our family, my dad is the drink maker. There's great irony in this because my dad never drinks.

The king of alcoholic beverages in our family is Dad's Whiskey Sour. It's orange-y, filled with Southern Comfort, and sweetened with sugar and maraschino cherries.

Now, a REAL whiskey sour is made like this:

Ingredients:
1 1/2 oz whiskey
1 1/2 oz lemon juice
3/4 oz sugar syrup
maraschino cherry for garnish

Preparation:
Pour the bourbon, lemon juice, and sugar syrup into a cocktail shaker with ice cubes. Shake well. Strain into a chilled sour glass. Garnish with the cherry.

But my father makes a whiskey sour like this:

Ingredients:
Orange Juice
Southern Comfort
Granulated Sugar
Maraschino cherries

Preparation:
In a blender, mix together OJ and Southern Comfort on a 2 to 1 ratio (2 parts OJ to 1 very generous part Southern Comfort). Add sugar to taste and drizzle a little maraschino cherry juice into the mixture. Blend well; serve on the rocks.

My dad's drink is more sweet than sour. It makes you feel all warm and sleepy after drinking a few of these bad boys.

Side note: my roommate in college was from Japan and she came to our house for Thanksgiving dinner one year. My dad made a batch of Southern Comfort Sours and after drinking one, my poor roommate got so intoxicated that she forgot how to speak English. True story.

Everyone who drinks in my family has had Dad's Southern Comfort Sours, and we're always glad to indulge. They're deliciousness of yum in a glass!

Tuesday, December 15, 2009

I Know It Sounds Weird, But TRY IT!

There are some meals that have always been in my life. I can't remember the first time I tried them, I'm not quite sure when I learned to cook them, but there they are: my culinary constants. One of these constants is Tuna Spaghetti. It's a quick family dinner that my mom's been making forever. As an adult, I've been making this meal for my husband for years and he loves it.

Tuna Spaghetti. Sounds gross, right? And if you ask Greta, she'd agree with you. She hates Tuna Spaghetti. Despite this, we've allowed her to stay in the family.

This is one of those recipes that has never been written down, that changes ever so slightly ever time we make it, and that really has to be tasted to appreciate. If you like pasta, bacon, and Parmesan cheese, you should check this out.

TUNA SPAGHETTI
serves 4 to 6 depending on how hungry you are

1 pound of spaghetti
Bacon (about 6 slices or so...however many you can fit in a single layer of a good sized fry pan like this one)
Crushed garlic--2 cloves (more or less if you'd like)
2 cans of water-packed tuna (7 oz. each--do NOT drain the water)
Dried oregano
Pepper to taste
2 T butter or margarine
Shredded Parmesan Cheese
  1. Fry bacon in a good sized skillet over medium heat. While the bacon is frying up, put a big pot of salted water on the stove and let it heat up to boiling.
  2. When bacon is crispy, drain on paper towels. Crumble (or chop if you don't want to get your hands all greasy) and set aside. Pour off all but about 1 Tablespoon of the bacon drippings in the skillet.
  3. When water boils, cook pasta according to directions on the box.
  4. Meanwhile, return the skillet used to cook the bacon (with the 1 T of reserved fat) to the burner. Reduce the heat to low since the pan will probably still be a little hot. Add garlic and let it cook for a few seconds (don't let the garlic burn). Add the undrained cans of tuna to the pan. Scrape up the bacon-y residue on the bottom of the pan and stir to combine the tuna and garlic. Add a few good pinches of dried oregano (as much or as little as you like) and a few grinds of fresh cracked pepper.
  5. Using tongs, grab a now empty tuna can and dip it in the boiling pasta water to fill it up. Pour the starchy pasta water into the skillet with the tuna. Increase heat to medium and stir to combine. You'll want to reduce the liquid down a bit in the pan. (Note: how far you reduce it is a matter of personal preference. I like my Tuna Spaghetti less watery than my mom cooks it. Try it a few ways to see what you like.) Adjust oregano and pepper, if necessary.
  6. When spaghetti is done, drain and toss with 2 Tablespoons of butter. Add spaghetti to the skillet and toss with the tuna mixture.
  7. Add crumbled bacon into the spaghetti and tuna mixture. Serve pasta immediately, sprinkled with Parmesan cheese.
Sure to serve Tuna Spaghetti with lots of crunchy Italian or French bread and a salad.

If you try this one, let me know how it turns out for you.

Monday, December 14, 2009

My Favorite Birthday Meal

Sunday, December 13 was my 38th birthday. To celebrate it, I opted for food, family and of course presents! I had Indian food on Saturday (see the post on 12/16) and home cooked comfort food on Sunday - both were very different, but delicious and wonderful.

Sunday's menu was baked chicken breasts, macaroni and cheese, green beans with toasted almonds, Pilsbury crescent rolls and finished off with homemade cherry pie - one of my favorite meals. My Mom started cooking after breakfasts and put together a mouthwatering treat for me!

Here are Mom's recipes:

Baked Chicken

2/3 cup dried breadcrumbs
1 1/2 tablespoons Parmesan cheese
1/2 teaspoon garlic salt
1/4 teaspoon pepper
4 skinned and boned chicken breasts
1/4 cup melted butter or margarine
  1. Combine breadcrumbs, cheese, garlic salt and pepper.
  2. Dip chicken in butter; then dredge in breadcrumb mixture.
  3. Place in a lightly greased oven proof baking dish; sprinkle with remaining crumb mixture.
  4. Bake at 350 degrees for 45 minutes or until done.
Baked Macaroni and Cheese

1 8 oz package elbow macaroni
2 cups grated cheddar cheese
1/4 cup margarine
1/4 cup unsifted flour
2 cups milk
1 teaspoon salt
1/8 teaspoon pepper
  1. Preheat oven to 375 degrees.
  2. Cook macaroni as package label directs; drain.
  3. In 1 1/2 quart baking dish, alternate macaroni (in 2 layers) with 1 1/2 cup cheese.
  4. Meanwhile, prepare sauce: melt margarine in medium saucepan; remove from heat. Blend flour; gradually stir in milk, then seasonings. Bring to boiling, stirring; boil 1 minute.
  5. Pour sauce over macaroni + cheese in casserole. Top with remaining cheese.
  6. Bake 15 to 20 minutes, or until cheese is melted and browned.
Finally, I am not the biggest fan of cake, but I love a good pie (especially Mom's pie crust)!


Pie Crust

Single

1 1/3 cup sifted flour
1/2 teaspoon salt
1/2 cup Crisco
2 to 3 tablespoons water

Double

2 cups sifted flour
1 teaspoon salt
3/4 cup Crisco
3 to 4 tablespoons water

Combine flour and salt. Cut in Crisco until mixture is uniform. Sprinkle with water, a tablespoon at a time; toss lightly with fork. When all water has been added, work dough into firm ball.

To bake without filling: Preheat oven to 425 degrees. prick bottom + sides with fork. Bake 10 to 15 minutes or until lightly browned.

To bake with filling: Preheat oven to temperature stated in recipe. Do not prick with fork. Bake according to recipe directions.