Showing posts with label holiday. Show all posts

Monday, November 23, 2015

Portobello Mushroom Stuffing


Every year, my company puts on a Thanksgiving pot luck. The company always supplies the turkey, ham, mashed potatoes and rolls and then the rest of us sign up to bring in various sides and desserts; vegetarian options are always encouraged. This year, I decided to embrace the vegetarian dish and make portobello mushroom stuffing to share.


Ingredients:

3 portobello mushrooms, cleaned & sliced
1 package white mushrooms, cleaned & sliced
3 Granny Smith apples, peeled & chopped
3-4 stalks celery, diced
3-4 carrots, diced
1 large yellow onion, diced
3 tbsp butter
3 tbsp olive oil
1 oz package stuffing
1 1/2 cups vegetable stock
2 eggs, beaten
1/2 tbsp Italian seasoning
1/2 tbsp parsley
1 tsp garlic powder
salt & pepper to taste
  1. Preheat oven to 375 degrees; grease a 9 x 13 baking dish (I cheat and use cooking spray).
  2. In a large pot, heat butter and oil over medium-high heat; add celery, onion, and carrots. Saute for about 5 minutes, until the onions are translucent.
  3. Add apples, mushrooms, and seasonings; mix well.
  4. Remove from heat and add the vegetable broth and bread cubes; stir in the eggs and mix well.
  5. Pour out mixture into baking dish, cover with foil and bake for 45 minutes.
  6. Remove foil and bake for an additional 15 minutes so the top can brown.
Since this is for a work pot luck, I made this the day before and transferred the stuffing into a microwave safe container (so that it can be microwaved before serving). 

Wednesday, January 5, 2011

Easy Elegance

Cream Puffs with Peppermint Ice Cream and Hot Fudge Sauce.  Easy and yummy!
After serving up a meal like Boeuf Bourgignon for Christmas dinner, I knew I had to do something easy yet delicious for dessert.  After much consideration, I decided on cream puffs filled with ice cream, bathed in rich hot chocolate sauce.  Nothing wrong with that!

I first read through several recipes for pate a chou before consulting my mother. I remember my mother making cream puffs (or profiteroles) when I was a kid, and I know my mom is not a fan of complex recipes.  I thought I found a simple enough recipe from the Joy of Cooking, but Mom told me to get out my copy of the Southern Living Cookbook.  The recipe she always used was from there and, she promised, it was a piece of cake.

I'm happy to report that I took my mom's sage advice.  The Southern Living Cookbook recipe was perfection--it was easy to follow and yielded deliciously elegant results.  If you need a fancy dessert that's easy to make, I highly recommend this one.  And the best part is that you can do whatever you want with the cream puffs once they're cooked.  They can be used for savory or sweet dishes, and the only limit to fillings and pastry shapes is your imagination.

Try this one out...it's a breeze.  And, you can make it ahead of time and stick it in the freezer.  Nice!


Cream Puffs, fresh out of the oven...cooling off.
CREAM PUFF PASTRY

2/3 cup water
1/3 cup butter
2/3 cup all purpose flour
1/8 tsp salt
3 eggs

  1. Combine water and butter in a medium saucepan; bring to a boil.
  2. Add flour and salt, all at once, stirring vigorously over medium-high heat until the mixture leaves the sides of the pan and forms a smooth ball.  
  3. Remove from heat and cool 4 to 5 minutes.
  4. Add eggs, one at a time, beating thoroughly with a wooden spoon after each addition; then beat until the dough is smooth.
  5. Shape and bake pastry immediately according to recipe directions.  Dough can be used for cream puffs, eclairs, etc.
  6. To make cream puffs: drop pastry into 8 equal mounds 3 inches apart on an ungreased baking sheet (note: I lined my baking sheet with parchment paper).  Bale at 400 degrees for 30 to 35 minutes or until golden brown and puffed.  Cool away from drafts.  Cut top off of puffs and scoop and discard out the soft, uncooked dough in the center.  Add ice cream and top with hot fudge sauce.

Tuesday, January 4, 2011

Christmas Dinner, Revisited

Right before we took our holiday break, I mention that I was planning on making Julia Child's Boeuf Bourgignon for my family for Christmas dinner.  I am happy to report that I completed the meal...and that it was freaking awesome.

I'm not going to reprint Julia's recipe...you can find in on the Internet if you are crafty (or find it in Julia's book, if you own it)...but I'll show you all the steps involved.  Nothing like looking at pictures of cooking in action to inspire the appetite!

First, I took some time to read (and re-read) Julia's recipe.  I also searched around to see how others make this famous dish.  I made a few adjustments to the original recipe...using normal bacon instead of a 6 oz. uncut chunk of the stuff as called for (I didn't have time to run around trying to find what Julia said I should use and opted for convenience over authenticity.  I don't think my final dish suffered for this.)  When I knew what needed to be done, I got all my ingredients ready to go.

Is there anything more lovely than mise en place?

I fried up the bacon then browned stew meat in the rendered bacon fat.  By the way, bacon fat is the best...is it not?

Next came veggies.

The meat went back into the Dutch oven, along with the cooked bacon and all the residual juices.  Also added were herbs, tomato paste, salt, pepper, garlic and flour.

The whole thing went into a hot oven for a few minutes.  Then I added cognac (not called for in Julia's recipe, but mentioned in others) that was lit aflame.  Once the blue flicker of alcohol-laden flame died out, I added a bottle of French red wine and beef broth.  The Dutch oven went back into the oven to allow for constant heat to work its magic.

At this point, I cooked mushrooms in butter--a combination that made my fungus-loving husband drool.  I also braised pearl onions in butter and homemade chicken stock.

When the meat was tender, the Dutch oven came out of the oven.  The stew was strained and I mixed the fork-tender beef with the buttered mushrooms and brothy onions.

The strained wine sauce simmered and reduced down before being added back to the beef and veggies, and the meal was ready for consumption.

I served the Boeuf Bourgignon over buttered egg noodles with a salad and crunchy French bread.  It was a hit.  It was the kind of meal that warms you up and leaves you fully sated.  And it's going in my "keeper" list.  If you want to make this, don't be intimidated.  It's not as difficult as you might think, and you'll be rewarded for your efforts with tender beef, succulent veggies, and a broth to die for.  Now I'm getting hungry all over again!
(Thanks to my husband for taking photos while I cooked.  His fee?  A few buttery mushrooms and several tastes of beef!)

Monday, November 29, 2010

Thanksgiving Success!

I survived making my very first Thanksgiving dinner for my family!  Here are some highlight's from last week's feast:

My 13 pound turkey was yummy!  I followed an easy recipe from Ina Garten and--though the cooking time was more like 3 hours, not 2 1/2 like Ina said--the turkey turned out great.  No brining or basting required! 

My husband and father carved up the bird using the handy dandy electric knife.  I really prefer the thick chunks of breast meat to the traditional thin slices.  The meat seemed more moist, stayed warmer, and felt more substantial.

I went 2 for 3 with my side dishes. 

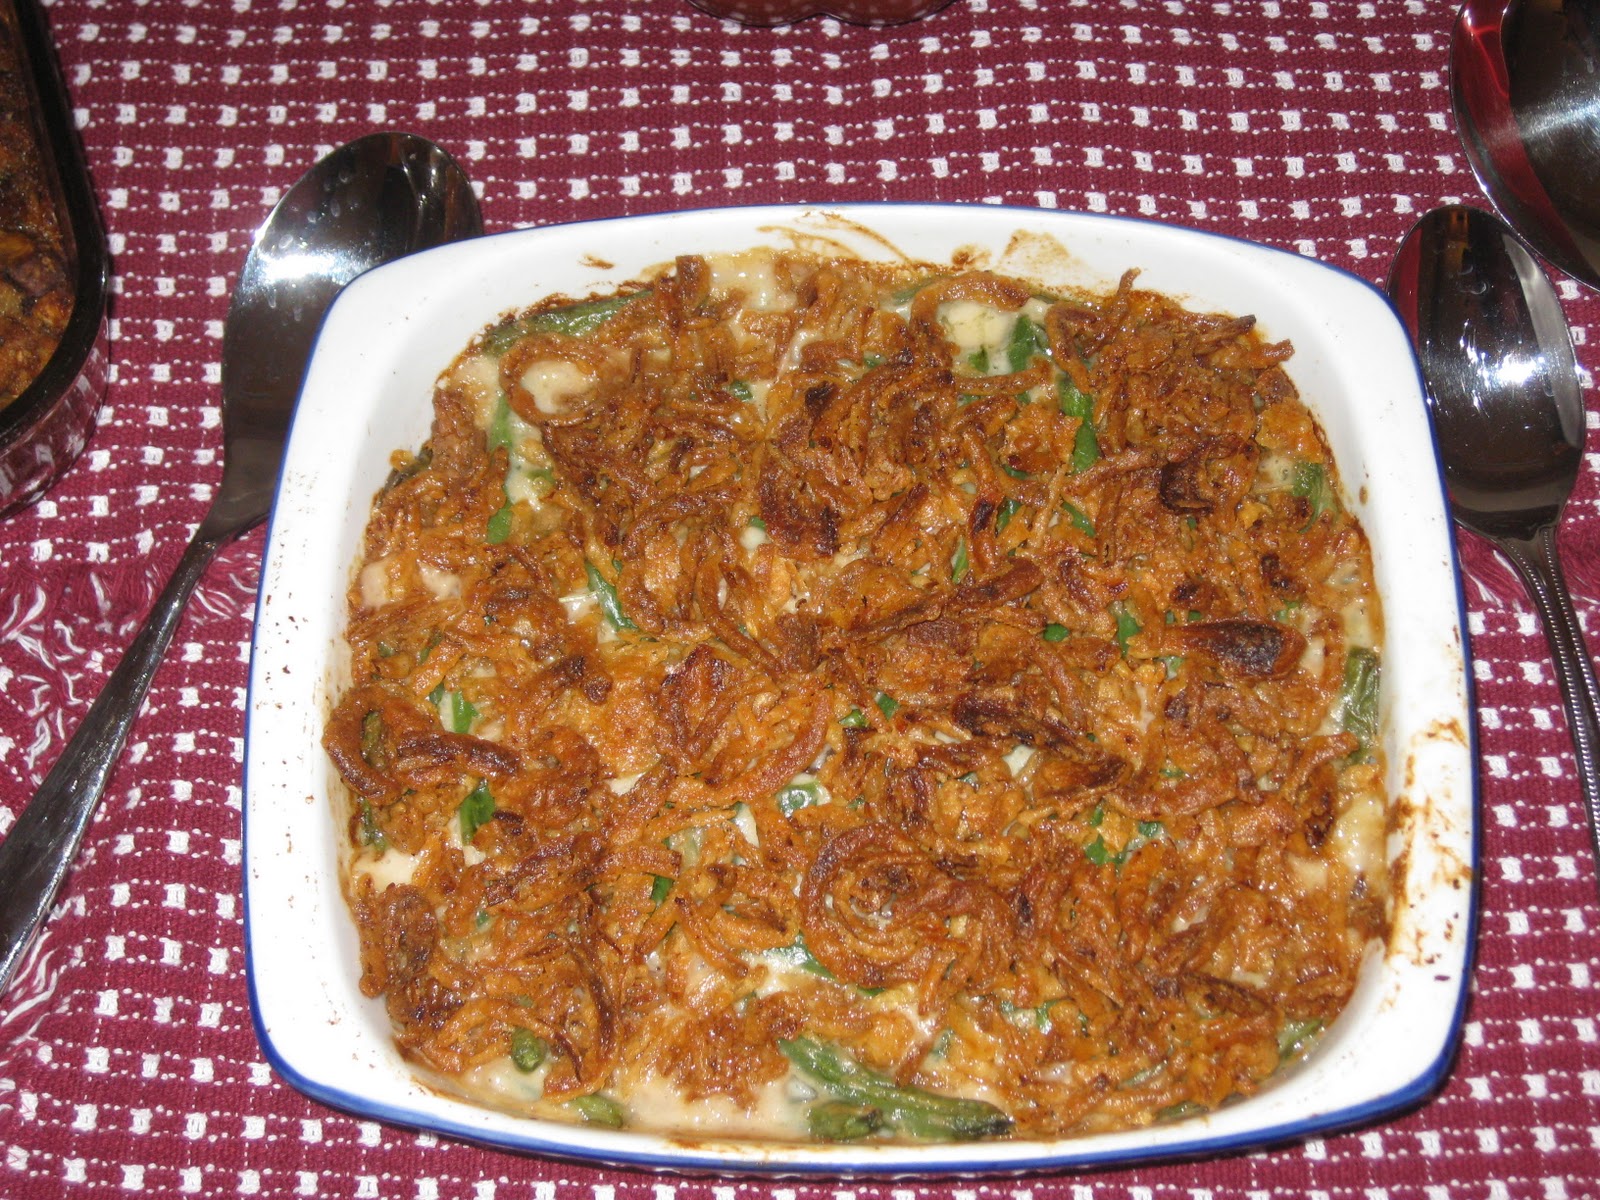
The classic green bean casserole (yes, from Campbell's!) was predictable but good (the Mister loves this dish!).  There's something so wrong and wonderful about those damn French Fried onions!

The stuffing was AMAZING.  I've never made stuffing before, so I just threw everything in and hoped for the best.  I wanted to appease the people who like "inside the bird" stuffing (because I did not stuff my bird when I cooked it) and those of us who prefer outside the bird stuffing.  I think my stuffing was a satisfying mix of moist and crunchy goodness.  (My "recipe" is at the end of this post.)

The smashed sweet potato casserole was a flop.  The recipe was also from Ina, the rare TV cook that usually has good cooking ideas...but this one was a miss.  My husband was the only one who liked it.  It was too nutmeg-y for me and Greta said it reminded her of soap.  Yup...that's a FAIL.  If I were to try this again, I'd steer clear of the stupid nutmeg.  Lesson learned!

The other sides for the night were easy: a can of cranberry sauce (yes, a can!  We love the open and slice approach to cranberry goodness), sauerkraut (it's not Thanksgiving without it!), and gravy.  Mom helped me out with the gravy, and it turned out delicious as always.

Desserts were also kick ass!  Greta made pumpkin pie (with a little help from Mom, who makes the world's best pie crust), I made Chocolate Guinness Cake (a cake I'm inexplicably sick of), and I also had some mincemeat tarts from Cost Plus World Market.

Overall it was a very good meal and a happy Thanksgiving.  Oh, and before I forget, here's how I made my stuffing.  I didn't really have a single recipe that I followed, but it turned out super yummy. From reading many different stuffing recipes, I figured out that the most important thing was to make sure my stuffing had a lot of moisture.  I'm currently doing the Weight Watchers program, and I don't usually eat this much rich yumminess, but it's Thanksgiving...why not break out multiple sticks of butter?  This is not a recipe for calorie counters, but so be it. 

Lydia's "How the Hell Do You Make Stuffing?" Stuffing
  • 1 pound breakfast sausage (I used the unseasoned "original" kind from Jimmy Dean because Greta hates sage.  Use whatever you want!  Even Italian sausage would work here.)
  • 1/2 stick butter (1/4 cup)
  • 3 stalks of celery, chopped
  • 1 onion, chopped
  • 2-3 cloves of garlic, minced
  • 8 oz. sliced crimini mushrooms
  • 14 oz. package of cubed stuffing (I used Safeway brand because I'm cheap.  I also opted for the unseasoned variety because of the sage-hater.  If you have homemade bread cubes, use that)
  • fresh parsley, chopped (to taste--I probably used 1/4 cup or so)
  • To taste: 
    • Kosher salt
    • Fresh cracked black pepper
    • Dried thyme
    • Dried marjoram 
    • Dried rosemary
  • 2 1/2 to 3 cups chicken stock (I used my homemade stock)
  • 1/2 cup melted butter
Brown sausage in a hot pan, breaking it up into small pieces.  When cooked through, place sausage on paper towel lined plate to drain a bit. Pour out excess grease from the pan.

In the same pan, melt 1/2 stick of butter over medium high heat.  Add the celery, onion and garlic.  Cook a few minutes then add the mushrooms.  Cook and stir well to get all the browned bits on the bottom of the pan up and mixed into the veggies.  Add a few pinches of salt and pepper to this mixture and cook until veggies are soft.

In a large bowl, combine cooked sausage and cooked veggies.  Stir well to mix.  Add cubed bread to the bowl and toss well to combine.  Add parsley and seasonings, stirring well.  (I spent a lot of time stirring and adding to make sure the entire mixture was well seasoned.)  Pour in chicken stock and stir to moisten.  Place mixed stuffing in a large casserole dish sprayed with Pam. 

You can either cook the stuffing right away or put it in the fridge and let it sit overnight, to be cooked the next day.  Before you put the stuffing in the oven, pour the melted butter over the top of the casserole.  Bake at 350 until heated through...about 45 minutes or so.

Wednesday, November 24, 2010

Happy Thanksgiving!

The big day is almost here.  Greta and I want to wish you all a happy and delicious Thanksgiving.

Here's what I am planning to make for the big day.  Leave a comment and let us know what you're serving!

Appetizers (I'm keeping it light...no need to stuff yourself before the turkey!)
Dinner
  • Ina's Perfect Roasted Turkey
  • Gravy
  • Sausage Stuffing
  • Smashed Sweet Potatoes
  • Green Beans
  • Cranberry Sauce
  • Sauerkraut (I think this is a Baltimore tradition...it's certainly a family tradition if nothing else!)
  • Dinner rolls
  • Wine (not sure what kind yet...I better figure that out!)
Dessert
It's safe to say no one will go away hungry.  Again, have a Happy Thanksgiving!  Thanks for reading our little blog.

Monday, November 22, 2010

Tool Time: Slice With Ease!

Back when I made the yummiest roasted chicken I've had in some time, I had my parents come over to share the meal.  Like they always do, they asked if they could bring anything.  I said yes!  Bring your electric carving knife!

Since my husband normally leaves meat carving (and cake slicing) to my dad, I wanted the Mister to have a chance to practice before Thanksgiving.  I asked my dad to guide my hubby through the carving process.  With the help of the electric carving knife, some earlier reading on the matter from The Joy of Cooking, and words of experience from my father, the Mister carved up the chicken beautifully.  (More on that in a minute!)

The electric carving knife was a huge help.  If you don't have one, consider making the modest financial investment to pick one up.  My father has used electric carving knives ever since I've been alive (he's gone through at least two of them!), and he's never had a hard time carving meat.  My husband declared the electric carving knife fun to use...it made first time carvery a snap because he got a clean cut without that annoying sawing motion of a traditional knife.  The electric carving knife doesn't tear the meat, and it gets the carving process done faster than a normal knife.  It's also easy to clean (bonus!)

Men like power tools...and since men are traditionally tasked to carve meat, this is the perfect gadget for the kitchen.  We'll be using this tool on Thursday to carve up the turkey!

Oh, one more note on carving: This year, we're carving the turkey breast differently.  Instead of cutting thin slices, my husband is going to remove the entire breast and then cut it into thicker slices...just like he did with the chicken (see photo below).  This does a few things: 1) it ensures people will get substantial pieces of white meat, 2) it keeps the meat moister and warmer (since less of the meat is exposed), and 3) it allows diners to get a better bite of yummy, crispy turkey skin!

Tuesday, November 16, 2010

Sticking With Tradition

As I mentioned last week, I gave my family several options for dinner on Thanksgiving.  I let the family vote, and--despite saying earlier that they didn't want a turkey--the family has chosen to stick with tradition.  So...just like millions of OTHER Americans, I'll be making turkey, stuffing, gravy, etc. on November 25th.  Turkey wouldn't have been my first choice, but the people have spoken.

Gobble, gobble!

Wednesday, November 10, 2010

Cookbook Corner: Best-Loved Cookies

Since we are entering the holiday cooking season, I thought I would share my favorite cookie cookbook: Best-Loved Cookies by Publications International, Ltd. I found this book about 9 years ago and I break it out whenever I want to cook up a batch of delicious cookies (usually around Christmas time). I have been really happy with the cookbook and the variety of the recipes in it.

What to expect: About 370 pages of recipes and pictures. The introduction includes cookie basics like the different types of cookies, how to melt chocolate, how to bake them, and how to store them once they are made.

The book is organized by the different types of cookies: Cookie Jar Classics, Chockful of Chips, Out of the Ordinary, Brownie Bonanza, A Bevy of Bars, Holiday Treats, Almost Homemade, and Especially for Kids.

Best recipes: These are my go to favorites and I use them so much that the spine has been worn out.
  • Mexican Wedding Cakes, p.26. I love these - little balls of sugar, butter and nuts. They are fun to make and are delicious with coffee.
  • Soft Spicy Molasses Cookies, p.37. These are exactly what the title says they are and are yummy. Warning, they are a bit messy to make and you really need to keep these cold when you roll them into balls (otherwise they kind of melt).
  • Original Nestle Toll House Chocolate Chip Cookies, p.56. In case you do not have the recipe memorized or have a bag of Nestle chips, this recipe is a favorite and I use this all year long. It is the same recipe that you find on the back of the Nestle Toll House bag.
  • Chocolate Edged Lace Cookies, p110. These look very fancy, but are pretty easy to make (and to eat). Watch out, these do not last long because they are so edible!
  • Philadelphia Marble Brownies, p.188. A nice spin on traditional brownies by adding Philadelphia cream cheese to the recipe.
  • Chippy Chewy Bars, p.232. I knew these growing up as 5 layer bars. They have graham crackers, peanut butter chips, chocolate chips and my favorite - coconut flakes!
  • Danish Raspberry Ribbons, p.280. A shortbread type cookie with jam in it. These are made into ropes with indents to place the jam and then after they are cooked, they are cut and drizzled with glaze. Very delicious!
Complaints: This book does not have a good recipe for Spritz cookies or Gingerbread cookies - both an essential to holiday cooking. For these recipes, I turn to the Joy Of Cooking Cookbook, a tried and true no frills cookbook that has page after page of recipes.

Deliciousness scale: 4 spoonfuls of yum out of 5.

Details: This review is based on ISBN# 0-7853-4363-6.

Monday, November 8, 2010

Back to the Drawing Board

Last week, I posted about my plans to make Thanksgiving dinner for the first time ever in my life.  In my head, I had it all worked out.  I've been looking at recipes, thinking about menus, etc. since Halloween flew by.  But now?  I am officially not sure what I'm going to do!

I had my parents and nephew over for dinner on Saturday night and mentioned my plans to make a traditional turkey dinner for Thanksgiving.  My dad looked at me like I said I was going to cook one of my cats.  "A turkey?  Why don't you make something else?" he asked.  I think he's wanting lamb, but lamb is not a meat I'm in love with.

After my dad's comment (and because I am not the biggest fan of turkey and Thanksgiving in general), I've made a decision: I'm going to let the family decide what I'm cooking.  I haven't told the family my plan to have them pick the meal yet, but I'm going for a democratic approach.  I'm going to give them five dinner options (below) and then let them tell me their first, second, and third choice picks.  From that, I'll tally up a cumulative score for each option and then cook whatever gets the highest score.  This will be fun (sorta!).

What would you pick if you were coming to my house for Thanksgiving dinner this year?  Here are the options, in no particular order:

  • Traditional Turkey Dinner (with stuffing, sweet potatoes, green beans, gravy, rolls, etc.)
  • Chicken with Morel Mushrooms (boneless, skinless breasts in a cream sauce with mushrooms.  Served with rice, green beans, crunchy bread)
  • Boeuf Bourguignon (Julia Child's classic French beef stew, served with hot, buttered noodles and crunchy bread)
  • Fettuccine Bolognese (when I don't burn the crap out of it, this is really good dish.  The sauce is made of ground beef, pork and veal in a wine and cream tomato sauce.  Served with salad and bread)
  • Connecticut Beef (this is a family recipe that I've never made!  It's chunks of beef and mushrooms in a creamy sauce, topped with scalloped potatoes, cheese and breadcrumbs.  Served with veggies and bread)
These are all good choices.  I have my top three meals picked out, but I won't say what they are.  I don't want to bias my family in any way.  I'll let you know what gets decided!  No matter what, it should be a yummy meal.

Thursday, November 4, 2010

Getting Ready For Turkey Day

So Lydia told you all that she is making Thanksgiving Day dinner this year - this is one of the first years since graduating from college that I am not cooking the meal! In 2006, I listened to an interview on NPR with Greg Atkinson and he talked about brining the turkey and I thought that sounded really good - so I gave it a try. Since then, I have made a brine for my bird and have been really happy with the results.

The first thing to making a delicious turkey is to order a fresh bird from the meat department at the grocery store. I usually put in my order in mid-November and schedule to pick it up at least one day before the big day. I also try to get a 14-16 pound bird (enough to feed everyone and still have leftovers -because what is Thanksgiving without leftovers). Also for the brine, use Kosher salt.

Here's how to make your brine, based on Greg Atkinson's recipe.
1 14-16 pound turkey (fresh or thawed)
4 cups Kosher salt
2 cups brown sugar
2 tablespoons whole black peppercorns
4 bay leaves
1 gallon boiling water
1 gallon ice
  • Wash out a medium-sized cooler. Unwrap the turkey, remove all the giblets and wash it well; place the turkey in the cooler.
  • Make the brine. Stir the kosher salt, brown sugar, and peppercorns into the boiling water and let it steep for 20 minutes. Stir in the ice water and continue stirring until the ice has melted. Pour the cold brine over the turkey and cover the cooler. Allow the turkey to soak for 12 to 24 hours - make sure that the bird stays cool (you can use gel packs for this purpose).
  • Preheat the oven to 350 degrees. Place the turkey on a roasting pan and discard the brining solution. Roast the turkey until the thigh meat reads 180 degrees, about 3 1/2 to 4 hours. Cover the breast with aluminum foil during the last hour to prevent it from over browning. Allow it to sit for at least 20 minutes prior to carving it.

Tuesday, November 2, 2010

Time for the Holidays!

Now that Halloween is over, it's inescapable: the holiday season is upon us!  It's time to start thinking about Thanksgiving dinner, Christmas shopping, and trimming the tree.  Eesh!  This year is flying by...

This year--for the first time ever in my 34 years--I've committed to cooking Thanksgiving dinner.  This is a big deal for me because 1) Thanksgiving is my least favorite holiday and 2) like I said, I've never done this before.  Sure, I've roasted chickens, made big holiday dinners for Christmas, etc., but Greta always handles turkey day.

Last year our parents were back in Maryland, leaving just me, the Mister, my sister, and my nephew.  We decided to depart drastically from tradition and celebrated with what our family calls tachos (tacos/nachos).  This year, I'll roast up a turkey and do it the old fashioned way.

I've been looking at a ton of recipes and menu ideas to get myself prepared.  I know that our Thanksgiving dinner MUST include a turkey, canned cranberry sauce, and sauerkraut.  These three things are a tradition, and I'm not about to mess with tradition. 

But I do have a question for all of you: What has to appear on your Thanksgiving Day menu?  Are there any recipes or dishes that you absolutely, positively have to have for it to be Thanksgiving?  If so, leave me a comment...I want to hear about it and who knows!  Maybe I'll include one of your family traditions in my own this year.

Tuesday, October 26, 2010

Toxic Cupcakes for Halloween!

I love, love, love Halloween (I better!  I got married on Halloween seven years ago!).  It's the only really fun holiday.  There's no pressure: you can dress up as who or whatever you want (or not), you get to eat candy, and there only stress you have is the stress you create for yourself.  There's no worrying over finding the perfect gift, cooking the perfect turkey, etc.  It's all about make believe....and if you don't love that, then there's something wrong with you.

The other night, I had the whole family over for an early Halloween dinner.  I made a a yummy (and surprisingly low-calorie) chili, cornbread, my famous guacamole, and...to finish it all off...toxic green and black cupcakes.

Here's the recipe I followed.  The recipe is nice because it only makes 12 cupcakes--and 12 is plenty for my family of six!  The end result is a somewhat more dense cupcake than I am used to...a cupcake that's more like an old fashion cake donut.  These aren't the best cupcakes I've ever made, but they were yummy (and, since the recipe came from Cooking Light, they were relatively low cal and low fat for a cupcake!).


CHOCOLATE CUPCAKES

3/4 cup granulated sugar
5 Tablespoons butter, softened
1 teaspoon vanilla
2 large eggs
1 cup flour
1/4 cup unsweetened cocoa
1/2 teaspoon baking soda
1/4 teaspoon salt
1/2 cup milk (I used skim!)

  • Preheat oven to 350.  Line 12 muffin cups with paper liners.
  • Using an electric mixer, beat first three ingredients at medium speed until well blended, about 3 minutes.
  • Add eggs, one at a time, beating well after each addition.
  • In a separate medium sized bowl, whisk together the flour, cocoa, baking soda and salt (use regular table salt.  Also: you may want to sift the cocoa if it seems clumpy) to combine.  
  • Add flour mixture to the sugar/egg mixture alternatively with the milk, beginning and ending with flour (like this: 1/3 flour mixture, 1/2 of the milk, 1/3 flour, remaining milk, remaining flour).  Mix well after each addition.
  • Spoon cupcake batter into prepared paper lined tins.  
  • Bake at 350 for 22 minutes or until cupcakes spring back when touched lightly in the center.
  • Cool cupcakes in the tin on a wire rack for 10 minutes.
  • Remove cupcakes from tin and let cool completely on wire rack.
  • Frost with your favorite frosting once completely cool.
NOTES
  • Every time I make a chocolate cake, I add a teaspoon or so of instant espresso powder.  This gives chocolate a little more dimension.  I am not a fan of chocolate flavored things (though I do like coffee!), but I promise you won't notice a coffee flavor.  Like I said...it just gives chocolate more umpf.
  • I was really lazy and used pre-made vanilla frosting (I think it was Duncan Hines?).  I added a boatload of green food coloring to the frosting to make my cupcakes look toxic.  Black and green is a great alternative to the traditional Halloween black and orange combo.

Thursday, July 1, 2010

Happy 4th of July!

I can't believe July 4th is almost here. Thanks to our strangely cool weather, we haven't really had more than a taste of summer here in the Seattle area. I guess I shouldn't complain: the rest of the country has had to suffer through blistering heat, something I am just not equipped to deal with.As we get ready to celebrate our independence, I thought I'd take a moment to reflect on some of the places I've lived over the years. America is a huge country, and there are so many regional differences that keep things interesting.

Here are some July 4th inspired foods from my personal, regional history with America.

MARYLAND
My sister and I grew up in Maryland. Though I lived there for about 18 years of my life, I have no great desire to return to the mid-Atlantic. It's too darn hot (and humid!) in the summer and it's way too flat for my tastes.

But when it comes to the 4th of July in MD, you can't beat a good Maryland-style crab feast! We would devour what seemed like dozens of tasty blue crabs coated in Old Bay, served up with fresh corn, tomatoes, and bread. Not to mention cold beer for the grown ups (as a kid, I opted for Coke while Greta drank milk...blech! Milk and crabs?).

If you want to have a Maryland crab feast but you're not in MD, you're in luck. You can order from Phillip's and have everything you need sent to you. We did this last year. It was a lot of fun!

VERMONT

I moved to Vermont after high school and graduated from Castleton State College. Vermont has a very special place in my heart, and I find myself missing the Green Mountain State more than I care to admit.

When it comes time to fire up the grill, hot dogs are a favorite. But in VT (and other areas in New England), hot dog buns are very different than what the rest of the country is used to. New England hot dog buns look like a folded piece of white bread, and for some reason they make hot dogs (or lobster rolls) taste so much better.

While you can't buy New England hot dog buns easily, you can make them yourself. Check out this blog entry from one of my faves, King Arthur Flour, on how to use their New England Hot Dog Bun Pan.

NORTH CAROLINA
I've never lived in NC, but my late father-in-law was from there. As a kid, our family made a few trips to the south (to Disney World and to South Carolina) and every time we crossed into North Carolina, we made sure to stop off for some pulled pork sandwiches.

North Carolina style BBQ is by far our family favorite. The sauce is more vinegar based instead of being dominated by tomato sauce. The pulled pork is tender and perfect, and sops up the vinegar-y sauce in porky heaven.

In honor of my father-in-law--and because I really crave a good NC-style pulled pork from time to time, check out this recipe--'ll have to try it sometime soon!

No matter what you eat or how you celebrate, have a fun, safe 4th of July!

Tuesday, February 16, 2010

Keep the Home Fires Burning

Valentine's Day was Sunday, and many people went out to celebrate the Hallmark holiday in fancy-schmancy restaurants. My husband and I are never ones to follow trends, so instead of eating out, we opted to spend the evening at home. We cooked a dinner together and had a lovely, quiet night.Not knowing what we wanted to have for dinner, we made a pit stop at the Safeway and wandered around aimlessly. We spotted a display of pre-measured, pre-packaged spices on recipe cards from McCormick (called McCormick Recipe Inspirations). My husband was intrigued, so we grabbed the packet for Rosemary Roasted Chicken and Potatoes (they also have packets for Quesadilla Casserole, Apple Sage Pork Chops, Garlic Lime Fajitas, Spanish Chicken Skillet, and Shrimp and Pasta Primavera). We also snagged some chicken and small red-skinned potatoes and headed for home.
My husband is not a cook. He amazing at many things, but cooking is not one of them and that's ok. But he decided that he wanted to help put dinner together. He diced up the potatoes and tossed together the chicken pieces and potatoes with the pre-measured spices and some oil. It was super easy and he had fun getting his hands dirty.
The dinner cooked up quickly and easily and resulted in moist chicken with crispy skin and tender but pleasantly crunchy potatoes. The seasoning was excellent and the meal was perfect. I know it's a gimmicky product, but I must say that the McCormick Recipe Inspirations card was a good find. The recipe on the back can be used over and over with the spices I have in my pantry. Sometimes when my hubby and I go on vacation, we rent a house at the beach. I could see packing one of these Recipe Inspiration cards with us to make for an easy but yummy meal on the fly.

While at the grocery, my husband requested that I make up a batch of Red Velvet cupcakes. Who am I to deny my husband something sweet on Valentine's Day? After we prepped the chicken, we whipped up Red Velvet cupcakes with cream cheese frosting for dessert. I use a recipe from the food blogger at Vanilla Garlic. Click here to get the recipe for yourself. These cupcakes are super delicious, so I highly recommend you check it out.

I hope you all had as nice of a Valentine's Day as we did!

Thursday, December 31, 2009

I'll Eat to That!

It's New Year's Eve! I can speak for my sister when I say, "good riddance, 2009, and a hearty hello to 2010!"

In our family, New Year's Eve dinner meant sandwiches made from deli meats purchased at Lexington Market in downtown Baltimore. I can still remember the sawdust on the floor and the faint smell of...well, let's not go there. My mother-in-law eats grapes and wears funny colored socks to usher in prosperity with the new year.

There are a ton of traditional meals and customs that come along with the celebration of the start of a new year. We don't do anything apart from eat, drink a little champagne, and hope to stay up late enough to see the ball drop on TV. Wow--that's pretty lame.

If you're looking to adopt a new year's tradition into your celebration, here are a few to try out:
  • Black-Eyed Peas: This is a Southern-US tradition and are served with cooked greens and pork (see below). They're meant to represent prosperity and the custom of eating them at the start of the year dates back to the Civil War.
  • Cooked Greens: Cabbage, collard greens, kale, chard, etc. are cooked and served on New Year's all over the world. The cooked greens represent money and--let's face it--who doesn't want more of that each year?
  • Pork: Eating pork symbolized progress because pigs push forward, rooting themselves in the ground before moving. Hmmm...ok. Pigs taste good, that's for sure. And their fatty richness could also symbolize wealth. No matter why they're eaten, pork products are consumed all over the world in all sorts of varieties: roast suckling pig, pork sausage, pigs' feet, etc. Or marzipan pigs if you prefer the non-meat variety.
  • Grapes: According to my mother-in-law, you're supposed to eat 12 grapes at midnight on New Year's Eve. Each grape represents a different month, so if the third grape is a bit sour, March might be a rocky month. This is mostly a custom in Spanish, Portuguese, Mexican, Cuban, Venezuelan and other Latin American cultures.
If you have any New Year's food traditions, leave us a comment and tell us about it. Otherwise, Happy 2010!

Monday, December 28, 2009

More Holiday Treats (In Case You Still Have Room)

These are all recipes from my cookie party. All are delicious and fairly easy to make. If you haven't yet had your fill of butter, sugar and chocolate, then these treats should help put you back into the holiday spirit (or a sugar coma).

Five Layer Bars

By Ariel

Every time a bite into these bars, I think of my Aunt. My Aunt always made a version of these at Christmas time. She kept them in the refrigerator and they were always one of my favorite holiday treats. When these showed up at the cookie party, I was delighted and taken back to childhood!


1 1/2 cups graham cracker crumbs
1 stick salted butter, melted
1/2 cup chopped pecans
1 cup butterscotch chips
1 cup semisweet chocolate chips
1 cup shredded coconut
1 14-ounce can sweetened condensed milk

Preheat oven to 350. Combine graham cracker crumbs and melted butter in a bowl. Press into the bottom of a 9x13 inch baking dish. Mix pecans, chips, and coconut and sprinkle on top of graham cracker crumbs. Pour sweetened condensed milk over the mixture and bake for 30 minutes. Cool completely and cut into bars.


Frosted Ginger Cookies

By Andrea

These are soft and melt in your mouth. They are perfect with coffee and really bring out the smells and taste of the season!


1 cup granulated sugar, plus more for rolling cookies
3/4 cup butter at room temperature
1 egg
3 Tbsp molasses
2 cups flour, sifted
1 tsp baking soda
1 1/2 tsp ground ginger
1 tsp cinnamon
1/2 tsp salt
1/2 tsp ground cloves
1/2 tsp ground nutmeg
1 cup powdered sugar
1 tsp lemon juice
  1. Preheat oven to 350. In a large bowl cream 1 cup granulated sugar with butter until light and fluffy, about 3 minutes. Mix in egg and molasses.
  2. In a medium bowl, stir together flour, baking soda and spices. Add butter to mixture and blend well.
  3. Fill a shallow bowl with granulated sugar. Break off walnut-size pieces of dough and roll into balls; roll balls in sugar. Arrange on greased cookie sheets and bake until golden brown, about 10 minutes. Transfer to cooling racks.
  4. Meanwhile, make glaze. Combine powdered sugar with 1 Tbsp water and stir until smooth, then stir in lemon juice. Drizzle glaze over cookies.
Enjoy and keep the holiday spirit!

Wednesday, December 23, 2009

Ho Ho Ho - Treats for Santa!

What Christmas wouldn't be complete without baking up some cookies to leave for Santa? I thought that this year instead of making tons of different types of cookies, that I would host a cookie exchange - then I would only have to make one or two different cookies, could share them and still have lots of tasty options!

Aidan and I got to work, he made Peanut Butter Kiss Cookies (with a little help from Mom) and I made Mexican Wedding Cookies. Both are favorites of mine and the Mexican Wedding Cookies always remind me of Christmas - I think it was the only time during the year when we made them, plus they look like snow balls. The Peanut Butter Cookies are pretty easy to make with kids and mine loves to push the kisses into the cookies!


Peanut Butter Kiss Cookies
By Aidan


1 cup softened shortening
1 cup sugar
1 cup brown sugar
2 eggs
1 teaspoon vanilla
1 cup peanut butter
2 teaspoons baking soda
1/2 teaspoon salt
3 cups flour
1 package Hershey's Kisses

Mix all ingredients in order. Shape into 1-inch balls and place on ungreased cookie sheet. Bake 15-18 minutes at 375 degrees. After removing cookie sheet from oven, immediately push a kiss into each cookie. Refrigerate cookies for a while to harden kisses.

Makes approximately 48 cookies (plenty to share with friends, family and Santa).

Mexican Wedding Cookies
By Greta

1 cup pecan pieces or halves
1 cup butter, softened
2 cups powdered sugar, divided
2 teaspoons vanilla
1/8 teaspoon salt

Place pecans in food processor. Process using on/off pulsing until pecans are ground. Beat butter and 1/2 cup powdered sugar in large bowl with electric mixer at medium speed until light and fluffy. Gradually add 1 cup flour, vanilla and salt. Beat at low speed until well blended. Stir in remaining 1 cup flour and ground nuts with spoon. Shape dough into a ball; wrap in plastic wrap and refrigerate 1 hour or until firm.

Shape tablespoons of dough into 1-inch balls; place 1-inch apart on ungreased cookie sheet. Bake at 350 degrees for 12-15 minutes. Let cookies stand on sheet for 2 minutes. Place 1 cup powdered sugar in 13x9 inch glass dish. Transfer hot cookies to glass dish and roll cookies in sugar; let cool in dish. Shift remaining 1/2 cup powdered sugar over cookies before serving.

Makes 48.

Everyone brought a different type of cookie or bar and we had hot chocolate, coffee and egg nog to wash them all down. The assortment of treats included 5 layer bars, M&M chocolate chip cookies, German Chocolate bars, soft gingerbread, Snickers cookies, and peppermint sugar cookies. Everyone had fun and no one left hungry!

Merry Christmas Everyone and Enjoy!!

Wednesday, December 9, 2009

Gingerbread Yum


This past weekend, my son asked to make gingerbread cookies - he can devour them like Cookie Monster. Since I like to cook with him, I thought that it would be fun. It seems that making and decorating gingerbread is quickly becoming a Christmas tradition and I am always on the lookout for things that can make decorating fun and easy.

I didn't have everything that I would need to make and decorate the cookies, so I headed out to the store and the seasonal isle. There I found a bucket of various cookie cutters and what looked like glue. It turned out to be squeezable white icing in a bottle by Wilton and has now become one of my favorite decorating tools - everyone loved it, from my 7 year old to my Mom and Dad. We used it to add mini M&Ms, sprinkles and nonpareils.

So once I had the necessary tools and decorations, I then turned to my bible - the Joy of Cooking for the gingerbread recipe.

Recipe from the Joy Of Cooking, by Irma S. Rombauer and Marion Rombauer Becker, 1985:

Gingerbread Men


1/4 cup butter
1/2 cup brown sugar
1/2 cup dark molasses
3 1/2 cups all-purpose flour
1 teaspoon baking soda
1/4 teaspoon ground cloves
1/2 teaspoon cinnamon
2 teaspoons ginger
1/2 teaspoon salt
1/4 cup water
  1. Preheat oven to 350 degrees.
  2. Blend the butter and sugar until creamy.
  3. Beat in molasses.
  4. Sift the flour, then add all spices and resift dry ingredients.
  5. Add the sifted ingredients to the butter mixture in about three parts, alternately with the water.
  6. Roll the dough to any thickness you like and cut out shapes with cookie cutters.
  7. Decorate before baking with small raisins, bits of candied fruits, red-hots, marshmallows and citron; use icing and sprinkles after baking.
  8. Bake the cookies for 8 minutes or longer, according to their thickness. Test for doneness by pressing the dough with your finger. I it springs back after pressing, they are ready to be cooled on a rack.
Icing

1/4 cup confectioner's sugar
A few drops of water

In a small bowl, stir together the sugar and water. Add a drop or two of food coloring and use to decorate cookies.

This year, I omitted the icing recipe and used already prepared, multicolored icings. We all had fun and even shared some with friends and family. I hear that Santa is very fond of gingerbread too!

Friday, December 4, 2009

Bake Sale Treats - Cheesecake Cups


Well it is that time of year again - time for school bake sales and holiday parties!

So what is easy to make and super yummy? For my son's holiday bake sale, I went with an old standby - cherry topped cheesecake cups. I also thought that this recipe would be easy to make with my son and would yield plenty of batter left in the mixing bowl for him to lick. I was right on both accounts!

Here is the recipe:

Cheesecake Cups

2, 8oz packages of cream cheese
3/4 cup sugar
2 eggs
1 teaspoon vanilla
1 teaspoon lemon juice
vanilla wafers
pie filling
  1. Have cream cheese at room temperature, then cream with next 4 ingredients.
  2. Place vanilla wafer in the bottom of cup cake papers (which have been placed in muffin tins) and fill 2/3 full with cheese mixture.
  3. Bake at 350 degrees F for 15 - 20 minutes.
  4. Cool.
  5. Top with any type of pie filling you choose or leave plain.
Makes about 21 cakes.
Note: 1/2 can pie filling fills 1 recipe cheesecake cups.

These are always delicious and my favorite is using cherry pie topping on them. Over the years, I have also discovered that using a Kitchen Aid or an electric mixer to make a smooth batter really makes these even more tempting, plus my son loves to work anything electric.

So give these a try for your next office party, bake sale, dinner party or any other occasion!

Enjoy!

Tuesday, December 1, 2009

Pumpkin Eater

(Sorry for the crappy iPhone photo. I meant to snap shot of this beauty sooner, but that just didn't happen!)

I hate pumpkin pie. It smells so good and the taste of pumpkin and spices is like a forkful of fall. But the texture? Blech. It's like eating baby food. Cold, somewhat soggy baby food.

So what's a girl to do when she loves the taste of something but not the texture? She finds ways to have her pumpkin and eat it too, that's what. Thanks to the Queen of Butter and All Things Deliciously Lethal (otherwise known as Paula Deen), I whipped up a batch of Pumpkin Bars with Cream Cheese Frosting for our Tacho Turkey Day.

Before I go any further, let me just ask this: isn't everything better with cream cheese frosting? Everything dessert-y, anyway.

So, if you want to make delicious Pumpkin Bars, here are some things to consider:
  • Though they're called Pumpkin Bars, they're more like a Pumpkin Sheet Cake. No matter what you call them, they're awesome. And yummy.

  • You need to plan ahead, but only a little. Since the bars are made with oil and no other form of fat, you don't have to sit around and wait for butter to come to room temperature.

  • That said, you do need to wait for the pumpkin bars to cool completely before you attempt the frosting. My suggestion? Make the pumpkin bars before you go to bed. That way they'll cool all night long and your house will smell like pumpkin when you hit the sheets (here's a bonus: the scent of pumpkin is supposedly an aphrodisiac for men!)

  • The frosting, though majorly yum, is a bit much. To cut the sugar overload, consider making just half the frosting. Cut your bars/cake/awesome pumpkin things into nice even serving sizes, fill up a pastry bag with the frosting, and make pretty little dollops on each bar.

  • Skip the frosting all together. You could dust the top of the bars/cake/awesome pumpkin thing with powdered sugar and then serve it with whipped cream. Or spread pumpkin butter on the bars/cake/awesome pumpkin thing and serve with whipped cream.

  • Play with the cake spices if you want. It calls for cinnamon, but you could put in whatever you want: ginger, clove, pumpkin pie spice, etc. You can probably also cut some of the fat by using applesauce....whatever.
So, with that said, here is the recipe:

PUMPKIN BARS
4 eggs
1 – 2/3 cups granulated sugar
1 cup oil
one 15 ounce can pumpkin
2 cups sifted all-purpose flour
2 teaspoons baking powder
2 teaspoons ground cinnamon
1 teaspoon salt
1 teaspoon baking soda

1. Preheat oven to 350 degrees.

2. Using an electric mixer at medium speed, combine the eggs, sugar, oil, and pumpkin until light and fluffy. Stir together the flour, baking powder, cinnamon, salt, and baking soda. Add the dry ingredients to the pumpkin mixture and mix at low speed until thoroughly combined and the batter is smooth.

3. Spread the batter in an ungreased nonstick 13 by 10 inch baking pan. Bake for 30 minutes (or until it feels a tiny bit firm in the middle!).

Let cool completely before frosting.

ICING
One 3 ounce package cream cheese, softened
1/2 cup (1 stick) butter softened
2 cups sifted confectioners’ sugar
1 teaspoon vanilla extract

To make the icing: Combine the cream cheese and butter in a medium bowl with an electric mixer until smooth. Add the sugar and mix at low speed until smooth. Add the sugar and mix at low speed until combined. Stir in the vanilla and mix again. Spread on cooled pumpkin bars.

Makes 48 small bars or 24 larger ones.