Showing posts with label dessert. Show all posts

Friday, October 30, 2015

Easy and Quick Chocolate Chip Muffins

I've always enjoyed making muffins. They can be sweet or savory and are easy to share. Muffins are also portion controlled (unless you eat multiples at once). I recently came across a very easy recipe from Lily Ernst (Little Sweet Baker) that is very forgiving and are made from ingredients that I usually have on hand. These have been very popular with family and co-workers and only take 30 minutes to make (that includes baking).

Here is the recipe for Chocolate Chip Muffins:

Dry Ingredients:
2 1/2 cups all purpose flour
1 tsp baking soda
1 tbsp baking powder
1/4 tsp salt
12 oz semi-sweet chocolate chips

'Wet' Ingredients:
1 stick butter (1/2 cup), melted
1 cup sugar
buttermilk (or regular milk)
2 eggs
1 tbsp vanilla extract
  1. Mix together all the dry ingredients; set aside.
  2. In a large bowl (I cheat and use a Kitchen Aid mixer), mix together the 'wet' ingredients.
  3. Slowly add in the dry ingredients to the 'wet' ingredients until just mixed (Note: I have made these in a hurry and over-mixed them in my mixer - they turned out fine).
  4. Grease muffin tins (12) and fill the tins with your mixture. For larger muffins, fill all 12 so they are very full. If you like smaller muffins, you can fill the tins about 3/4 full and get around 16 muffins. If you do this, watch your bake time!
  5. Preheat your oven to 425 degrees F; cook for 5 minutes.
  6. Decrease heat to 375 degrees F and cook for 15 minutes.
  7. Remove from muffin pans and allow to cool. If you aren't going to eat them right away, make sure that they are fully cooled before storing them.
These are delicious as-is, but I'd also love to add 1/2 cup of chopped walnuts to the mix! Enjoy for breakfast, as a dessert, or just a snack!!

Wednesday, January 5, 2011

Easy Elegance

Cream Puffs with Peppermint Ice Cream and Hot Fudge Sauce.  Easy and yummy!
After serving up a meal like Boeuf Bourgignon for Christmas dinner, I knew I had to do something easy yet delicious for dessert.  After much consideration, I decided on cream puffs filled with ice cream, bathed in rich hot chocolate sauce.  Nothing wrong with that!

I first read through several recipes for pate a chou before consulting my mother. I remember my mother making cream puffs (or profiteroles) when I was a kid, and I know my mom is not a fan of complex recipes.  I thought I found a simple enough recipe from the Joy of Cooking, but Mom told me to get out my copy of the Southern Living Cookbook.  The recipe she always used was from there and, she promised, it was a piece of cake.

I'm happy to report that I took my mom's sage advice.  The Southern Living Cookbook recipe was perfection--it was easy to follow and yielded deliciously elegant results.  If you need a fancy dessert that's easy to make, I highly recommend this one.  And the best part is that you can do whatever you want with the cream puffs once they're cooked.  They can be used for savory or sweet dishes, and the only limit to fillings and pastry shapes is your imagination.

Try this one out...it's a breeze.  And, you can make it ahead of time and stick it in the freezer.  Nice!


Cream Puffs, fresh out of the oven...cooling off.
CREAM PUFF PASTRY

2/3 cup water
1/3 cup butter
2/3 cup all purpose flour
1/8 tsp salt
3 eggs

  1. Combine water and butter in a medium saucepan; bring to a boil.
  2. Add flour and salt, all at once, stirring vigorously over medium-high heat until the mixture leaves the sides of the pan and forms a smooth ball.  
  3. Remove from heat and cool 4 to 5 minutes.
  4. Add eggs, one at a time, beating thoroughly with a wooden spoon after each addition; then beat until the dough is smooth.
  5. Shape and bake pastry immediately according to recipe directions.  Dough can be used for cream puffs, eclairs, etc.
  6. To make cream puffs: drop pastry into 8 equal mounds 3 inches apart on an ungreased baking sheet (note: I lined my baking sheet with parchment paper).  Bale at 400 degrees for 30 to 35 minutes or until golden brown and puffed.  Cool away from drafts.  Cut top off of puffs and scoop and discard out the soft, uncooked dough in the center.  Add ice cream and top with hot fudge sauce.

Monday, November 29, 2010

Thanksgiving Success!

I survived making my very first Thanksgiving dinner for my family!  Here are some highlight's from last week's feast:

My 13 pound turkey was yummy!  I followed an easy recipe from Ina Garten and--though the cooking time was more like 3 hours, not 2 1/2 like Ina said--the turkey turned out great.  No brining or basting required! 

My husband and father carved up the bird using the handy dandy electric knife.  I really prefer the thick chunks of breast meat to the traditional thin slices.  The meat seemed more moist, stayed warmer, and felt more substantial.

I went 2 for 3 with my side dishes. 

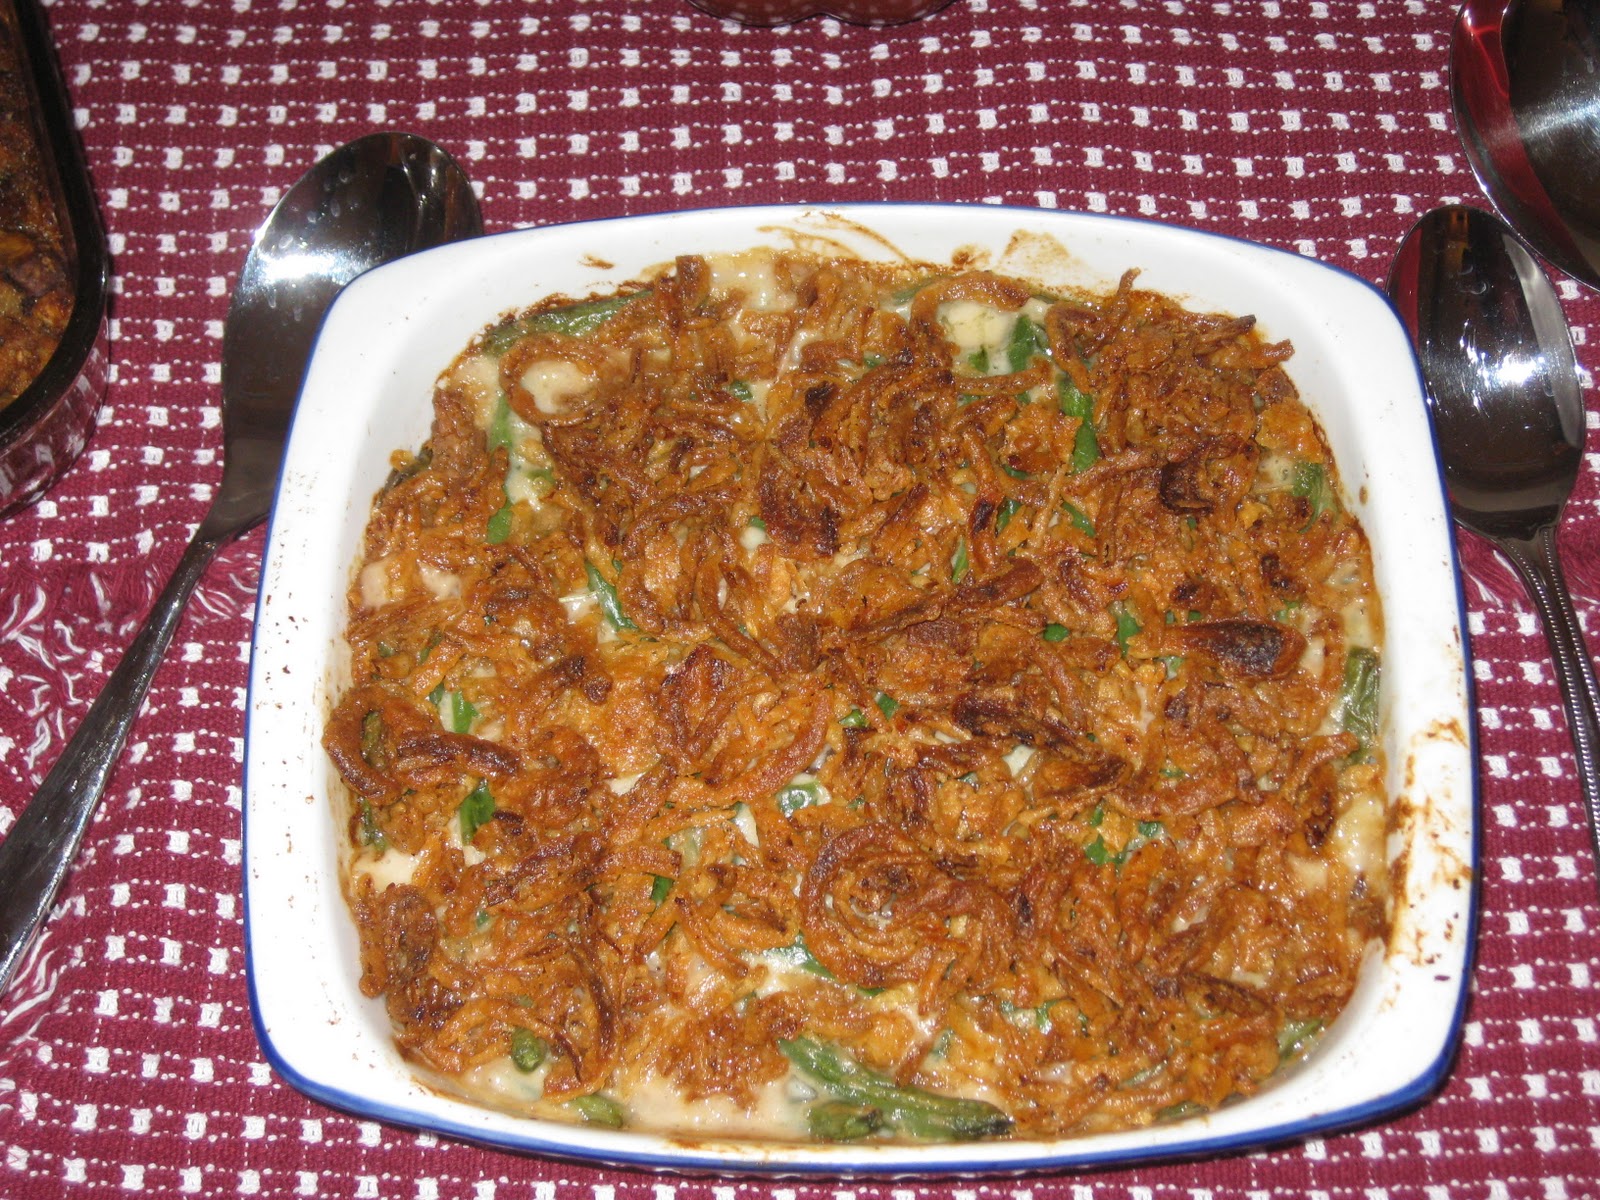
The classic green bean casserole (yes, from Campbell's!) was predictable but good (the Mister loves this dish!).  There's something so wrong and wonderful about those damn French Fried onions!

The stuffing was AMAZING.  I've never made stuffing before, so I just threw everything in and hoped for the best.  I wanted to appease the people who like "inside the bird" stuffing (because I did not stuff my bird when I cooked it) and those of us who prefer outside the bird stuffing.  I think my stuffing was a satisfying mix of moist and crunchy goodness.  (My "recipe" is at the end of this post.)

The smashed sweet potato casserole was a flop.  The recipe was also from Ina, the rare TV cook that usually has good cooking ideas...but this one was a miss.  My husband was the only one who liked it.  It was too nutmeg-y for me and Greta said it reminded her of soap.  Yup...that's a FAIL.  If I were to try this again, I'd steer clear of the stupid nutmeg.  Lesson learned!

The other sides for the night were easy: a can of cranberry sauce (yes, a can!  We love the open and slice approach to cranberry goodness), sauerkraut (it's not Thanksgiving without it!), and gravy.  Mom helped me out with the gravy, and it turned out delicious as always.

Desserts were also kick ass!  Greta made pumpkin pie (with a little help from Mom, who makes the world's best pie crust), I made Chocolate Guinness Cake (a cake I'm inexplicably sick of), and I also had some mincemeat tarts from Cost Plus World Market.

Overall it was a very good meal and a happy Thanksgiving.  Oh, and before I forget, here's how I made my stuffing.  I didn't really have a single recipe that I followed, but it turned out super yummy. From reading many different stuffing recipes, I figured out that the most important thing was to make sure my stuffing had a lot of moisture.  I'm currently doing the Weight Watchers program, and I don't usually eat this much rich yumminess, but it's Thanksgiving...why not break out multiple sticks of butter?  This is not a recipe for calorie counters, but so be it. 

Lydia's "How the Hell Do You Make Stuffing?" Stuffing
  • 1 pound breakfast sausage (I used the unseasoned "original" kind from Jimmy Dean because Greta hates sage.  Use whatever you want!  Even Italian sausage would work here.)
  • 1/2 stick butter (1/4 cup)
  • 3 stalks of celery, chopped
  • 1 onion, chopped
  • 2-3 cloves of garlic, minced
  • 8 oz. sliced crimini mushrooms
  • 14 oz. package of cubed stuffing (I used Safeway brand because I'm cheap.  I also opted for the unseasoned variety because of the sage-hater.  If you have homemade bread cubes, use that)
  • fresh parsley, chopped (to taste--I probably used 1/4 cup or so)
  • To taste: 
    • Kosher salt
    • Fresh cracked black pepper
    • Dried thyme
    • Dried marjoram 
    • Dried rosemary
  • 2 1/2 to 3 cups chicken stock (I used my homemade stock)
  • 1/2 cup melted butter
Brown sausage in a hot pan, breaking it up into small pieces.  When cooked through, place sausage on paper towel lined plate to drain a bit. Pour out excess grease from the pan.

In the same pan, melt 1/2 stick of butter over medium high heat.  Add the celery, onion and garlic.  Cook a few minutes then add the mushrooms.  Cook and stir well to get all the browned bits on the bottom of the pan up and mixed into the veggies.  Add a few pinches of salt and pepper to this mixture and cook until veggies are soft.

In a large bowl, combine cooked sausage and cooked veggies.  Stir well to mix.  Add cubed bread to the bowl and toss well to combine.  Add parsley and seasonings, stirring well.  (I spent a lot of time stirring and adding to make sure the entire mixture was well seasoned.)  Pour in chicken stock and stir to moisten.  Place mixed stuffing in a large casserole dish sprayed with Pam. 

You can either cook the stuffing right away or put it in the fridge and let it sit overnight, to be cooked the next day.  Before you put the stuffing in the oven, pour the melted butter over the top of the casserole.  Bake at 350 until heated through...about 45 minutes or so.

Tuesday, October 26, 2010

Toxic Cupcakes for Halloween!

I love, love, love Halloween (I better!  I got married on Halloween seven years ago!).  It's the only really fun holiday.  There's no pressure: you can dress up as who or whatever you want (or not), you get to eat candy, and there only stress you have is the stress you create for yourself.  There's no worrying over finding the perfect gift, cooking the perfect turkey, etc.  It's all about make believe....and if you don't love that, then there's something wrong with you.

The other night, I had the whole family over for an early Halloween dinner.  I made a a yummy (and surprisingly low-calorie) chili, cornbread, my famous guacamole, and...to finish it all off...toxic green and black cupcakes.

Here's the recipe I followed.  The recipe is nice because it only makes 12 cupcakes--and 12 is plenty for my family of six!  The end result is a somewhat more dense cupcake than I am used to...a cupcake that's more like an old fashion cake donut.  These aren't the best cupcakes I've ever made, but they were yummy (and, since the recipe came from Cooking Light, they were relatively low cal and low fat for a cupcake!).


CHOCOLATE CUPCAKES

3/4 cup granulated sugar
5 Tablespoons butter, softened
1 teaspoon vanilla
2 large eggs
1 cup flour
1/4 cup unsweetened cocoa
1/2 teaspoon baking soda
1/4 teaspoon salt
1/2 cup milk (I used skim!)

  • Preheat oven to 350.  Line 12 muffin cups with paper liners.
  • Using an electric mixer, beat first three ingredients at medium speed until well blended, about 3 minutes.
  • Add eggs, one at a time, beating well after each addition.
  • In a separate medium sized bowl, whisk together the flour, cocoa, baking soda and salt (use regular table salt.  Also: you may want to sift the cocoa if it seems clumpy) to combine.  
  • Add flour mixture to the sugar/egg mixture alternatively with the milk, beginning and ending with flour (like this: 1/3 flour mixture, 1/2 of the milk, 1/3 flour, remaining milk, remaining flour).  Mix well after each addition.
  • Spoon cupcake batter into prepared paper lined tins.  
  • Bake at 350 for 22 minutes or until cupcakes spring back when touched lightly in the center.
  • Cool cupcakes in the tin on a wire rack for 10 minutes.
  • Remove cupcakes from tin and let cool completely on wire rack.
  • Frost with your favorite frosting once completely cool.
NOTES
  • Every time I make a chocolate cake, I add a teaspoon or so of instant espresso powder.  This gives chocolate a little more dimension.  I am not a fan of chocolate flavored things (though I do like coffee!), but I promise you won't notice a coffee flavor.  Like I said...it just gives chocolate more umpf.
  • I was really lazy and used pre-made vanilla frosting (I think it was Duncan Hines?).  I added a boatload of green food coloring to the frosting to make my cupcakes look toxic.  Black and green is a great alternative to the traditional Halloween black and orange combo.

Monday, September 27, 2010

Super Yum!

I am just back from a weekend mini-vacation to Ocean Shores, WA.  My hubby and I have visited Ocean Shores many times (and I wrote about Galway Bay, one of our favorite restaurants in the greater Ocean Shores vicinity), in the past) but this was the first time we ever spent the night there.

Though our trip was short (we only stayed over Friday and Saturday nights), we had a ton of fun.  We stayed at this awesome inn that overlooked the harbor.  Our room was the Turret Room--we had a big soaking tub, a medieval-looking four-poster bed, and a wrap around balcony.  The Inn served up a tasty breakfast each morning and the place had a lingering smell of inciting food.  The innkeepers also offer a 4-course dinner on Friday and Saturday nights--we had dinner at the Inn our first night there and everything was perfect.

On Saturday night, we headed into the retail section of town and ate at Pasta di Vine, an Italian place that--as we later learned--is also owned by the couple who own and operate the inn (it's a small town!).  The food at the Italian place was very, very good, but it was dessert that blew us away.  We ordered their cheesecake and OMG!  I've never had a cheesecake quite like the one we got.

The cheesecake itself was very simple--just a plain cheesecake served without fruit or any type of sauce.  What set it apart from other cheesecake was that it was a creme brulee cheesecake.  They sprinkled sugar on the top and sides of our slice of cake and then torched the sugar, creating that familiar caramel-y shell of a creme brulee surrounding the cheesecake.  The results were amazing!  There were two contrasting textures: the smooth, velvety cheesecake and the crisp burnt sugar that cracked when you dug your fork into it.  And the flavor?  Perfection!  It was deep, rich, creamy, caramel-y and oh so good.

I've never had a creme brulee cheesecake before, but if I ever see this on a menu, I'm ordering the biggest slice ever.  It was out of this world!  I can't wait to go back to Ocean Shores to get this super yummy dessert again.

Wednesday, July 28, 2010

Gluten-Free, Wheat-Free, Non-Dairy Brownies, Are They Good?

I recently started a new job (yeah!!) and one of my co-workers has a gluten food allergy. One night we decided to have a gluten free dinner - that was easy, we had taco salads (super yummy and gluten free thanks to corn tortilla chips). I wanted to also have something chocolaty for dessert and I found Pamela's Chocolate Brownie Mix (that is gluten and wheat free) and thought I would give it a try.

These were very easy to make. I used the directions for the original oil recipe:
1 bag of Pamela's Brownie Mix
1 egg
1/2 cup oil
1/4 cup water

Mix all ingredients together and pour into a lightly greased square pan. Cook at 350 degrees for 18 minutes, then let cool. Cut into squares and enjoy!

I ended up cooking my batch for an additional 5 minutes (my stove usually takes a bit longer) and I let them cool for about 2 hours before I cut them. They were moist and filled with chocolate chunks and very good for a mix. I can't say that I missed the flour or wheat and felt that these were a great substitute! My one complaint is the price, almost $8.00 at Safeway, but if you can not eat wheat, gluten, or dairy I would spend the money to get my dessert fix!

Tuesday, June 1, 2010

One Of My Favorite Desserts: Black Bottoms

Growing up, there has been an on-going debate in the house on how to properly eat a black bottom cupcake. One camp (my Dad's) likes them fresh from the oven with the cream cheese and chocolate chips melting. The other camp (my sister's & myself) prefer them cold, with the cream cheese and chocolate chips formed and solid. Either way, these are one of my favorite desserts and will always bring back good & tasty childhood memories. So whip up a batch and join the debate - warm or cold!

Filling:
1 egg
1, 8 ounce cream cheese
1/3 cup sugar
  • Combine then add 6 ounces chocolate chips.
Cupcakes:
1 cup sugar
1/4 cup cocoa
1/2 teaspoon salt
1 1/2 cups flour
1 teaspoon baking soda
1 cup water
1/2 cup vegetable oil
1 tablespoon vinegar
1 teaspoon vanilla
  • Combine and blend well.
Directions:
  • Fill muffin tin with foil or paper cupcake liners.
  • Put cupcake mixture into liners, 2/3 full.
  • Drop a tablespoon of filling into cupcakes, do not blend.
  • Bake at 350 degrees for 30-35 minutes.
  • Refrigerate when cool (these can also be frozen).

Wednesday, May 26, 2010

Dream Squares

Pumpkin Dream Squares

We have had these for dessert quite a few times and they are moist and delicious. The actual name of the recipe is Apple Dream Squares, but I have used all sorts of fruit butters to make them and apple just seems to be restrictive.

Ingredients:
1 cup flour
1/2 teaspoon baking soda
1/4 teaspoon salt
1/4 pound margarine
1 cup brown sugar, packed
1 cup apple butter
2 eggs
1/2 cup chopped nuts
powdered sugar
  • Place the flour, baking soda and salt in a bowl. Cut in the butter until mixture is crumbly.
  • Add all at once brown sugar, apple butter, eggs and chopped nuts. Stir with a wooden spoon until all ingredients are moistened and blended.
  • Place mixture in a greased 9x13x2 baking pan. Bake at 350 degrees for 30 minutes or until center tests done with a toothpick.
  • Cool, cut into squares and dust with powdered sugar.
Notes:
I have used apple butter, pumpkin butter and cranberry butter to make these and all have turned out delicious! These also always take longer than 30 minutes (at least in my oven) - they usually need another 10 minutes to fully cook. I also think that some raisins would be a nice touch - I never add them though because when these are made, half of the family would not like the addition! Finally, the type of nuts I use are pecans - I think that they have the best flavor with the fruit.