Showing posts with label dinner. Show all posts

Tuesday, February 8, 2011

Green is the New Yum

For Christmas, my husband did a super nice thing and bought me a subscription to Cooking Light.  I love this magazine!  I'm always on the lookout for good recipes that are healthy and that will not be detrimental to my current weight loss plan.  Cooking Light never fails.  The January/February edition featured so many yummy sounding recipes that I created an online recipe file to keep everything handy (I hate dealing with clipped out recipes--they're so messy!).

As we all know, Super Bowl Sunday was this past weekend.  In our family, football is something other people watch.  I don't think I have ever sat through a Super Bowl in my life, but since easy, crowd pleasing football friendly recipes were everywhere, I thought I'd get into the spirit and whip up some chili for me and the hubs.  I turned to the January/February edition of Cooking Light and found Green Chile Chili.  Wow!  This is a winner.

Not only is it easy, but it's really, really tasty.  Plus--thanks to the Cooking Light folks--it does not have a ton of calories or fat.  My Weight Watchers plan and my taste buds send major thanks to CL

Click over to Cooking Light's website for the recipe.  I'll show you the creation of the meal in progress.

First, I got my ingredients ready to go.

I browned some ground beef in my trusty Le Creuset, then I added chopped onions, chili powder and paprika, followed by garlic.  (The kitchen smelled so good at this point...and the yumminess just intensified as I cooked along!).

In went a bottle of dark beer that I let bubble and reduce down until there was almost no liquid left.

Then I added salsa verde and chopped green peppers (the green of my green chile chili), crushed tomatoes and kidney beans. Everything mingled together for a few hours, then I served it with shredded cheddar and tortilla chips.

OMG--this was so yummy and so easy...you better believe I am making this one again!

Tuesday, January 18, 2011

One Hot Dish!


Friday night I took on my first meal in 2011. I decided that I would make somehting Italian and somewhat spicey. The night before, Lydia and I had been at the meat counter in Central Market and I saw that they had loose Hot Italian Sausage and I thought about how and what I might add together to come up with a meal.

Spicey Pork Sauge and Orecchiette
1 1/2 pounds Hot Italian Sausage (removed from the casing)
3 cloves of garlic
1/2 onion diced
cooking spray
1 28oz can crushed tomatoes
1 14.5 oz can diced tomatoes
1/2 cup red wine
1/4 cup capers, rinsed
12 white mushrooms, sliced
salt and pepper to taste
1 box orecchiette
parmesan cheese to top
  1. In a large pot over medium-high heat, spray bottom of pot with cooking oil and add, garlic, onion and pork; season with salt & pepper to taste. Heat until fully cooked.
  2. Reduce heat to simmer and add tomatoes, wine, capers and mushroom. Allow to simmer for several hours; stir often.
  3. Cook orecchitte according to instructions. When cooked, pour in to a large pasta serving bowl. Add sauce on top; top with parmsan cheese.

This dish was delicious, but I fear that I was the only one that really fully enjoyed it - I love the heat and the rest of my family does not (so much). Everyone had seconds, but I still have my doubts. If I make this in the future, I would use 1/2 spicey pork and 1/2 plain pork to balance out the heat.

Overall, I was happy with the dinner and I served it with a nice loaf of french bread and a spinach salad. Everyone was grateful for the chocolate ice cream that we had for dessert - I thought that the ice cream might help with the heat too!

Tuesday, January 4, 2011

Christmas Dinner, Revisited

Right before we took our holiday break, I mention that I was planning on making Julia Child's Boeuf Bourgignon for my family for Christmas dinner.  I am happy to report that I completed the meal...and that it was freaking awesome.

I'm not going to reprint Julia's recipe...you can find in on the Internet if you are crafty (or find it in Julia's book, if you own it)...but I'll show you all the steps involved.  Nothing like looking at pictures of cooking in action to inspire the appetite!

First, I took some time to read (and re-read) Julia's recipe.  I also searched around to see how others make this famous dish.  I made a few adjustments to the original recipe...using normal bacon instead of a 6 oz. uncut chunk of the stuff as called for (I didn't have time to run around trying to find what Julia said I should use and opted for convenience over authenticity.  I don't think my final dish suffered for this.)  When I knew what needed to be done, I got all my ingredients ready to go.

Is there anything more lovely than mise en place?

I fried up the bacon then browned stew meat in the rendered bacon fat.  By the way, bacon fat is the best...is it not?

Next came veggies.

The meat went back into the Dutch oven, along with the cooked bacon and all the residual juices.  Also added were herbs, tomato paste, salt, pepper, garlic and flour.

The whole thing went into a hot oven for a few minutes.  Then I added cognac (not called for in Julia's recipe, but mentioned in others) that was lit aflame.  Once the blue flicker of alcohol-laden flame died out, I added a bottle of French red wine and beef broth.  The Dutch oven went back into the oven to allow for constant heat to work its magic.

At this point, I cooked mushrooms in butter--a combination that made my fungus-loving husband drool.  I also braised pearl onions in butter and homemade chicken stock.

When the meat was tender, the Dutch oven came out of the oven.  The stew was strained and I mixed the fork-tender beef with the buttered mushrooms and brothy onions.

The strained wine sauce simmered and reduced down before being added back to the beef and veggies, and the meal was ready for consumption.

I served the Boeuf Bourgignon over buttered egg noodles with a salad and crunchy French bread.  It was a hit.  It was the kind of meal that warms you up and leaves you fully sated.  And it's going in my "keeper" list.  If you want to make this, don't be intimidated.  It's not as difficult as you might think, and you'll be rewarded for your efforts with tender beef, succulent veggies, and a broth to die for.  Now I'm getting hungry all over again!
(Thanks to my husband for taking photos while I cooked.  His fee?  A few buttery mushrooms and several tastes of beef!)

Monday, December 13, 2010

Stove Top Chicken Casserole

What to cook for dinner tonight? This is a question that I run into often. Followed by, what do I have on hand and what can I throw together and still be yummy? In answer to these questions, I look to the freezer (to see what type of meat I have on hand) and to the pantry (to see what canned/boxed goods are available). Throughout the years, there has been a staple that is usually handy, tasty, and a crowd pleaser - Stove Top Stuffing!

I use the Stove Top Stuffing to top casseroles and also add some seasoning to dishes. The nice thing about this casserole is that you really can make it with whatever you have available. The basics are Stove Top Stuffing, butter/margarine, cream of mushroom (or any cream of soup), meat/vegetables, cheese (if you please), and liquid (wine, water or broth). The following is a very loose recipe for the dish. Feel free to add/subtract whatever you like!

Stove Top Chicken Casserole

4 chicken breasts, boned and cut into chuncks
1 onion, chopped
4 cloves garlic, chopped
salt & pepper to taste
1/2 cup Marsala wine (or chicken broth, or white wine, or water)
1 can cream of mushroom soup
12 mushrooms, sliced
1/4 cup frozen peas
1/4 cup frozen corn
1 cup cheddar cheese, shredded
1 box Chicken flavored Stove Top Stuffing (I prefer low sodium)
10-12 pats of butter

In a large pot, heat some cooking oil (~ 1 tablespoon) over medium-high heat. Add garlic, onions and chicken and cook unitl the chicken is no longer pink; season with salt & pepper. Turn down the heat to simmer-low and add the wine. Let simmer for 10 minutes. Remove from heat and add the soup and vegetables; mix well. Preheat the oven to 350 degrees. Transfer the meat mixture to a greased casserole dish. Top with cheese. Add the stuffing over the cheese and finally top with butter (place the butter evenly all over the top of the stuffing). Place casserole in preheated oven and cook until bubbly (about 30-40 minutes). Remove from oven, let stand for 5 minutes and serve with a salad.

Tuesday, November 30, 2010

Fancy Comfort Food

Lately my husband and I have been spending our weekends in.  It's been so nice to hang around the house with no real need to adhere to an agenda.  Time at home has also afforded me with ample opportunity to cook.  I've made a few big dishes lately, but one of my favorites has been Coq Au Vin...chicken in wine.

My mother used to make Coq Au Vin when I was a little kid.  I liked it so much that I had her make it for my birthday dinner one year.  It's a meal that I have great memories of, though I haven't had it in years.  After picking up a decent (but not exceptional) frozen Coq Au Vin from Trader Joe's, I decided to break down and make it myself.

I'm so glad I did! 

The final product turned out better than my memories.  The chicken was tender and flavorful, the sauce was thick and perfect, and the mushrooms and onions rounded things out nicely.  I served my Coq Au Vin over hot, buttered egg noodles with a salad and (of course!) crunchy French bread.

After reading both Julia Child's recipe and the recipe in The Joy of Cooking, I went with the later.  Both recipes were very similar, but The Joy of Cooking won out because I wanted more onions and carrots.  There are a million ways to make Coq Au Vin, and there are a number of wines you can use (I may try this with a Riesling in the springtime for a lighter dish), but The Joy of Cooking recipe was easy to follow and didn't require hours upon hours of cooking. Since everyone has (or should have!) a copy of The Joy of Cooking, I'm not going to type out the recipe.  Just flip open your book and get cooking!  Here's what mine looked like in the end:


If you make this (and you should!) let me know how it went!

Monday, November 29, 2010

Thanksgiving Success!

I survived making my very first Thanksgiving dinner for my family!  Here are some highlight's from last week's feast:

My 13 pound turkey was yummy!  I followed an easy recipe from Ina Garten and--though the cooking time was more like 3 hours, not 2 1/2 like Ina said--the turkey turned out great.  No brining or basting required! 

My husband and father carved up the bird using the handy dandy electric knife.  I really prefer the thick chunks of breast meat to the traditional thin slices.  The meat seemed more moist, stayed warmer, and felt more substantial.

I went 2 for 3 with my side dishes. 

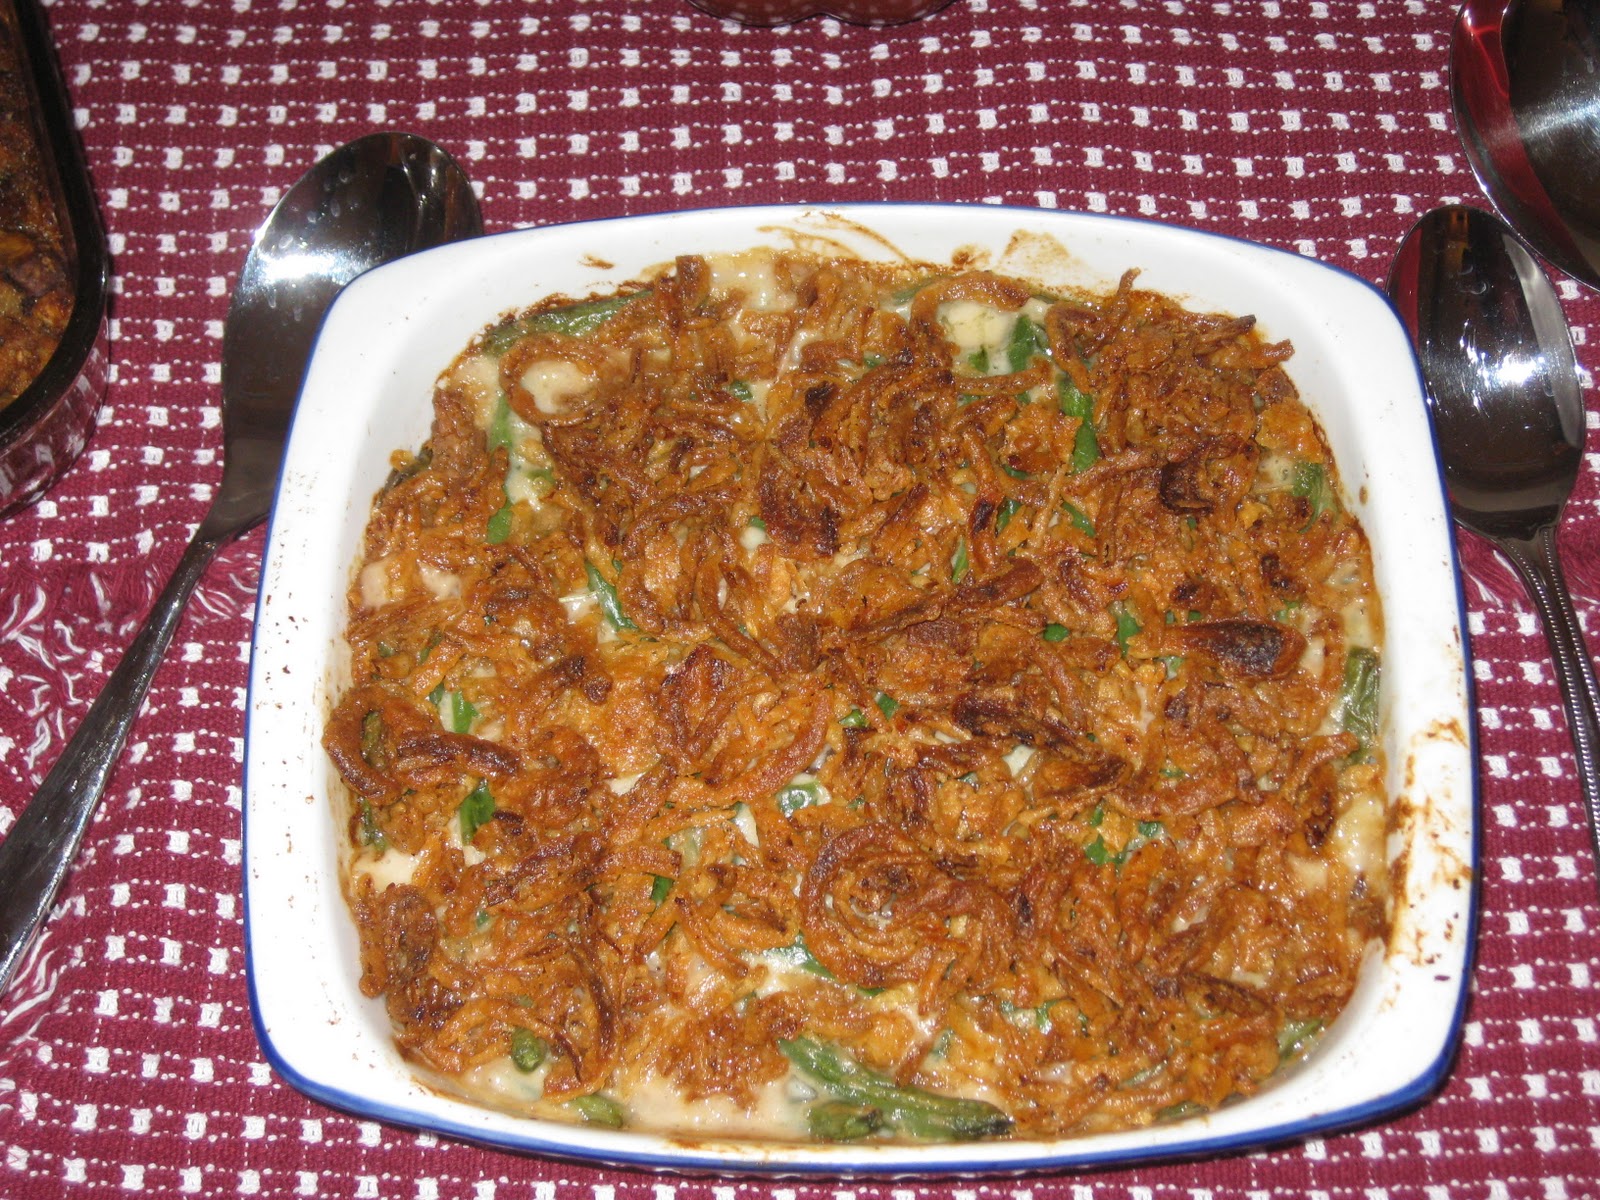
The classic green bean casserole (yes, from Campbell's!) was predictable but good (the Mister loves this dish!).  There's something so wrong and wonderful about those damn French Fried onions!

The stuffing was AMAZING.  I've never made stuffing before, so I just threw everything in and hoped for the best.  I wanted to appease the people who like "inside the bird" stuffing (because I did not stuff my bird when I cooked it) and those of us who prefer outside the bird stuffing.  I think my stuffing was a satisfying mix of moist and crunchy goodness.  (My "recipe" is at the end of this post.)

The smashed sweet potato casserole was a flop.  The recipe was also from Ina, the rare TV cook that usually has good cooking ideas...but this one was a miss.  My husband was the only one who liked it.  It was too nutmeg-y for me and Greta said it reminded her of soap.  Yup...that's a FAIL.  If I were to try this again, I'd steer clear of the stupid nutmeg.  Lesson learned!

The other sides for the night were easy: a can of cranberry sauce (yes, a can!  We love the open and slice approach to cranberry goodness), sauerkraut (it's not Thanksgiving without it!), and gravy.  Mom helped me out with the gravy, and it turned out delicious as always.

Desserts were also kick ass!  Greta made pumpkin pie (with a little help from Mom, who makes the world's best pie crust), I made Chocolate Guinness Cake (a cake I'm inexplicably sick of), and I also had some mincemeat tarts from Cost Plus World Market.

Overall it was a very good meal and a happy Thanksgiving.  Oh, and before I forget, here's how I made my stuffing.  I didn't really have a single recipe that I followed, but it turned out super yummy. From reading many different stuffing recipes, I figured out that the most important thing was to make sure my stuffing had a lot of moisture.  I'm currently doing the Weight Watchers program, and I don't usually eat this much rich yumminess, but it's Thanksgiving...why not break out multiple sticks of butter?  This is not a recipe for calorie counters, but so be it. 

Lydia's "How the Hell Do You Make Stuffing?" Stuffing
  • 1 pound breakfast sausage (I used the unseasoned "original" kind from Jimmy Dean because Greta hates sage.  Use whatever you want!  Even Italian sausage would work here.)
  • 1/2 stick butter (1/4 cup)
  • 3 stalks of celery, chopped
  • 1 onion, chopped
  • 2-3 cloves of garlic, minced
  • 8 oz. sliced crimini mushrooms
  • 14 oz. package of cubed stuffing (I used Safeway brand because I'm cheap.  I also opted for the unseasoned variety because of the sage-hater.  If you have homemade bread cubes, use that)
  • fresh parsley, chopped (to taste--I probably used 1/4 cup or so)
  • To taste: 
    • Kosher salt
    • Fresh cracked black pepper
    • Dried thyme
    • Dried marjoram 
    • Dried rosemary
  • 2 1/2 to 3 cups chicken stock (I used my homemade stock)
  • 1/2 cup melted butter
Brown sausage in a hot pan, breaking it up into small pieces.  When cooked through, place sausage on paper towel lined plate to drain a bit. Pour out excess grease from the pan.

In the same pan, melt 1/2 stick of butter over medium high heat.  Add the celery, onion and garlic.  Cook a few minutes then add the mushrooms.  Cook and stir well to get all the browned bits on the bottom of the pan up and mixed into the veggies.  Add a few pinches of salt and pepper to this mixture and cook until veggies are soft.

In a large bowl, combine cooked sausage and cooked veggies.  Stir well to mix.  Add cubed bread to the bowl and toss well to combine.  Add parsley and seasonings, stirring well.  (I spent a lot of time stirring and adding to make sure the entire mixture was well seasoned.)  Pour in chicken stock and stir to moisten.  Place mixed stuffing in a large casserole dish sprayed with Pam. 

You can either cook the stuffing right away or put it in the fridge and let it sit overnight, to be cooked the next day.  Before you put the stuffing in the oven, pour the melted butter over the top of the casserole.  Bake at 350 until heated through...about 45 minutes or so.

Tuesday, November 16, 2010

A Chicken in Every Pot!

I only snapped one photo before this delicious, moist, crisp-skinned chicken was devoured!
Lately I've been getting in the habit of cooking a big meal on Saturday nights.  This past Saturday, I felt like roasting a chicken.  Really...is there anything better than roasted chicken (and, of course, crispy chicken skin!)?

There are a million recipes and techniques out there for roasting a chicken.  Some call for starting out with a super hot oven, others have you flip the chicken from side to side throughout cooking, others say to just throw the chicken in the oven as is.  After reading over a dozen different ways to cook a chicken, I settled on this super easy recipe from everyone's favorite, Martha Stewart...and I must say, I picked the right recipe.  It was a snap to make and it produced chicken that was flavorful, moist, and delicious!

MARTHA'S PERFECT ROASTED CHICKEN
  • 1 six-pound roasting chicken
  • 1 tablespoon unsalted butter
  • Salt and freshly ground black pepper
  • 2 medium onions, peeled and sliced crosswise 1/2 inch thick
  • 1 lemon
  • 3 large cloves garlic, peeled
  • 4 sprigs fresh thyme
1. Let chicken and 1 tablespoon butter stand at room temperature for 30 minutes. Preheat oven to 425 degrees. Remove and discard the plastic pop-up timer from chicken if there is one. Remove the giblets and excess fat from the chicken cavity. Rinse chicken inside and out under cold running water. Dry chicken thoroughly with paper towels. Tuck the wing tips under the body. Sprinkle the cavity of the chicken liberally with salt and pepper, and set aside.

2. In the center of a heavy-duty roasting pan, place onion slices in two rows, touching. Place the palm of your hand on top of lemon and, pressing down, roll lemon back and forth several times. This softens the lemon and allows the juice to flow more freely. Pierce entire surface of lemon with a fork. Using the side of a large knife, gently press on garlic cloves to open slightly. Insert garlic cloves, thyme sprigs, and lemon into cavity. Place chicken in pan, on onion slices. Cut about 18 inches of kitchen twine, bring chicken legs forward, cross them, and tie together.

3. Spread the softened butter over entire surface of chicken, and sprinkle liberally with salt and pepper. Place in the oven, and roast until skin is deep golden brown and crisp and the juices run clear when pierced, about 1 1/2 hours. When chicken seems done, insert an instant-read thermometer into the breast, then the thigh. The breast temperature should read 180 degrees.and the thigh 190 degrees.

4. Remove chicken from oven, and transfer to a cutting board with a well. Let chicken stand 10 to 15 minutes so the juices settle. Use the pan juices to make gravy, as you prefer. Untie the legs, and remove and discard garlic, thyme, and lemon. Carve, and serve gravy on the side.

I didn't love Martha's gravy technique, and instead called upon my trusty Joy of Cooking to make a super yummy, rich, deep brown gravy with leftover pan juices, wine, broth, butter, flour, and (here's a tip) a few drops of lemon.  The lemon juice and wine really added some much needed acidity to the mix.  Here's an embarrassing fact: before Saturday, I had never made gravy.  Lame, right?  But now that I have, it's not a problem.

If you make Martha's Perfect Roasted Chicken, be sure to keep and serve the onions that get cooked (and burnt!) in the roasting pan.  They sit under the chicken, soaking up all the flavor and juices from the roast.  The onions became almost like an onion jam, and were a huge source of flavor.  In Martha's recipe, she says to throw them away.  Really, Martha?  Ditch all that lovely flavor?  You're crazy!

This was sort of a dry run for Thanksgiving dinner...a delicious dry run!

Sticking With Tradition

As I mentioned last week, I gave my family several options for dinner on Thanksgiving.  I let the family vote, and--despite saying earlier that they didn't want a turkey--the family has chosen to stick with tradition.  So...just like millions of OTHER Americans, I'll be making turkey, stuffing, gravy, etc. on November 25th.  Turkey wouldn't have been my first choice, but the people have spoken.

Gobble, gobble!

Wednesday, October 13, 2010

Pot Full of Yummy!

Last week I told you about a book my husband gave me, Glorious One Pot Meals.  I pulled it off my cookbook shelf recently for two reasons: 1) it's getting cooler so I want to eat heartier foods; and 2) I've been trying to cook at home on the weekends more often to save money and because it can be a hassle to go out over and over again.

I'm cooking my way through this book and thought I'd share one of the recipes, Chicken Marsala.  I'm not giving you the exact recipe in the book--instead, I'm giving you what I did to whip this up.  It's a super fast one pot meal, perfect for two people.  It can be easily adapted, so have fun with it if you decide to give it a try.


One Pot Chicken, Marsala Style

PAM, or olive oil spray
1 shallot, sliced fine
3-4 cloves of garlic, minced
1 cup rice (use any kind you like--I've done this with normal white rice and arborio rice)
1/2 cup chicken broth
1/2 cup marsala
1/2 tsp. red pepper flakes
1/4 tsp. ground fennel (optional)
2 boneless, skinless chicken breasts
Sea salt and pepper to taste
1 small zucchini, cut into circles and then in fourths
Mushrooms--about 16 oz., give or take--any kind you like (baby bellas, shiitake, etc.)
3 sprigs, fresh thyme

Ready for the oven!
Directions
  1. Preheat oven to 450.  Spray the inside and inner top of a two-quart dutch oven.
  2. Scatter sliced shallots and half the garlic on the bottom of the dutch oven.
  3. Add the rice to the dutch oven in an even layer.
  4. Mix together broth, marsala, red pepper flakes, fennel and remaining garlic.  Stir, then pour half of this mixture over the rice.
  5. Season the chicken lightly with sea salt and pepper.  Place the breasts on top of the rice (do not overlap).
  6. Pour the remaining liquid over the chicken.
  7. Scatter mushrooms and zucchini over the chicken.  Tuck the sprigs of thyme into the mushrooms.
  8. Cover and cook in the preheated oven for 45 minutes.
  9. Remove thyme sprigs and serve immediately.
All cooked up and ready to serve!
NOTES:
  • Unlike normal marsala chicken, you do not get any sauce out of this dish.  What you do get is perfectly cooked, moist chicken and rice that is infused with the flavors of a traditional marsala.
  • If you want, you can substitute the rice for couscous.
  • If you don't have any zucchini, try another squash.  You can also add carrots to the mix if you want.
  • Instead of thyme, try rosemary for a heartier taste.
  • The possibilities are endless!

Monday, October 11, 2010

Mom's Artichoke Chicken

A few weeks ago my Mom was rummaging through her pantry in hopes of finding inspiration for a chicken dish. She found a can of artichoke hearts and then she turned her attention to recipes and how to make use of them. What she found was a recipe in the Southern Living Cookbook for Baked Chicken and Artichoke Hearts - it was delicious and I would happily eat this again, often. Here is the recipe.


Baked Chicken and Artichoke Hearts
6 chicken breast halves, skinned and boned
1/2 teaspoon salt
1/2 teaspoon paprika
1/4 teaspoon pepper
1/4 cup butter, melted
1 (14 ounce) can artichoke hearts, drained and halved
1/4 pound fresh mushrooms, sliced
2 tablespoons all-purpose flour
2/3 cup canned diluted chicken broth
3 tablespoons dry sherry (Mom used Marsala)
  • Sprinkle chicken with salt, paprika, and pepper. Brown chicken in butter over low heat; transfer to a lightly greased shallow 2-quart casserole, reserving drippings in skillet. Arrange artichoke hearts between chicken breasts.
  • Saute mushrooms in reserved drippings 4 to 5 minutes. Stir in flour, and cook 1 minute. Gradually add chicken broth and sherry; cook over medium heat, stirring constantly, until mixture is thickened and bubbly. Pour over chicken and artichokes. Cover and bake at 375 degrees for 40 minutes.
This was a really good dish! Mom served it with rice and green beans & toasted almond slices. It was very much a comfort food dish and I would recommend it for a yummy take on chicken. Thank you Mom and Southern Living!

Monday, October 4, 2010

Cookbook Corner: Glorious One Pot Meals

Now that fall is officially here, it's time to change how we're cooking.  To hell with grilling and making more delicate foods...it's time to cook (and eat) more hearty dishes, like pot roast, stews, and chili.  One problem with this (for me!) is that one pot meals generally make enough food to feed an army.  When I cook, it's just for me and my husband.  Thankfully, Glorious One-Pot Meals includes tons of tasty, hearty recipes designed for two.  Yay!

What to expect: This is sort of an appliance cookbook because all the recipes require the use of a small cast iron Dutch oven.  All the recipes are for two people, but they can be easily double, tripled, etc.--especially if you have a larger Dutch oven.  I have a small, two-quart Le Creuset Dutch oven that is the perfect size for these recipes.

All the recipes are full meals--they include a protein, a carb, and veggies.  They're easy and quick to make, and, best of all, they're all very healthy (the author rarely uses butter or oils).  If you have a family or are just a very busy person, this book will help you put a tasty (and healthy) meal on the table in less than an hour.

Best recipes: I think of the recipes as a springboard--you can swap out meats, veggies, and carbs to your taste.  That said, here are a few of the standouts:

  • Shrimp Masala with Rice, pg. 78
  • Adobo Pork, pg. 82
  • Beef with Sherried Mushroom Sauce, pg. 88
  • Chicken Marsala, pg. 126
  • Rosemary Chicken, pg. 150
  • Eggplant Parmesan, pg, 172
Complaints: The recipes tend to be repetitive, and I kinda sorta wish there was a dessert section (come on! You can totally whip up some sort of ooey-gooey dessert in a Le Creuset pot!).  Other than that, I think this book inspires you to create you own combinations of grains, meat, and veggies to cook up in 45 minutes in the oven.


Deliciousness scale: 4 spoonfuls of yum out of 5.

Details: This review is based on the 2009 edition of Glorious One-Pot Meals by Elizabeth Yarnell; ISBN 978-0767930109

Monday, September 13, 2010

The Teriyaki of Our Discontent

Teriyaki: It's What's For Dinner (on Monday night).
Now that the school year is officially underway, my workload has increased and my schedule is back to “work normal.” This means that I have to work late the first two Mondays of every month. I don’t get home until 6:30 at the earliest, and after pulling a longer than normal day (and sitting through an agonizing meeting) the last thing I want to do is make dinner.

So what’s a girl to do?

Pick up teriyaki, that’s what!

Now, I don’t have any problems with teriyaki in general. It’s a very decent carry-in. It’s just rice and meat, and it’s served up fast. But for me, teriyaki for dinner means I’ve had a long day, that I’ve had to suffer through an extended day at the office (and that’s never a good thing).

Nasty Teriyaki Salad (this usually goes right into the trash)
So for me, Monday nights taste like sweet teriyaki sauce mixed with special blend of stress, apprehension, and work dissatisfaction.

Yummy?

Wednesday, September 8, 2010

Monday Night Pot Luck

Continuing with the tradition of Monday night meals at work, on Labor Day we had Slow Cooker Beef Stroganoff over noodles, steamed (microwaved) green beans, bread (for all the sauce) and Cherry Pineapple Dump Cake. I would love to claim credit for this meal, but it was the brain-child of my coworker, Jamie and it was delicious.

Here are the recipes for the stroganoff and cake. As you can see, both do not require many ingredients and were really yummy! FYI - my crappy pictures do not do either of these dishes justice.

Beef Stroganoff

Ingredients
1 pound cubed beef stew meat
1 (10.75 ounce) can condensed mushroom soup
1/2 cup chopped onion
1 tablespoon Worcestershire sauce
1/4 cup water
4 ounces cream cheese

Directions
In a slow cooker, combine the meat, soup, onion, Worcestershire sauce and water. Cook on low setting for 8 hours or on high setting for about 5 hours. Stir in cream cheese just before serving.

Cherry Pineapple Dump Cake

Ingredients
1 can (16 ounce) crushed pineapple
1 can (30 ounce) cherry pie filling
1 package yellow cake mix
1 cup butter
Optional: 1/2 to 2/3 cup chopped nuts

Directions
Grease a 9 x 13 inch pan. Dump in the pineapple and juice, spreading evenly. Pour cherry pie filling over the pineapple, spreading evenly. Add dry cake mix evenly over the fruit. Add nuts, then slice butter and lay all over the top. Do not mix. Bake in a 325 degree oven for 50 - 55 minutes.

Both of these dishes were really good! The cake would go great with coffee, as the sugars in it make a nice crunchy crust that would melt in your mouth with a hot cup of joe. We had the stroganoff over noodles and Jamie and I both thought that adding a little Marsala and extra mushrooms to the recipe would really make this even more mouth-watering.

Tuesday, September 7, 2010

Hotter Than Hell!

The other day I was puttering around the kitchen, trying to figure out what to cook for dinner.  I dug through my pantry and fridge and found a bottle of simmer sauce I picked up from Cost Plus World Market during one of my visits there.  It was a Vindaloo sauce, very low in calories, and I thought I'd whip up a tasty, quick dinner.

I swirled a tiny bit of oil in my skillet and added some cubed up pieces of chicken breast.  I let that cook then added onions, zucchini, and mushrooms.  Once everything was cooked nicely I poured in the Vindaloo sauce.  It was beautiful!  It smelled amazing and looked good.  I let the sauce, chicken and veggies cook together so the sauce thickened up a tad.  I couldn't wait to eat!

I put a bed of rice in the center of my plate, topped it with the Chicken and Veggie Vindaloo and sat down to eat.  I took one bite and WOW!  I thought my head was going to explode.  It was insanely hot!

What I failed to notice on the bottle of Vindaloo sauce were those three evil little peppers.  Now, I can handle some spice, but this?  It was way too much!  I sucked down a forkful of rice and tried a few more bites of my meal.  Big mistake!  My mouth was on fire and the heat seemed to intensify as I sat there and tried to eat.  Out of desperation, I gulped down a glass of milk to cool things off. 

My poor husband can't tolerate spicy foods well (he's a big baby), so I put the remaining rice and Chicken and Veggie Vindaloo in a tupperware container and gave it to the only person I know who would eat it: My sister.  Turns out that was a good move--she loved it and thought it was spicy but not too hot to eat.  Apparently she inherited some sort of asbestos tastebuds or something.

Overall: this Vindaloo sauce was a huge disappointment.  I wish it had been a few degrees cooler because it looked, smelled and tasted so good.  Maybe I could have stirred in some yogurt to cool it off...who knows.  Oh well...you can't win them all!

Thursday, September 2, 2010

Success!


I mentioned last week that I was on the hunt for the perfect Shrimp and Grits recipe.  I failed to mention that I was also looking for a relatively low fat, low calorie Shrimp and Grits recipe.  My first attempt tasted good, but the shrimp were overcooked.  And overcooked shrimp do not meet the standards of "Deliciousness of Yum."  While searching for recipes and obsessively thinking about making a better, healthy Shrimp and Grits, I stumbled onto Cooking Light's website...and found Shrimp and Grits nirvana.
I made this dish for the whole family and the entire casserole was devoured.  It turned out creamy and cheesy and the shrimp were not overdone.  Yay!  As a bonus, this recipe is a snap to prepare.  So let's review: this tastes good, is relatively healthy, and easy to make.  This might just be a perfect meal!

Here's the original recipe from Cooking Light:

Shrimp and Grits Casserole
Ingredients

  • 2 cups 2% reduced-fat milk
  • 3/4 cup fat-free, less-sodium chicken broth
  • 1 cup uncooked quick-cooking grits
  • 1/4 teaspoon salt
  • 1/2 cup (2 ounces) shredded Parmesan cheese
  • 2 tablespoons butter
  • 1 (3-ounce) package 1/3-less-fat cream cheese
  • 3 tablespoons chopped fresh flat-leaf parsley
  • 1 tablespoon chopped fresh chives
  • 1 tablespoon fresh lemon juice
  • 2 large egg whites
  • 1 pound peeled and deveined medium shrimp, coarsely chopped
  • Cooking spray
  • Hot pepper sauce (optional)
Preparation

  1. Preheat oven to 375°.
  2. Combine milk and broth in a medium heavy saucepan; bring to a boil. Gradually add grits and salt to pan, stirring constantly with a whisk. Cook 5 minutes or until thick, stirring constantly. Remove from heat. Stir in Parmesan, butter, and cream cheese. Stir in parsley and next 4 ingredients (through shrimp). Spoon mixture into an 11 x 7–inch baking dish coated with cooking spray. Bake at 375° for 25 minutes or until set. Serve with hot pepper sauce, if desired.
VARIATION
Before making this, I read the reviews.  People seemed to be missing heat and seasoning from this dish.  To rectify this, I gave my shrimp a liberal dose of Slap Ya Mama cajun seasoning.  This gave my finished dish a nice hit of heat and added some authentic flavor to everything.  Use what you have on hand...since I'm a Maryland girl by birth, I could see seasoning the shrimp with Old Bay.

If you're not concerned about caloric content, you could go ahead and use full fat cream cheese, though I didn't find the skinny version to be lacking in any way, shape, or form.

I hope you try this one out--it rocks!

Monday, August 30, 2010

Easy Meal: Chicken Curry

Some of my favorite meals are ones that you put in a big pot, place on simmer, walk away and eat a few hours later. Chicken curry is one of those dishes! You can pretty much use what ever you have on hand and end up with a dish that is both delicious and easy and if you manage to have leftovers, heat up well and taste even better the next day.

Ingredients:
2 tablespoons curry paste
1 tablespoon peanut or vegetable oil
4 chicken breasts, skinned and boned
1 can coconut milk
1/2 cup chicken broth
1 onion, chopped
1 carrot, sliced (I use shredded carrot about 1/2 cup)
6-8 mushrooms
1 zucchini, chopped
salt & pepper to taste
1/4 cup cashews, toasted and chopped

Directions:
  • In a large, heavy pot over medium-high heat, add the oil and chicken. Once the chicken is cooked, add the curry paste and stir well. To the chicken, add the onions and carrots and cook until translucent.
  • Turn down the heat to simmer and add the coconut milk and chicken broth; stir well. Cover and allow to simmer at least 1 hour; stir occasionally.
  • One half hour prior to serving, add the mushrooms and zucchini and allow to simmer.
  • When ready to eat, serve over rice and top with some of the chopped cashews.
I cheat and use a curry base from A Taste of Thai - you can find this right in the grocery store and their products are really good! You can multiple meals out of the curry pouch too and the leftover paste can be stored in the refrigerator.

Tuesday, August 24, 2010

Obsession...

Do you ever get obsessed with a recipe?  Have you ever found yourself daydreaming about how to throw certain ingredients together to make your ideal meal?

I ask this because I currently find myself fixated on creating the perfect Shrimp and Grits recipe.  Weird, right?  Especially because I'm not a Southern gal and I'm not the world's biggest fan of grits.  So what gives?   I honestly have no idea.

All this started last week.  I was hoping to whip up a quick and tasty shrimp dinner for me and my hubby last Sunday, before catching True Blood.  I found a recipe that called for instant grits...I could only find quick cooking.  The final product turned out OK...the flavors were good, but the shrimp was over-cooked thanks to my molten-lava quick cooked grits.  Oh well.

Now I'm back at the drawing board considering the recipe.  I haven't had a chance to get in the kitchen just yet, but I am fairly certain I know how to correct my mistakes from my past Shrimp and Grits attempt. 

I'll write up my final recipe (and maybe some of my outtakes!) soon enough, but before I do, I'm curious: if you've been obsessed with a recipe, what was it?  Were you able to satisfy your obsession and make the perfect dish?  How many attempts did it take?

It's funny how damn important food is to us, and how fixated you can get on flavor/texture combination!

Tuesday, August 3, 2010

Vaction Food, Part 2

In my real life, I don't get to cook much.  I've mentioned it before, but my husband has a crazy/awful work schedule (he gets home at 9:30 pm), so I don't get to cook dinners the way I'd like to.  When you have to reheat dinners, you tend to go with things that won't dry out in the microwave...argh!  The mister's schedule is the bane of my existence.

One awesome part of being on vacation was getting to actually COOK a few meals.  I even grilled a few times (that's a big deal for me since I don't own a grill, thank you very much).  Here's one of the better meals I made:

Argentine Grilled Steaks with Peppers and Onions
I found this yummy sounding steak rub called Argentine Steak Rub while wondering around Cost Plus prior to vacation.  The spice rub contains salt, pepper, onion, garlic, red pepper flakes, thyme, rosemary, and fennel.  Unlike Greta, I love fennel (side note: have you ever tried grilled fennel? OMG...so amazing!).  Since the spice rub was already mixed and ready to go, I thought this would be an easy option for vacation cooking.

I bought a packet of sirloin steaks from the grocery, rubbed them down with a generous amount of the Argentine Steak Rub and then grilled them over a hot grill.  I like my steaks bloody (red and dripping!) but the hubs prefers his meat to be more on the "done" side, so I let the steaks go a little longer than I would have if I were just cooking for myself.  I let the meat rest and then sliced it up.  I was happy that there was still some pink, even if the blood wasn't running the way I like it.  I squeezed a lime over the sliced meat and served it with tortillas, peppers, onions, and guacamole.

I love fajitas--the combo of onions, peppers, and meat can't be beat!  So to add to my dinner, I sauteed some red, yellow and orange peppers with a Walla Walla sweet onion in olive oil.  I threw in garlic, salt, pepper, and a tiny bit of sugar to the peppers/onions and let them get good and cooked.  Nothing is better than caramelized onions and peppers!  I usually add thyme to my onions and peppers, but I wanted to keep things simple since I knew the meat was going to add all the herbs and spices I needed.

I also smooshed up an avocado together with a few cloves of garlic, a few scoops of already-made (store bought) salsa, and the juice of a lime.  I've been craving guacamole ever since my molcajete experiment, so I did a quick and easy version to satisfy my culinary urges.  Let me say this right now: I am freaking awesome with an avocado!  Though my quick guac paled in comparison to the real deal I made recently, it was fresh and yummy.  I even got my husband to try some and he actually liked it (this is a big damn deal!).

To finish the dinner off, I threw some tortillas in foil and tossed it onto the grill.  The bottom tortilla got slightly burnt by the grill, but this was a happy accident.  We used it to scoop up the guac when we were done with dinner, and I swear--that was better than any dessert I could have whipped up!
Burnt tortillas & guac--a happy accident!
Even though I had to cook and my poor (but well-fed) husband had to clean, this was one of the best meals we had all vacation.  I still have no plans to buy a grill, but I could get similar results on my grill pan, in the dead of winter when I need to conjure up some summertime memories.