Thursday, April 29, 2010

Rice Noodles with Soy Sauce, Chinese Broccoli, and Beef

Kwaytiow Paht Si-Yu

To complete the meal, I decided to make rice noodles with soy sauce, Chinese broccoli, and beef. Again, I used Nancie McDermott's Real Thai - The Best of Thailand's Regional Cooking for the recipe.

Here is the recipe for Kwaytiow Paht Si-Yu:
2 tablespoons dark sweet soy sauce or 2 tablespoons dark soy sauce and 1 tablespoon molasses or sugar
1 tablespoon fish sauce1/2 teaspoon freshly ground black pepper
3 to 4 tablespoons vegetable oil
1 tablespoon coarsely chopped garlic4 cups Chinese broccoli, cut into 2-inch by 1-inch strips, or 3 cups small broccoli florets
1/2 pound flank steak, thinly sliced across the grain in strips 2-inches by 1-inch
1 pound soft, fresh flat rice noodle sheets, cut lengthwise into strips 1-inch wide
2 eggs, lightly beaten
  • Combine the soy sauce, fish sauce, and pepper in a small bowl and set aside.
  • Heat wok over medium-high heat. Add 2 tablespoons of the oil and swirl to coat the surface. When the oil is very hot, drop a piece of the garlic into the pan. If it sizzles immediately, the oil is ready. Add the garlic and toss until it begins to turn golden, about 15 seconds. Add the Chinese broccoli and stir-fry until tender, bright green, and shiny, about 2 minutes. Remove from the pan to a platter.
  • Add a little more oil to the wok, swirl to coat, and heat for 15 seconds. Add the beef and stir-fry until it is no longer pink, about 2 minutes. Remove from the pan to the platter with the broccoli.
  • Add about 1 tablespoon of oil to the wok and heat for 15 seconds. Add the noodles and toss until separated and heated through. Push the noodles to one side of the wok. Put 2 teaspoons of oil into the center of the wok and add the eggs. Cook without stirring for about 30 seconds. Scoop and toss everything gently, scrambling the eggs and mixing the ingredients together.
  • Add the soy sauce mixture and the reserved beef and broccoli and stir-fry until the noodles, meat, and vegetables are lightly coated with sauce, about 1 minute. Transfer to a heated platter and serve at once with small bowls of sauce.
Serves 4.

Of all the dishes that I made, this one presented me with the most challenges. I could not find fresh noodles to save my life! I ended up using wide, rice stick noodles. So before I added them to the wok, I first put them in a very large bowl, covered them with warm water and let them sit for about 30-45 minutes. I also used tamari + sugar for my soy sauce and regular broccoli florets from the grocery store.

The dish was pretty easy to make and cooked up fairly fast (minus the prep time for the noodles). I was a bit disappointed with the dish though. I found it to be rather bland and ended up adding lots of the sweet-chili sauce to it for more flavor (it definitely needed more sauce). I think in the future, I will reduce the amount of noodles and add more sauce. This made more than 4 servings, I think due to the noodles and was also hard to mix together in the wok (maybe I need a bigger wok?).

All-in-all, I am pretty happy with my attempts at Thai cooking! I would love to make the satay sometime and would also love to make a noodle dish with peanut sauce or even a delicious Rama! I really loved the sweet-chili sauce and thought that it accompanied the meal fantastically!

Thank you Nancie McDermott for your tasty recipes!

Wednesday, April 28, 2010

Fried Spring Rolls

Boh Biah Tote (uncooked spring rolls)

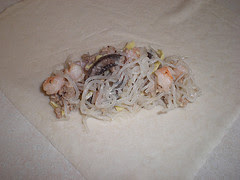
Next up in my attempts at making a delicious Thai dinner were fried spring rolls. I actually made these over 2 days. The day before I served them, I made the filling and the day of I rolled them, fried them, and ate them!

The following is taken from from Nancie McDermott's Real Thai - The Best of Thailand's Regional Cooking. Here is the recipe for Boh Biah Tote:

2 packets (2 ounces each) bean thread noodles
1 tablespoon tiny dried cloud ears
Vegetable oil for sauteing and deep-frying
2 eggs, lightly beaten2 tablespoons fish sauce
1 teaspoon freshly ground pepper
1 teaspoon sugar1 tablespoon coarsely chopped garlic
1/4 cup finely chopped shallot or onion
1/2 pound ground pork
1/2 pound shrimp, peeled, deveined, and coarsely chopped
1 package spring roll wrappers
A handful of fresh cilantro leaves
  • Place the bean thread noodles in a large bowl. cover with warm water, and soak until softened, about 30 minutes. Place cloud ears in a medium bowl, cover with warm water, and soak until softened, about 30 minutes.
  • Meanwhile, coat a small skillet with a little oil and warm for 1 minute over medium heat. Pour in one fourth of the eggs, tip the pan so that the egg covers the bottom in a thin sheet, and cook until set and opaque, less than 1 minute. Turn the egg sheet out onto a plate and repeat with the remaining eggs in 3 batches. When the sheets are cool, stack and slice into long, thin shreds. Set the shreds aside in a large bowl.
  • Drain the noodles well and dump the tangle onto a cutting board. Shape the noodles into a log and cut into 2-inch lengths. Precision doesn't count here - you're just trying to make them a little more manageable for stir-frying. Add the noodles to the bowl containing the egg shreds.
  • Drain the cloud ears and place on a cutting board. Check them over, cutting off and discarding any hard navels. Slice the cloud ears into long, thin shreds. Add them to the bowl containing the noodles and egg shreds.
  • Combine the fish sauce, pepper, ans sugar om a small bowl.
  • Heat a wok over medium-high heat. Add 1 tablespoon oil and swirl to coat the surface. When the oil is very hot, add the garlic and stir-fry until golden, about 15 seconds. Add the shallot and stir-fry until wilted. Add the pork and stir-fry until no longer pink, about 2 minutes. Add the shrimp and stir-fry until pink and opaque, about 1 minute. Add the fish sauce mixture and toss well.
  • Add the noodles, cloud ears, and egg strips and stir-fry (mixing well) for 1 to 2 minutes. The noodles will change from stiff, white, and wiry to clear, soft, and curly. As soon as they've transformed and all ingredients are well combined, turn the filling out into a large bowl and let cool to room temperature.
  • Gently separate the spring roll wrappers. Place 1 wrapper, smooth side down, on a work surface; cover the remaining wrappers with a dampened paper towel while you work. Position the wrapper with a point toward you. Place a heaping spoonful of the filling in the center half pf the diamond that is closest to you. Shape the filling into a log about 3-inches long. Fold the wrapper point closest to you up, over, and around the filling. Begin to roll the wrapper and, when you've rolled halfway to the top point, fold the right and left sides in toward the middle. Keep rolling. When you reach the top point, moisten it with water and seal the roll like an envelope. Set the roll aside on a tray with the seam side down.
  • Continue rolling until all the filling is used up. Space the rolls so that they are not touching and separate the layers with plastic wrap.
  • Pour the oil into a wok or deep, wide saucepan to a depth of 3-inches. Heat over medium heat to 350-375 degrees. Meanwhile, prepare a drain basket for the fried spring rolls by lining a colander with paper towels. Drop a tiny piece of wrapper into the wok. If it sizzles immediately, the oil is ready.
  • Carefully add a spring roll to the oil, it should sizzle and bubble at once. Add 2 more spring rolls and cook 3 at a time, turning occasionally and frying until golden brown, about 3 minutes.
  • Remove the spring rolls with a slotted spoon, hold them over the oil to drain for a few moments, and transfer to the prepared colander to drain. Place on a serving platter, garnish with cilantro, and serve with small saucers of dipping sauce.
Makes about 32 spring rolls.

These turned out great! My Dad told me that they were the best spring rolls that he has ever had and I don't think that he was being polite!

I used frozen spring roll wrappers that I got at H Mart - I was a bit leery about using these, but they were super easy and I would buy them again. The pack I got had 40 wrappers, so I had some left overs and I put a little cream cheese with curry powder, garlic and pepper in them and they were a big hit too. I could not find dried cloud ears, so I just used plain old mushrooms - I cut them in to long slices. I also cheated and used already peeled, deveined and cooked shrimp (so this cut down the cooking time buy a minute or so).

We didn't eat all 32 spring rolls, so I wrapped them in wax paper and frozen them. I took out a few the other night and heated them up in he oven (425 degrees for 20 minutes) and they were still yummy! In the future, I am going to make dessert out of the left over wrappers by adding fruit and cream cheese and chocolate sauce (kind of like a crepe).

Don't forget to make the sweet-hot garlic sauce to go with these!

See tomorrows post for Rice Noodles with Soy Sauce, Chinese Broccoli, and Beef!

Tuesday, April 27, 2010

Thai Corn Cakes & Sweet-Hot Garlic Sauce

Spring Rolls & Corn Cakes (see tomorrow's post for the spring roll recipe)

So first up was to make Thai corn cakes. We originally had these at Pen Thai in Bothell, WA as an appetizer - these are not on the menu, but be sure to ask for them if you go! I couldn't find a recipe in my cookbook, so I searched the web and found a really good website: www.realthairecipes.com.

Khao Pod Tod

Here is the recipe for Khao Pod Tod:
1 cup sweet corn kernels
1/4 cup flour
1 egg
1/4 teaspoon salt
1/4 teaspoon white pepper
1/2" vegetable oil for frying
  • In a medium sized bowl, add the corn, flour, egg, salt and pepper; mix well.
  • In a non-stick skillet, heat the oil. Add a drop a water to the oil and when it pops the oils is ready.
  • Drop the batter by rounded spoonfuls into the hot oil; press down slightly with the spoon to make a rounded, flat shape.
  • Cook on medium-high until golden brown, flip once.
  • Remove from the oil to a plate with a paper towel (to absorb some of the excess grease).
  • Serve while they are hot and crisp.
This recipe made approximately 5 cakes. I used frozen yellow corn, but you could also use fresh corn right off the cob (and that would be delicious). These turned out really well and were super easy to make! The next time I make these, I will double the amount of corn, flour, salt and pepper, but keep the single egg - the idea would be to make them less "eggy". If I made the original recipe, I would remove the yolk and just use the egg white.

To go with the corn cakes and the spring rolls, I made a Sweet-Hot Garlic Sauce. This was taken from the cookbook by Nancie McDermott, Real Thai - The Best of Thailand's Regional Cooking.

Nahm Jeem Gratiem

Here is the recipe for Nahm Jeem Gratiem:
1 cup sugar
1/2 cup water
1/2 cup white vinegar
2 tablespoons finely minced garlic
1 teaspoon salt
1 tablespoon chili-garlic sauce (tuong or toi sauce) or coarsely ground dried red chili
  • In a small, heavy saucepan, combine the sugar, water, vinegar, garlic, and salt.
  • Bring to a rolling boil over medium heat.
  • Stir to dissolve the sugar and salt and reduce the heat to low.
  • Simmer until the liquid reduces slightly and thickens to a light syrup, about 20 minutes.
  • Remove from heat and stir in the chili-garlic sauce; cool to room temperature.
  • Transfer the cooled sauce to a tightly sealed jar and store at room temperature for 2 to 3 days.
Makes about 1 1 /2 cups.

I love this sauce and used it on everything! I used dried red chili peppers, as I have quite a few on hand from all of my Indian cooking. Right after I made this sauce, I had my Mom taste it. She liked the flavor but found it a bit too hot for her liking. In an effort to please everyone, I made a second sauce with everything, minus the chili peppers. Instead, I added about a 1/2 cup of orange marmalade and 1 tablespoon of fresh, minced ginger. She loved it!

Tomorrow I am going to blog my attempt at fried spring rolls!

Monday, April 26, 2010

My Attempt At Thai Food

Since I recently have a little time on my hands, I decided to attempt to cook up some Thai food. I have tried in the past to make Pad Thai and had very limited success - you could eat it, but it was not restaurant quality (or even that good). So the first thing I did was find a good Thai cookbook; I got Real Thai, The Best of Thailand's Regional Cooking by Nancie McDermott. There are no pictures, but when I started looking at the recipes, they sounded good and the ingredients made me want to give it a try.

Next up was to figure out what to make and the best way to do this, thumb through the cookbook and read some recipes! The first one I came across was for fried spring rolls, then rice noodles with soy sauce, Chinese broccoli and beef, then Mussamun curry with beef, potatoes, and peanuts, next was grilled pork on skewers with cucumber salad and spicy peanut sauce, and lastly sweet-hot garlic sauce. Ok, so all of these sound really good, but might be a bit ambitious for my first attempt! I was also on the lookout for Thai corn cakes - I found them on-line at realthairecipes.com.

My final menu was:
Thai Corn Cakes (Khao Pod Tod)
Fried Spring Rolls (Boh Biah Tote) with Sweet-Hot Garlic Sauce (Nahm Jeem Gratiem)
Rice Noodles with Soy Sauce, Chinese Broccoli, and Beef (Kwaytiow Paht Si-Yu)

Before I could start to cook, I needed to get the right ingredients - so I headed off the H Mart (see Lydia's post from February 2, 2010). Bean thread noodles, rice stick noodles, fish sauce, tamari sauce (or dark soy sauce), spring roll wrappers, plus fresh ingredients like shrimp, ground pork, flank steak, shallots, garlic and ginger - yum!

Now that I got the menu down and the shopping done, it is time to cook! Check out the rest of the weeks blogs for how I did and how it was all received!

Wednesday, April 21, 2010

Sneaking In Veggies

Veggie Paste with Garlic - Marinara Base

My son is a very picky eater. During one of his doctor visits, the doctor asked him to name his favorite red food; his reply was strawberries - I was happy with that one! Then she asked what his favorite green food was. He thought long and hard (I held my breath) and finally came up with mint ice cream - sigh. Vegetables are not one of his favorite foods, although he will eat carrot sticks without too much of a fight (as long as they are not cooked). Dinner time can be full of challenges when it comes to feeding my boy!

When he was a baby, he ate anything that he was served - it was great! Then one day, he only would eat fruit, Cheerios and milk, so I had to come up with ways to sneak in veggies. What I came up with was a vegetable paste. It doesn't have the best color, but it tastes delicious and I use it in meatballs, soups, and pasta sauce. The best part is, he has no idea that he is eating veggies!

Vegetable Paste

Ingredients:
2 zucchini squashes
1 onion
1 package fresh mushrooms2 carrots
2 celery stalks
1 can chicken or vegetable broth
  • Clean and cut up all the veggies.
  • Over medium heat, add some cooking spray or vegetable oil and cook the onions until they are translucent.
  • Add all the other veggies and broth and simmer cook until the veggies are no longer firm.
  • Allow the mixture to cool, then blend or place in a food processor; blend until smooth.
  • Divide up into usable sections (you can use an ice cube tray) and freeze or use immediately.
Feel free to add any other veggies that you like! I don't add any seasoning to this, because I usually am seasoning whatever else I am adding this to (but you could always add garlic or other spices when simmering).

The picture above was taken when I made marinara sauce. I started by thawing some of the veggie paste, then I added some chopped garlic. The veggie paste in the sauce also helped thicken it a bit and added lots of good flavor too!

Marinara with Veggie Paste Hidden

The sauce turned out great and he never knew that it was full of dreaded vegetables!

Tuesday, April 20, 2010

Would a Mayo By Any Other Name Taste as Mayo-y?

I've been too busy to cook lately, and to be honest, I'm not entirely sure what I've been eating. Since I don't have much in the way of recipes to share this week, I thought I'd focus on shopping.

When it comes to buying food at the grocery store, I always tend to gravitate towards certain brands. I have my favorites, as I'm sure you do. The funny thing about having favorite brands is that I get pretty snobbish about my purchases. I'd rather pay full price for what I really want than save a few pennies on a cheap imitation. And I also tend to think that if you don't like my brand, then it's obvious that you're lacking in the taste department (told you I was snobbish).

So here you have it: Lydia's favorite brands, by item:

Mayonnaise: Hands down--Best Foods (or Hellmans if you're on the East Coast). I like the regular and low-fat versions of Best Foods mayo, and could probably tolerate other brands (like Kraft). But never, ever, ever serve me Miracle Whip. What is that junk anyway? It's not good.

Butter: I'm not as passionate about any particular butter brands (though I tend to favor Land O'Lakes), but here's the deal: I never buy margarine. If you're going to use butter, use the real thing. I'll bend the rules and use the easy-to-spread Land O'Lakes spreadable butter with canola oil, but really? The real deal is so much better.
Link
Sour Cream: Daisy. All the way. It's creamier and oh-so much better than the grocery store brand. Plus the annoying "Do a dollop of Daisy" jingle gets stuck in my head and makes me laugh.

Yogurt: I eat Tillamook yogurt almost every day for breakfast--not because I like it, but because it's easy. If I want to indulge myself or if I am cooking, I use Greek yogurt, especially from Fage. Their Greek yogurt with honey is so sinfully rich and good.

Cookies: I don't like boxed cookies as a rule. My only exceptions are Girl Scout Thin Mints and Tagalongs...and an occasional Oreo here or there. But my husband? Now he's a cookie fiend. And for him, there is none better than Chips Ahoy. I tried buying him the store brand once...yeah, that'll never happen again!

Bacon: I go back and forth on thick vs. regular bacon, but I almost always buy my bacon from Farmland Foods. I'm not big on Oscar Mayer bacon--it seems to be missing some flavor.

Cheddar Cheese: I lived in Vermont for awhile, so I have to say Cabot's Cheddar (and other products) are my sentimental favorite. But since I'm living in Washington state now, I use a lot of Tillamook Cheddar. And if you're in the market for already shredded cheddar, the Tillamook Classic Cheddar Blend actually tastes like Cheddar cheese (unlike the Kraft or store brands that taste like...nothing).

Peanut Butter: Here's a case where I almost don't care what I'm using as long as it isn't Adam's. I loathe the taste, texture, and layer of oil found in natural peanut butter. I know it sounds bad, but give me the processed stuff, whether it's Skippy or Jif!

Pop (or Soda): If you're going to drink sugar-laced crap, there's nothing better than a nice cold Coke Classic. Don't give me a diet soda (the fake sugar is disgusting), and don't make me settle for a Pepsi. There is a difference, and I'm a Coke girl.

What are your favorite food brands? Leave me a comment if I missed anything (or if you disagree and you happen to think Miracle Whip is the bomb).

Monday, April 19, 2010

Indian Comfort Food

The other night I decided to make dinner for the family. I wanted something relatively easy, something everyone would eat, and something that would not take all day to make. I started looking through all my cookbooks and I ended up looking at my favorite Indian cookbook by Madhur Jaffrey and found chicken with tomatoes and garam masala (Timatar murghi). This dish fit the bill for everything, plus I had almost all of the ingredients that I would need to make this!

Ingredients
:
5 tablespoons vegetable oil
3/4 teaspoon cumin seeds
1 inch cinnamon stick
6 cardamon pods
2 bay leaves
1/4 teaspoon peppercorns
2 medium onions, peeled and finely chopped
6-7 cloves garlic, peeled and finely chopped1 inch cube fresh ginger, peeled and finely chopped
6 medium tomatoes, peeled and finely chopped
3 lbs chicken pieces, skinned
1 1/2 teaspoon salt
1/8 - 1/2 teaspoon cayenne pepper
1/2 teaspoon garam masala

Put the oil in a large, wide pot and set over medium-high heat. When hot, put in the cumin seeds, cinnamon, cardamon pods, bay leaves, and peppercorns. Stir once and then put in the onions, garlic, and ginger. Stir this mixture until the onions pick up brown specks. Now out in the tomatoes, chicken pieces, salt, and cayenne pepper. Stir to mix and bring to a boil. Cover tightly, turn heat to low, and simmer for 25 minutes or until the chicken is tender. Stir a few times during this cooking period. Remove cover and turn up heat to medium.
Sprinkle in the garam masala and cook, stirring gently, for about 5 minutes in order to reduce the liquid in the pot somewhat.

I used 2 cans of diced tomatoes (it is what I had on hand) and I also simmered this all day long. I wanted all of the flavors to meld together. The chicken melted in your mouth and everyone really like this. It was super easy and extremely delicious. I served this over plain rice and also got some naan from Trader Joes - it was a wonderful meal and I will make it again!

Thursday, April 15, 2010

An Egg Filled Plate of Memories

I rescued my husband from Texas many years ago. Since we left the Lone Star State back in the late 1990s, we haven't ventured further south than Northern California. I can speak for my husband when I say that he really doesn't miss Texas. However, the one thing he does miss is the food.

My husband's mom is an amazing cook. She makes the best tamales in the world, and a plate of her chicken taquitos will make everything better. The other day my husband and his mom were talking and she mentioned that she made one of my hubby's childhood favorites: scrambled eggs with corn tortillas. My husband smiled as he remembered them, and I knew what I had to do: try to replicate one of my mother-in-law's recipes.

Now, eggs and tortillas are nothing new. Some call them migas. To others, they're chilaquiles (which is a super fun word to say). Whatever you call them, scrambled eggs and tortillas is easy, cheap, versatile, and tasty.

You can have this for breakfast, lunch, dinner, or a snack...and would probably be exceptionally good after a long night out on the town.

Here's the basic recipe, though it's more of a cooking technique than a recipe.
  • Heat a non-stick skillet and add about a tablespoon of oil (not extra virgin olive oil!)
  • Tear up (or cut) a few corn tortillas into strips and add to the hot oil. Allow the tortillas to crisp up.
  • Remove crispy tortillas from the skillet and drain on paper towels.
  • Beat a few eggs with a tablespoon or so of water. Add beaten eggs to the skillet and scramble to your liking.
  • Toss the crispy tortillas into the eggs and season with salt and pepper.
  • Serve immediately.
Now here are some ideas for additions--since this is an egg dish, you could add almost anything you like:
  • Saute some veggies with the tortilla. Onions, green/red peppers, mushrooms, zucchini, etc. would all be good.
  • Add meats: cooked and crumbled bacon or sausage might be good. Or be fancy and opt for shredded beef. Ham would certainly work, but really whatever you have in the fridge could go in this dish.
  • Add cheese: cheddar, jack, whatever you like!
  • Go southwest: serve this with avocado, salsa, chorizo, and extra tortillas.
As simple as this is, I'm still trying to perfect this dish, to make it as good as my mother-in-law's. Even though what I make is probably a sad rip-off, my husband loves this and devours it happily.

Give it a try!

Wednesday, April 14, 2010

Gloppy, Gooey, and Delicious!

Yesterday Greta gave you the recipe for a comfort food chicken casserole, and keeping in that theme, I present you Unforgettable Chicken Casserole. What a lame name! I refer to this as gloppy, gooey chicken because I think that's a tad more descriptive.

This recipe comes from my mother. She made it for the family over the winter and it was so good that I asked her to make it for my birthday in February. The recipe's super easy because you just stir everything together and throw it in the oven. The hardest part of making this for me is fighting with my cats so they don't eat the roasted chicken.
This is not health food by any stretch, but it is full of flavor and is very much a comfort food. Even though it's April, this dish is appealing to me on some weird level.

Here's the recipe:

3 cups chopped deli-roasted chicken
1 cup chopped carrots
1 cup grated cheddar cheese
1/2 cup slivered almonds
1/2 cup sour cream
1/2 cup light mayonnaise
1 can cream of chicken soup
1 cup sliced mushrooms
1 1/2 cups French fried onion rings
  1. Stir together first 8 ingredients in a large bowl.
  2. Spoon mixture into a lightly greased 11 x 7 baking dish.
  3. Bake at 350 for 40 minutes. Sprinkle onion rings over top and bake an additional 5 minutes, or until bubbly around the edges.
  4. Let stand 10 minutes before serving.
Variations:
You could add red peppers, celery, water chestnut, green beans etc. to this to make it more to your taste. In November when you have tons of leftover turkey, go ahead and throw that in instead of the chicken. Oh, and don't skimp on the fried onions! The crunch and onion-y flavor really makes the dish more tasty.

Tuesday, April 13, 2010

Chicken Casserole Goodness


Back on the blog on March 18, Lydia reviewed "The Best Casserole Cookbook Ever." After seeing the cookbook, I ran out to Half Price Books and picked it up. My first recipe from it was for Asiago Chicken and here it is:

Ingredients
4 tablespoons butter
8 boneless, chicken breast halves
1/2 pound mushrooms, sliced
1 green bell pepper, seeded and diced
8 slices Asiago cheese or Jarlsberg cheese
1 1/2 cups milk
1/4 cup all-purpose flour
1/2 cup sour cream
1 1/2 cups dried herb stuffing
  1. Preheat oven to 350 degrees. Butter a 9-by-13-inch baking dish.
  2. Rinse the chicken breast halves and pat dry with paper towels. Place in the baking dish and top with the mushrooms, bell pepper, and sliced cheese.
  3. Mix the milk, flour, and sour cream in a small bowl and pour over the chicken breasts. Sprinkle the stuffing mix over evenly and drizzle with the 4 tablespoons melted butter.
  4. Bake, uncovered, for 30 to 35 minutes, or until the chicken breasts are cooked through.
So here are my editorials on the recipe - I don't like peppers, so I left them out. I also used light sour cream, reduced fat Jarlsberg cheese and low sodium Chicken Stove Top Stuffing. I also mixed boneless chicken thighs and breasts. This was a super easy and very yummy meal! I served it with a tossed salad and some good bread. I would definitely make this again and I look forward to the next meal that I make from the cookbook!!

Monday, April 12, 2010

Upgrade the Ordinary

Here are 2 ideas for making everyday ingredients a bit more interesting and dare I say it, healthy.

First up is breakfast. I love bagels and a cup of coffee for breakfast, but take regular cream cheese and add in some veggies and you have a real treat!

Ingredients:
1 package cream cheese (I love Philadelphia cream cheese)
shredded carrots
1 radish, chopped green onion, chopped
parsley

Let the cream cheese get to room temperature, then mix in all the ingredients. Toast up a bagel and spread it on - that's it! The nice thing about this is that you can really add anything you like.

Second is dessert (this could also be a breakfast or a snack). In the summer, I try to make desserts that are not too heavy, are not ice cream, and are still yummy - so try a yogurt parfait.
Ingredients:
2 containers of vanilla yogurt (or your favorite flavor)
fresh fruit - strawberries, blueberries, blackberries, raspberries
1 cup granola cereal

Wash the berries and cut the strawberries into bite sized pieces. Mix the berries in to the yogurt. Put equal portions of the yogurt/berries into 4 cups and top with 1/4 cup of granola.

Both of these recipes are easy and can be doctored up in many ways - so have fun and enjoy!