Monday, January 10, 2011

Cookbook Corner: Nigella Kitchen

In our family, there are several absolutes.  When it comes to cookbooks, if there's a new book out by Ina Garten, our mom absolutely must have it.  It there's something from Madhur Jaffrey, it's a safe bet for Greta.  For me, whenever there's a new book from Nigella Lawson, I'm probably going to get my paws on it.  My husband understands this, so I was not surprised when he gave me Nigella Kitchen: Recipes for the Heart and Home for Christmas.

This book, like most books from Lawson, begs to be read.  You really need to give yourself time to sit down and enjoy Nigella's overly word, conversational style.  She not only gives you recipes, she also gives you plenty of ideas and thoughts about food, cooking and life.


What to Expect: This book is divided up into several different parts, as follows:
  • Part I: Kitchen Quandaries (chapters include recipes for every day cooking; quick cooking; easy to make meals; and pantry suppers).
  • Part II: Kitchen Comforts (chapters include chicken recipes; meals that require more time and effort; and cozy dinners)
The book also includes Nigella's thoughts on kitchen equipment, tips and shortcuts.

I really like this cookbook--there are plenty of pretty pictures and recipes that I want to try or that might inspire me to make something I wouldn't have. 

Best Recipes: Here are my top five:
  • Turkey Meatballs in Tomato Sauce (pg. 44)
  • African Drumsticks (pg. 46)
  • Speedy Scallopine with Rapid Roastini (pg. 68)
  • Buttermilk Scones (pg. 283)
  • Raspberry Almond Bars (pg. 298)
I've already made two recipes from this book (Peanut Butter Hummus and Chocolate Banana Muffins)--both of which will appear on the blog later this week!

Complaints: As much as I like this book, I don't think it's her best (How to Eat and How to be a Domestic Goddess are both killer books!).  My biggest complaints are:
  • Organization of recipes: Instead of all the baking recipes being in one area, they're dispersed throughout the book--as are all the recipes.  If you want a specific chicken recipe, you better use the index at the back to find it!
  • The book itself is large and it doesn't like to lie flat open.  I need to pull a can out of my pantry to act as a weight to keep the book from flopping closed.
Deliciousness scale: 4 spoonfuls of yum out of 5.

Details: This review is based on the 2010 edition of Nigella Kitchen: Recipes from the Heart of the Home; ISBN 978-1401323950

Thursday, January 6, 2011

Cookbook Corner: The Essential New York Times Cookbook

Every year, I always ask for, hope for, and receive, at least two new cookbooks for Christmas.  One of my favorite Christmas moments is sitting in front of the tree and the crumbled up pile of wrapping paper, flipping through my new cookbooks.  This year, my husband spoiled me with three new books and I've been devouring them all ever since.  I'll tell you about the other two soon enough, but today it's all about The Essential New York Times Cookbook: Classic Recipes for a New Century by Amanda Hesser.

This book is massive.  It's the kind of book that, like the Joy of Cooking or our family-favorite Southern Living Cookbook, will surely become a go-to reference for me when I'm searching for the best way to make a well-known dish.  Some books you get for their inspiration through innovation and originality, others...like this one...provide inspiration based on tradition.  The recipes in this book may not be groundbreaking, but they're sturdy, thoughtful, and they beg to be made.

What to expect: A whole freaking lot of recipes (no, that's not a technical term!).  The book contains tons of recipes, with chapters ranging from Drinks, Cocktails, Punches and Glog, Sandwiches, and Pizzas, and Savory Pies, to Poultry and Game, to Pies, Tarts, and Other Desserts, and everything in between.  This is a big book that requires the owner to sit down and read it.  Sure, you could flip to the back of the index to look up a particular recipe, but if you want a big book all about cooking, take the time to read the book and enjoy it.  No, I am not saying you need to read every chapter and every word, but spending time visiting with this book is time well spent.

Best recipes:  This book weighs in at 4 pounds 9 ounces according to my kitchen scale (yes, I did weigh it!) and it contains more than 1,400 recipes.  It's made up of all the best recipes from the past 150 years that have appeared in the New York Times.  There are some interesting recipes in here--ones that I would never make and others that I can't wait to try out.  I've only gone through this book twice (and have listed several dozen recipes I'm dying to make), but here are my top 5 so far:
  • Spicy, Lemony Clams with Pasta (pg. 336)
  • Crab Cakes, Baltimore Style (pg. 407)
  • Chicken Canzanes (pg. 458)
  • Flemish Beef and Onion Stew (pg. 515)
  • Dijon and Cognac Beef Stew (pg. 561)
Complaints: This is not a complaint of mine, but some may miss photos.  Others may find this book too large and overwhelming.  I've read a complaint that Amanda Hesser provides too much commentary.  I love commentary in a cookbook, so I don't give that complaint much merit.  So far, my only complaints are this:
  • Recipes are not arranged in an orderly fashion. For example, in the fish and seafood chapter, recipes are arranged by type.  Shrimp recipes are mixed with fish on the same page, then you'll go several pages without any fish recipes, then you're back to fish later in the chapter.
  • I haven't had enough time to sit down and really, really examine this book as much as I'd like.  That's more a complaint about me, but I had to list something...right?
Deliciousness scale: 5 spoonfuls of yum out of 5.

Details: This review is based on the 2010 edition of The Essential New York Times Cookbook: Classic Recipes for a New Century by Amanda Hesser; ISBN 0393061035

Wednesday, January 5, 2011

Easy Elegance

Cream Puffs with Peppermint Ice Cream and Hot Fudge Sauce.  Easy and yummy!
After serving up a meal like Boeuf Bourgignon for Christmas dinner, I knew I had to do something easy yet delicious for dessert.  After much consideration, I decided on cream puffs filled with ice cream, bathed in rich hot chocolate sauce.  Nothing wrong with that!

I first read through several recipes for pate a chou before consulting my mother. I remember my mother making cream puffs (or profiteroles) when I was a kid, and I know my mom is not a fan of complex recipes.  I thought I found a simple enough recipe from the Joy of Cooking, but Mom told me to get out my copy of the Southern Living Cookbook.  The recipe she always used was from there and, she promised, it was a piece of cake.

I'm happy to report that I took my mom's sage advice.  The Southern Living Cookbook recipe was perfection--it was easy to follow and yielded deliciously elegant results.  If you need a fancy dessert that's easy to make, I highly recommend this one.  And the best part is that you can do whatever you want with the cream puffs once they're cooked.  They can be used for savory or sweet dishes, and the only limit to fillings and pastry shapes is your imagination.

Try this one out...it's a breeze.  And, you can make it ahead of time and stick it in the freezer.  Nice!


Cream Puffs, fresh out of the oven...cooling off.
CREAM PUFF PASTRY

2/3 cup water
1/3 cup butter
2/3 cup all purpose flour
1/8 tsp salt
3 eggs

  1. Combine water and butter in a medium saucepan; bring to a boil.
  2. Add flour and salt, all at once, stirring vigorously over medium-high heat until the mixture leaves the sides of the pan and forms a smooth ball.  
  3. Remove from heat and cool 4 to 5 minutes.
  4. Add eggs, one at a time, beating thoroughly with a wooden spoon after each addition; then beat until the dough is smooth.
  5. Shape and bake pastry immediately according to recipe directions.  Dough can be used for cream puffs, eclairs, etc.
  6. To make cream puffs: drop pastry into 8 equal mounds 3 inches apart on an ungreased baking sheet (note: I lined my baking sheet with parchment paper).  Bale at 400 degrees for 30 to 35 minutes or until golden brown and puffed.  Cool away from drafts.  Cut top off of puffs and scoop and discard out the soft, uncooked dough in the center.  Add ice cream and top with hot fudge sauce.

Tuesday, January 4, 2011

Christmas Dinner, Revisited

Right before we took our holiday break, I mention that I was planning on making Julia Child's Boeuf Bourgignon for my family for Christmas dinner.  I am happy to report that I completed the meal...and that it was freaking awesome.

I'm not going to reprint Julia's recipe...you can find in on the Internet if you are crafty (or find it in Julia's book, if you own it)...but I'll show you all the steps involved.  Nothing like looking at pictures of cooking in action to inspire the appetite!

First, I took some time to read (and re-read) Julia's recipe.  I also searched around to see how others make this famous dish.  I made a few adjustments to the original recipe...using normal bacon instead of a 6 oz. uncut chunk of the stuff as called for (I didn't have time to run around trying to find what Julia said I should use and opted for convenience over authenticity.  I don't think my final dish suffered for this.)  When I knew what needed to be done, I got all my ingredients ready to go.

Is there anything more lovely than mise en place?

I fried up the bacon then browned stew meat in the rendered bacon fat.  By the way, bacon fat is the best...is it not?

Next came veggies.

The meat went back into the Dutch oven, along with the cooked bacon and all the residual juices.  Also added were herbs, tomato paste, salt, pepper, garlic and flour.

The whole thing went into a hot oven for a few minutes.  Then I added cognac (not called for in Julia's recipe, but mentioned in others) that was lit aflame.  Once the blue flicker of alcohol-laden flame died out, I added a bottle of French red wine and beef broth.  The Dutch oven went back into the oven to allow for constant heat to work its magic.

At this point, I cooked mushrooms in butter--a combination that made my fungus-loving husband drool.  I also braised pearl onions in butter and homemade chicken stock.

When the meat was tender, the Dutch oven came out of the oven.  The stew was strained and I mixed the fork-tender beef with the buttered mushrooms and brothy onions.

The strained wine sauce simmered and reduced down before being added back to the beef and veggies, and the meal was ready for consumption.

I served the Boeuf Bourgignon over buttered egg noodles with a salad and crunchy French bread.  It was a hit.  It was the kind of meal that warms you up and leaves you fully sated.  And it's going in my "keeper" list.  If you want to make this, don't be intimidated.  It's not as difficult as you might think, and you'll be rewarded for your efforts with tender beef, succulent veggies, and a broth to die for.  Now I'm getting hungry all over again!
(Thanks to my husband for taking photos while I cooked.  His fee?  A few buttery mushrooms and several tastes of beef!)

Monday, January 3, 2011

Happy 2011!

The holiday season is now nothing more than a memory, and we're gearing up to plow through 2011.  We hope you all spent time with your loved ones, celebrating the end of another year.  My sister and I have been insanely busy, and days have seemed to slide by, overlapping.  I feel like all I've done these past two weeks is eat.  And eat well, I might add.

We have much to tell you about.  At Christmas, we both got awesome new cookbooks we'll review.  I spent more time in the kitchen than I have in ages, and have a number of recipes to share with you.  In other words: bare with us.  We're getting our thoughts in order and will have proper posts up in no time.

Until our next post, we're wish you all a happy, healthy, and delicious 2011!

Monday, December 20, 2010

Christmas Menu

Happy almost Christmas!   Sorry we've been inconsistent bloggers lately...'tis the season for being way too busy, I suppose.

I'm not sure if we'll have time to write between now and Christmas, so I wanted to just say thanks to everyone for swinging by our blog the past 1+ year.  We love your comments!

What are you doing for Christmas dinner this year?  I'll be making dinner for the whole family Christmas night.  I'm serving Julia Child's Boeuf Bourguignon with a nice salad and plenty of crusty bread.  For dessert, I'm making profiteroles with either Peppermint or French Vanilla ice cream (and a healthy glop of hot fudge sauce for good measure).  I'll report back with photos and reviews after the holiday.

Happy Holidays to you and yours.  We hope you get everything you want!

Monday, December 13, 2010

Stove Top Chicken Casserole

What to cook for dinner tonight? This is a question that I run into often. Followed by, what do I have on hand and what can I throw together and still be yummy? In answer to these questions, I look to the freezer (to see what type of meat I have on hand) and to the pantry (to see what canned/boxed goods are available). Throughout the years, there has been a staple that is usually handy, tasty, and a crowd pleaser - Stove Top Stuffing!

I use the Stove Top Stuffing to top casseroles and also add some seasoning to dishes. The nice thing about this casserole is that you really can make it with whatever you have available. The basics are Stove Top Stuffing, butter/margarine, cream of mushroom (or any cream of soup), meat/vegetables, cheese (if you please), and liquid (wine, water or broth). The following is a very loose recipe for the dish. Feel free to add/subtract whatever you like!

Stove Top Chicken Casserole

4 chicken breasts, boned and cut into chuncks
1 onion, chopped
4 cloves garlic, chopped
salt & pepper to taste
1/2 cup Marsala wine (or chicken broth, or white wine, or water)
1 can cream of mushroom soup
12 mushrooms, sliced
1/4 cup frozen peas
1/4 cup frozen corn
1 cup cheddar cheese, shredded
1 box Chicken flavored Stove Top Stuffing (I prefer low sodium)
10-12 pats of butter

In a large pot, heat some cooking oil (~ 1 tablespoon) over medium-high heat. Add garlic, onions and chicken and cook unitl the chicken is no longer pink; season with salt & pepper. Turn down the heat to simmer-low and add the wine. Let simmer for 10 minutes. Remove from heat and add the soup and vegetables; mix well. Preheat the oven to 350 degrees. Transfer the meat mixture to a greased casserole dish. Top with cheese. Add the stuffing over the cheese and finally top with butter (place the butter evenly all over the top of the stuffing). Place casserole in preheated oven and cook until bubbly (about 30-40 minutes). Remove from oven, let stand for 5 minutes and serve with a salad.

Monday, December 6, 2010

Taming the Chaos

Right before Thanksgiving break, I finally decided to break down and clean out my pantry.  My pantry had been bugging me for ages, but with the huge cooking task of turkey dinner looming, I decided enough was enough and cleaned up my act.

Here are a few shots of how my pantry looks now:

To get my pantry looking like this, I had to do a lot of work.  I...
  • Took out every single thing in my pantry.
  • Sorted things into three categories: keep, toss, or donate.
  • Moved all the keep items onto my dining room table to be dealt with later.
  • Emptied out and recycled what I could from the toss pile.  We ended up with about 3+ bags of trash thanks to my pantry clean out!
  • Bagged up my donation items and searched for places to donate.
  • Cleaned out every shelf.
  • Lined each shelf.
  • Reorganized where my keepers would go.
I can't believe how much crap I had in my pantry.  There were opened bags of cookies, cans that expired in 2007(!?!), and things I don't remember buying shoved into the murky depths of my too-deep pantry.  It amazing how many boxes of pasta and cans of refried beans I have stashed away...and I have no idea what that says about me as a person.

I used to have all my canned goods on the top shelf, but have now come to the realization that that was madness.  Canned goods are now lower, just below eye-level so I can better see what's in there.  Pasta and grains have been moved to the top, with baking goods just below them followed by canned goods, then snacks, then cookies, then miscellaneous junk that has no better place to go.

I'm hoping to keep the pantry organized, but we'll see how long it lasts.  Pantries can be scary places, but for now, I'm happy that I've tamed the chaos!

Wednesday, December 1, 2010

Hearty Vegetable Soup - Something To Warm You Up

Growing up, my Mom has a very beloved cookbook - McCall's Cookbook - it is old and tattered and pages are dogeared and ready to fall out. The spine has disintegrated, but my Mom goes back to it all the time. One of her recipes that I really enjoy is in the Low Calorie section, but it is full of vegetables and flavor and I absolutely love it. It is for Hearty Vegetable Soup - it is so good this time of year after being out in the cold and I love it with some good crusty bread. Here is the recipe from McCall's.


Hearty Vegetable Soup

2 lb shin beef

large soupbone

1 tablespoon salt

4 cups thinly sliced cabbage (1 lb)

1 1/2 cups chopped onion

6 carrots, pared and cut in 3-inch pieces

3/4 cup chopped celery

1/4 cup chopped green pepper

1 can (1 lb 12 oz) tomatoes, undrained

1/2 pkg (10 oz size) frozen lima beans

1/2 pkg (9 oz size) frozen cut green beans

1/2 pkg (10 oz size) frozen peas

1 can (12 oz) whole-kernel corn, drained

1 pared potato, cubed

2 tablespoons chopped parsley

1 can (6 oz) tomato paste

1/2 teaspoon cloves

1 teaspoon sugar

2 teaspoons salt

1/2 teaspoon pepper


  • Place beef, soupbone, salt, and 4 quarts water in very large kettle. Cover; bring to boiling. Skim surface.


  • Add cabbage, onion,carrots, celery, green pepper, and tomatoes.


  • Bring to boiling; simmer, covered, 30 minutes.


  • Add other ingredients; simmer, covered 3 1/2 hours.


  • Remove meat and bone; discard bone.


  • Let meat cool. Cut into cubes; add to soup. Refrigerate several hours.


  • Just before serving soup, skim fat from surface. Slowly heat soup to boiling. Store leftover soup, covered, in refrigerator.

So when my Mom makes this, she does not add the green pepper (thankfully); my Dad and I are not a fan of peppers. Also, I think that she uses stew meat that has already been cubed. The other nice thing about this soup is that the longer it cooks, the more delicious it gets - it also freezes well!

Tuesday, November 30, 2010

Fancy Comfort Food

Lately my husband and I have been spending our weekends in.  It's been so nice to hang around the house with no real need to adhere to an agenda.  Time at home has also afforded me with ample opportunity to cook.  I've made a few big dishes lately, but one of my favorites has been Coq Au Vin...chicken in wine.

My mother used to make Coq Au Vin when I was a little kid.  I liked it so much that I had her make it for my birthday dinner one year.  It's a meal that I have great memories of, though I haven't had it in years.  After picking up a decent (but not exceptional) frozen Coq Au Vin from Trader Joe's, I decided to break down and make it myself.

I'm so glad I did! 

The final product turned out better than my memories.  The chicken was tender and flavorful, the sauce was thick and perfect, and the mushrooms and onions rounded things out nicely.  I served my Coq Au Vin over hot, buttered egg noodles with a salad and (of course!) crunchy French bread.

After reading both Julia Child's recipe and the recipe in The Joy of Cooking, I went with the later.  Both recipes were very similar, but The Joy of Cooking won out because I wanted more onions and carrots.  There are a million ways to make Coq Au Vin, and there are a number of wines you can use (I may try this with a Riesling in the springtime for a lighter dish), but The Joy of Cooking recipe was easy to follow and didn't require hours upon hours of cooking. Since everyone has (or should have!) a copy of The Joy of Cooking, I'm not going to type out the recipe.  Just flip open your book and get cooking!  Here's what mine looked like in the end:


If you make this (and you should!) let me know how it went!

Monday, November 29, 2010

Thanksgiving Success!

I survived making my very first Thanksgiving dinner for my family!  Here are some highlight's from last week's feast:

My 13 pound turkey was yummy!  I followed an easy recipe from Ina Garten and--though the cooking time was more like 3 hours, not 2 1/2 like Ina said--the turkey turned out great.  No brining or basting required! 

My husband and father carved up the bird using the handy dandy electric knife.  I really prefer the thick chunks of breast meat to the traditional thin slices.  The meat seemed more moist, stayed warmer, and felt more substantial.

I went 2 for 3 with my side dishes. 

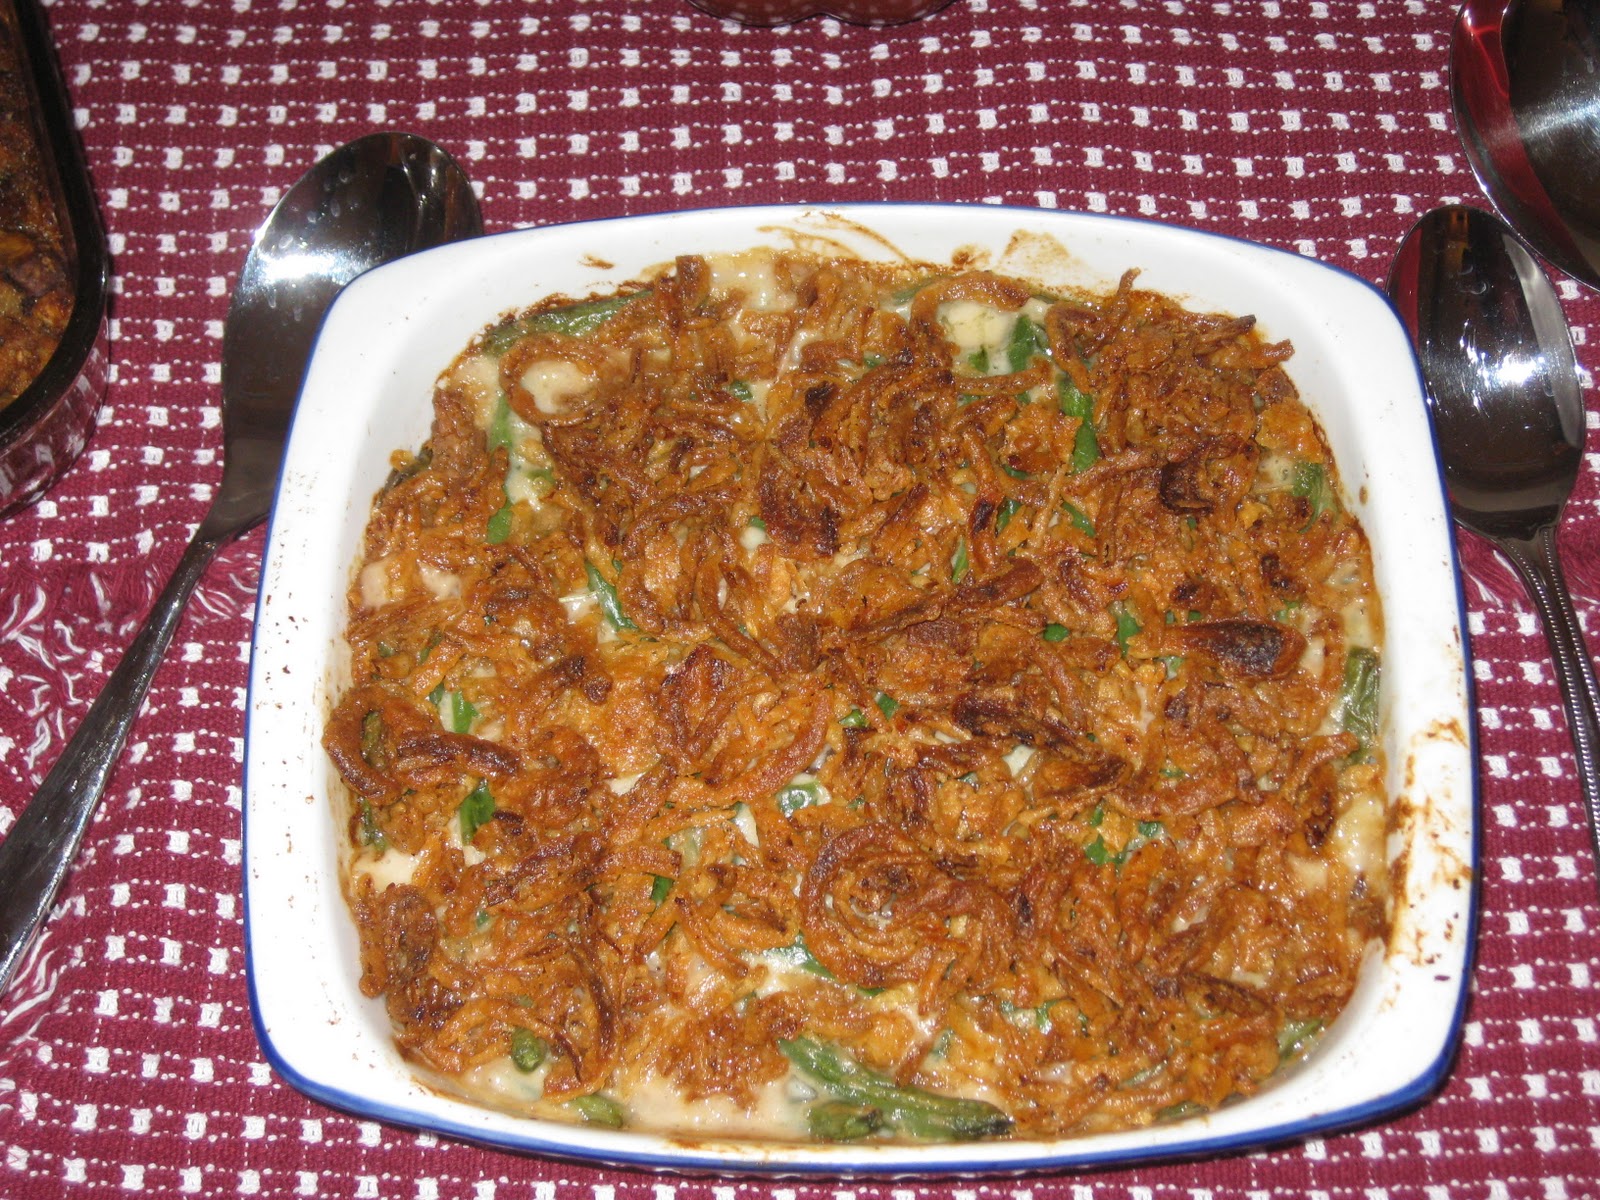
The classic green bean casserole (yes, from Campbell's!) was predictable but good (the Mister loves this dish!).  There's something so wrong and wonderful about those damn French Fried onions!

The stuffing was AMAZING.  I've never made stuffing before, so I just threw everything in and hoped for the best.  I wanted to appease the people who like "inside the bird" stuffing (because I did not stuff my bird when I cooked it) and those of us who prefer outside the bird stuffing.  I think my stuffing was a satisfying mix of moist and crunchy goodness.  (My "recipe" is at the end of this post.)

The smashed sweet potato casserole was a flop.  The recipe was also from Ina, the rare TV cook that usually has good cooking ideas...but this one was a miss.  My husband was the only one who liked it.  It was too nutmeg-y for me and Greta said it reminded her of soap.  Yup...that's a FAIL.  If I were to try this again, I'd steer clear of the stupid nutmeg.  Lesson learned!

The other sides for the night were easy: a can of cranberry sauce (yes, a can!  We love the open and slice approach to cranberry goodness), sauerkraut (it's not Thanksgiving without it!), and gravy.  Mom helped me out with the gravy, and it turned out delicious as always.

Desserts were also kick ass!  Greta made pumpkin pie (with a little help from Mom, who makes the world's best pie crust), I made Chocolate Guinness Cake (a cake I'm inexplicably sick of), and I also had some mincemeat tarts from Cost Plus World Market.

Overall it was a very good meal and a happy Thanksgiving.  Oh, and before I forget, here's how I made my stuffing.  I didn't really have a single recipe that I followed, but it turned out super yummy. From reading many different stuffing recipes, I figured out that the most important thing was to make sure my stuffing had a lot of moisture.  I'm currently doing the Weight Watchers program, and I don't usually eat this much rich yumminess, but it's Thanksgiving...why not break out multiple sticks of butter?  This is not a recipe for calorie counters, but so be it. 

Lydia's "How the Hell Do You Make Stuffing?" Stuffing
  • 1 pound breakfast sausage (I used the unseasoned "original" kind from Jimmy Dean because Greta hates sage.  Use whatever you want!  Even Italian sausage would work here.)
  • 1/2 stick butter (1/4 cup)
  • 3 stalks of celery, chopped
  • 1 onion, chopped
  • 2-3 cloves of garlic, minced
  • 8 oz. sliced crimini mushrooms
  • 14 oz. package of cubed stuffing (I used Safeway brand because I'm cheap.  I also opted for the unseasoned variety because of the sage-hater.  If you have homemade bread cubes, use that)
  • fresh parsley, chopped (to taste--I probably used 1/4 cup or so)
  • To taste: 
    • Kosher salt
    • Fresh cracked black pepper
    • Dried thyme
    • Dried marjoram 
    • Dried rosemary
  • 2 1/2 to 3 cups chicken stock (I used my homemade stock)
  • 1/2 cup melted butter
Brown sausage in a hot pan, breaking it up into small pieces.  When cooked through, place sausage on paper towel lined plate to drain a bit. Pour out excess grease from the pan.

In the same pan, melt 1/2 stick of butter over medium high heat.  Add the celery, onion and garlic.  Cook a few minutes then add the mushrooms.  Cook and stir well to get all the browned bits on the bottom of the pan up and mixed into the veggies.  Add a few pinches of salt and pepper to this mixture and cook until veggies are soft.

In a large bowl, combine cooked sausage and cooked veggies.  Stir well to mix.  Add cubed bread to the bowl and toss well to combine.  Add parsley and seasonings, stirring well.  (I spent a lot of time stirring and adding to make sure the entire mixture was well seasoned.)  Pour in chicken stock and stir to moisten.  Place mixed stuffing in a large casserole dish sprayed with Pam. 

You can either cook the stuffing right away or put it in the fridge and let it sit overnight, to be cooked the next day.  Before you put the stuffing in the oven, pour the melted butter over the top of the casserole.  Bake at 350 until heated through...about 45 minutes or so.

Wednesday, November 24, 2010

Happy Thanksgiving!

The big day is almost here.  Greta and I want to wish you all a happy and delicious Thanksgiving.

Here's what I am planning to make for the big day.  Leave a comment and let us know what you're serving!

Appetizers (I'm keeping it light...no need to stuff yourself before the turkey!)
Dinner
  • Ina's Perfect Roasted Turkey
  • Gravy
  • Sausage Stuffing
  • Smashed Sweet Potatoes
  • Green Beans
  • Cranberry Sauce
  • Sauerkraut (I think this is a Baltimore tradition...it's certainly a family tradition if nothing else!)
  • Dinner rolls
  • Wine (not sure what kind yet...I better figure that out!)
Dessert
It's safe to say no one will go away hungry.  Again, have a Happy Thanksgiving!  Thanks for reading our little blog.

Tuesday, November 23, 2010

A Simple and Easy Taste of the Season

On one of my recent trips to the grocery store, I looked over the seasonal display and found Pumpkin Scones by Sticky Fingers. I love their other scones and have found them to be incredibly easy to make - add 3/4 cup of water, mix with a fork, then scoop spoonfulls onto a greased baking tray; cook for approximately 15 minutes and you have delicious scones. I also really like the flavor of pumpkin and thought that I would give these a try.

I am really glad that I did! These were super yummy and followed in the tradition of the other Sticky Fingers product line. I made these while my son was getting ready for school and put a little bit of butter on them when they came out of the oven. The smell was definitely of Autumn and the flavors were delicious. I enjoyed mine with a hot cup of coffee. My mother thought that they could use raisins (I disagreed and this one and thought that they were wonderful as-is) and she also ate hers with some cream cheese (that actually looked good).

Anyway, if you enjoy pumpkin flavored breads then keep your eye out for this mix. Again, I am always happy with the Sticky Fingers products and highly recommend them!

Monday, November 22, 2010

Tool Time: Slice With Ease!

Back when I made the yummiest roasted chicken I've had in some time, I had my parents come over to share the meal.  Like they always do, they asked if they could bring anything.  I said yes!  Bring your electric carving knife!

Since my husband normally leaves meat carving (and cake slicing) to my dad, I wanted the Mister to have a chance to practice before Thanksgiving.  I asked my dad to guide my hubby through the carving process.  With the help of the electric carving knife, some earlier reading on the matter from The Joy of Cooking, and words of experience from my father, the Mister carved up the chicken beautifully.  (More on that in a minute!)

The electric carving knife was a huge help.  If you don't have one, consider making the modest financial investment to pick one up.  My father has used electric carving knives ever since I've been alive (he's gone through at least two of them!), and he's never had a hard time carving meat.  My husband declared the electric carving knife fun to use...it made first time carvery a snap because he got a clean cut without that annoying sawing motion of a traditional knife.  The electric carving knife doesn't tear the meat, and it gets the carving process done faster than a normal knife.  It's also easy to clean (bonus!)

Men like power tools...and since men are traditionally tasked to carve meat, this is the perfect gadget for the kitchen.  We'll be using this tool on Thursday to carve up the turkey!

Oh, one more note on carving: This year, we're carving the turkey breast differently.  Instead of cutting thin slices, my husband is going to remove the entire breast and then cut it into thicker slices...just like he did with the chicken (see photo below).  This does a few things: 1) it ensures people will get substantial pieces of white meat, 2) it keeps the meat moister and warmer (since less of the meat is exposed), and 3) it allows diners to get a better bite of yummy, crispy turkey skin!